Customers
The Customers tab in the console allows you to manage the contact details of your existing customers. It also gives you control over the data related to your customer.
The Customers tab allows you to do the following:
Create new customers
To create a new customer, click the '+ Create New' button then fill out all the required fields.

HelixPay automatically creates an account for first time subscribers.
Download customer details as excel file
In the Customers tab, click the ellipsis button beside the ‘Search by’ field then click 'Download Customer Summary'. This will automatically download the excel file and you can find it from your device’s downloads folder.

Import customers
The 'Import Customers' feature lets you upload your existing customer database to the HelixPay system. By doing so, you can easily send email blast to your customers informing them about your new payment system or any other announcement you want to share.
To import your customers, download the template first by clicking the ellipsis button beside the 'Search by' field in select 'Import Customers'.

You will then see an option to download the template or start the import.

By clicking the 'Download Template', an excel file will be automatically downloaded and you can find it from your device's download folder. Once the download is complete, you can fill the template with the required customer details and import it so you can have your existing customers on the HelixPay console.
Perform quick search action using the ‘Search’ bar

Customers can be searched by Customer Name, Customer ID, or Mobile Number.
Manage customers by deleting and/or editing their details
Steps in editing customer details:
Step 1: Click the ellipsis button found on the rightmost part of the customer details to edit then select 'View Details'.

Step 2: Click the pencil icon to edit the customer details.
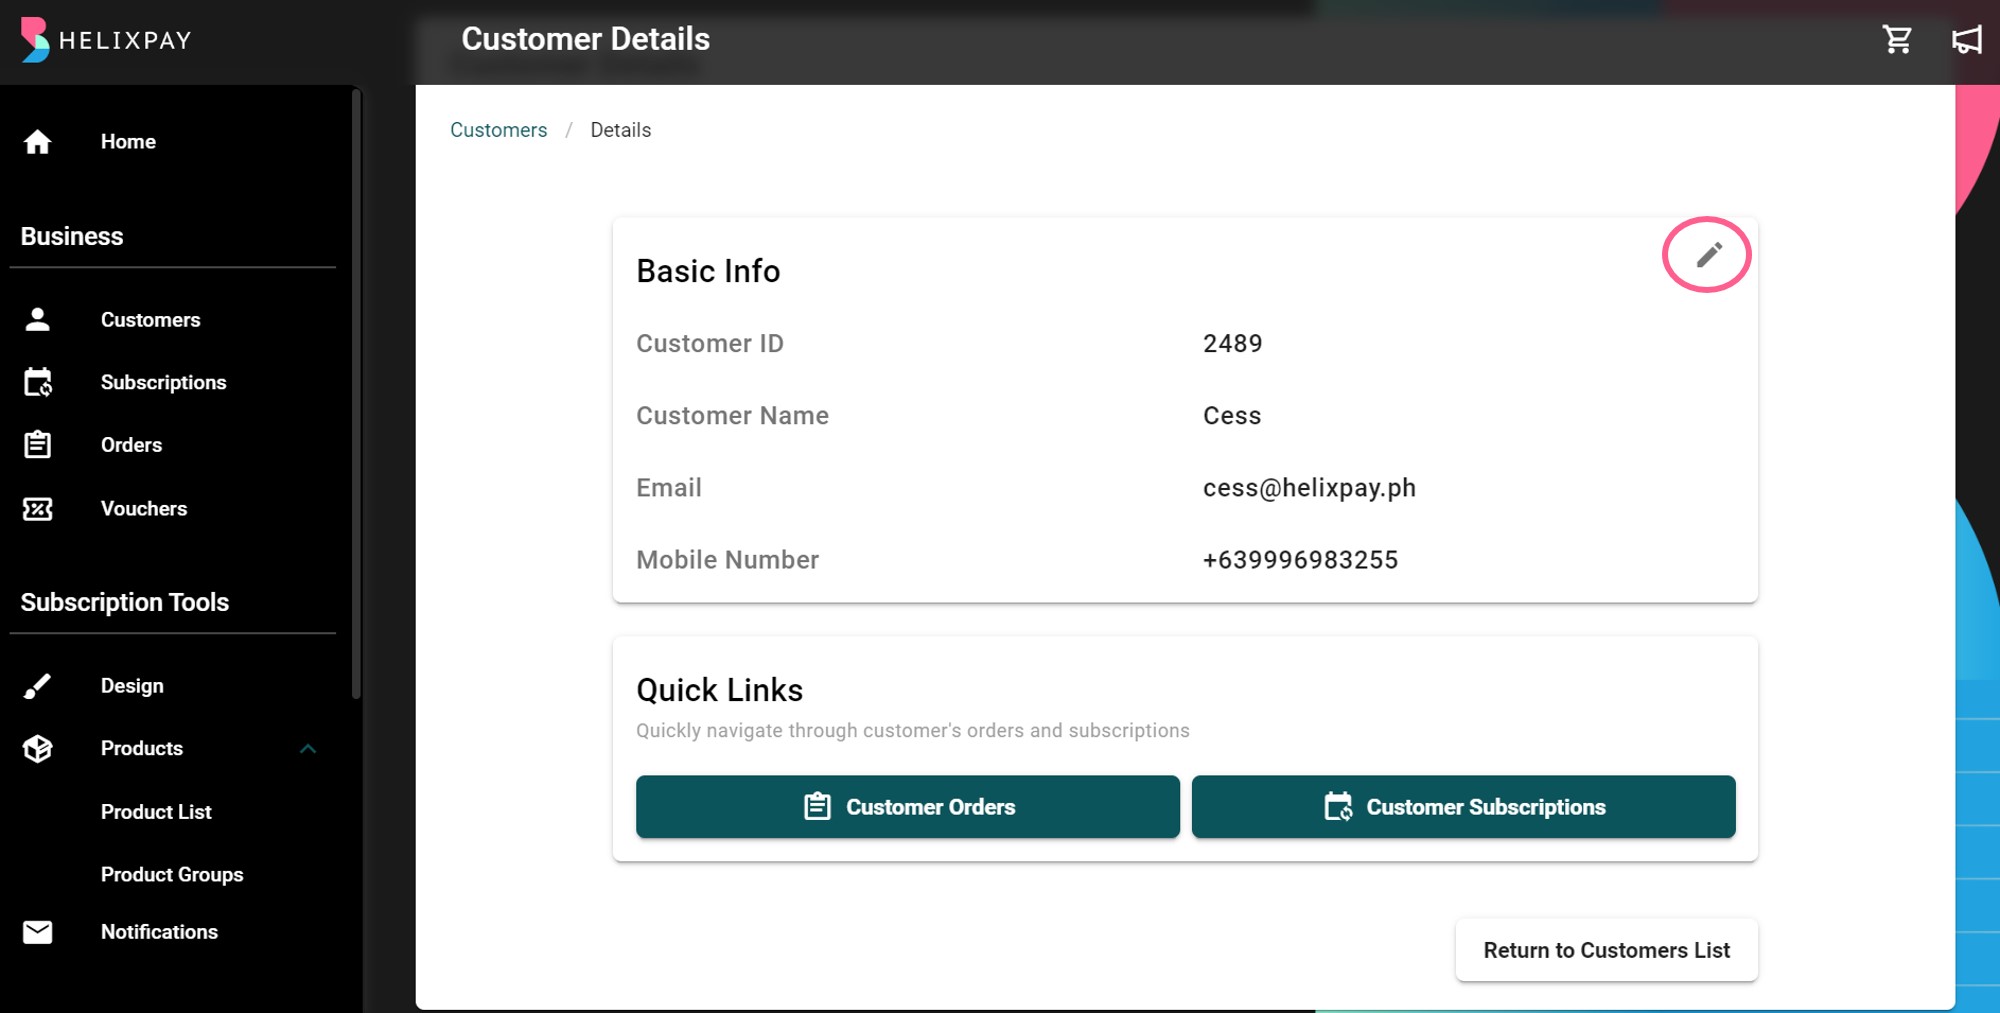
Customer’s name, email address, and phone number can be edited. You can also check easily the customer orders and subscriptions from the customer details page using the Quick Links.
Step 3: Click Save Changes!
Custom Fields
Check out custom components feature to add other information like birthday.
Update the customers with the latest news using the Blasts feature
The Blasts feature helps you send out an email to a group of customers all at once. You can use this feature to announce a new product/service, update customers with the latest deals, or to promote a limited-time offer.
Steps in creating a Blast:
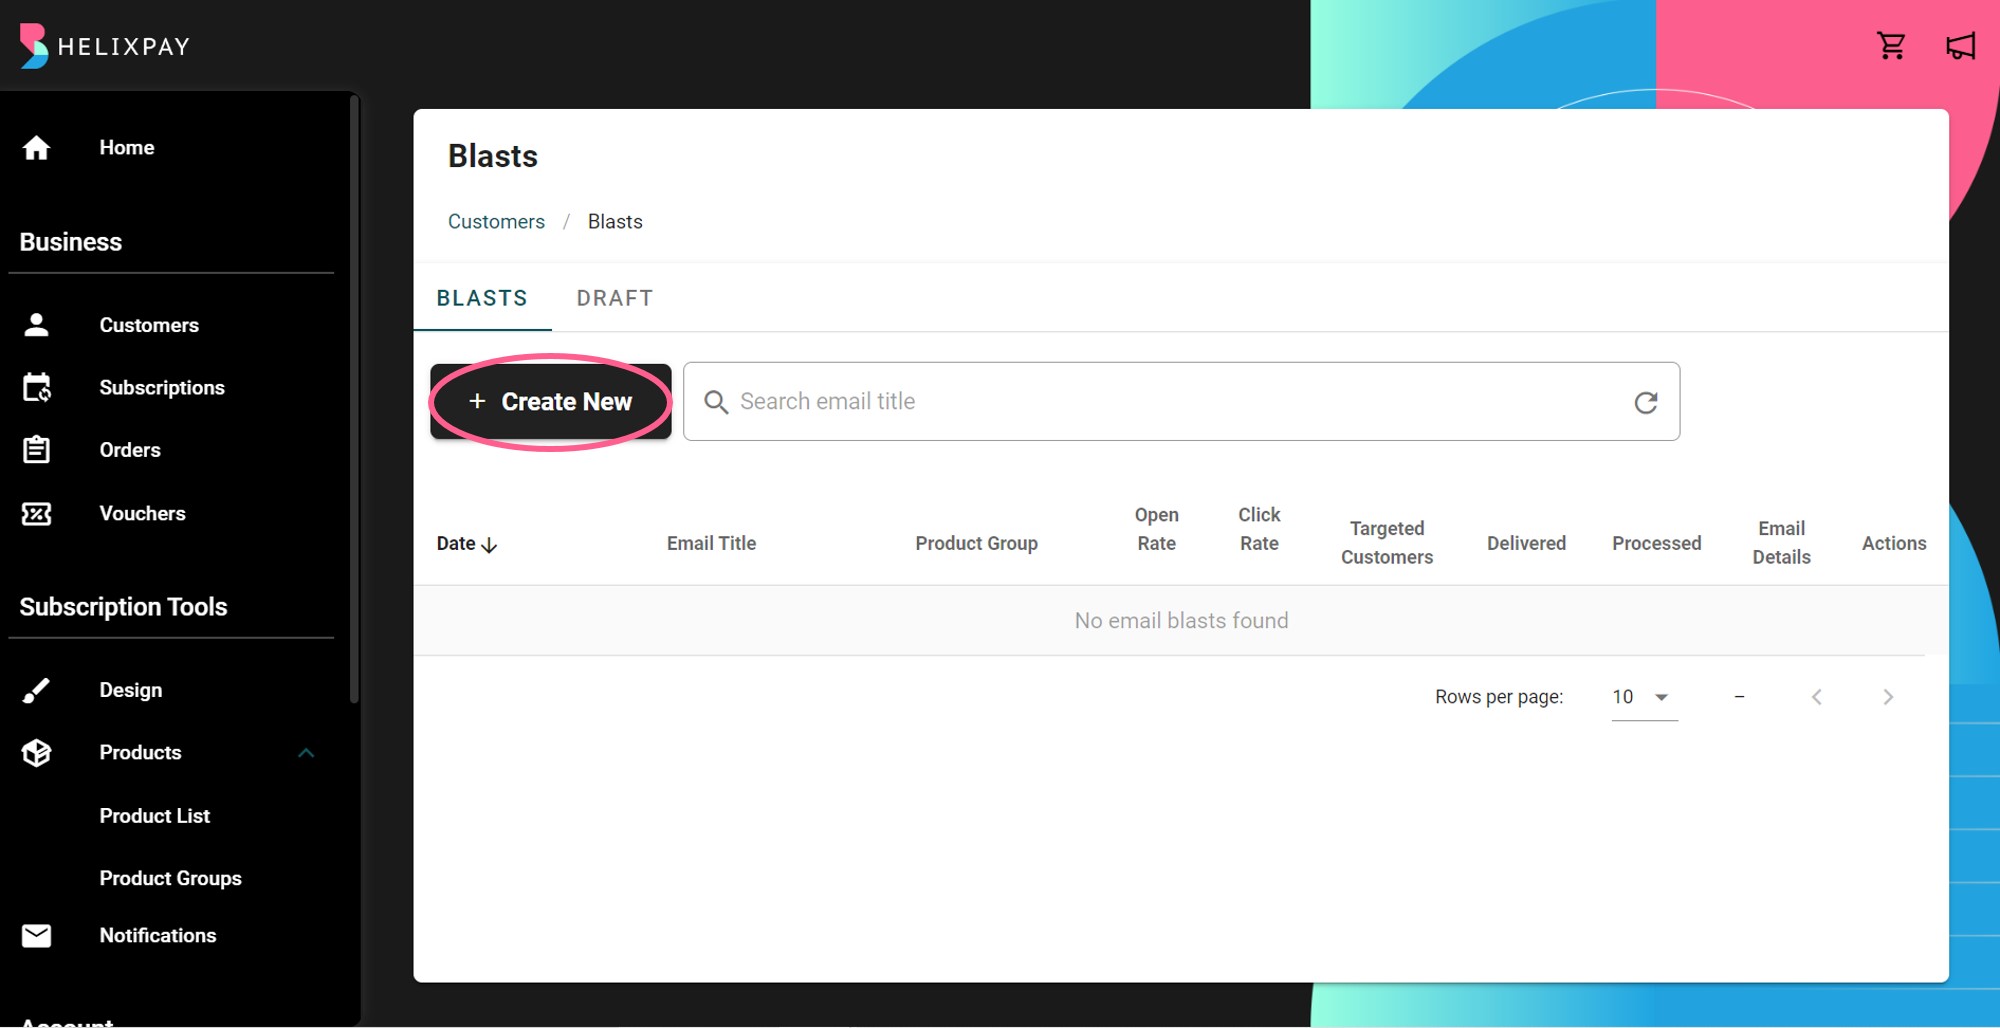
Step 1: Click the 'Blasts' button.

Step 2: Click '+ Create New'.
Step 3: Fill out all the required fields and click the 'Next' button. You can add place holders to your email which will change accordingly by copying the 'keywords' available. You will then see a preview of the email content on the right side as you create the email blast.
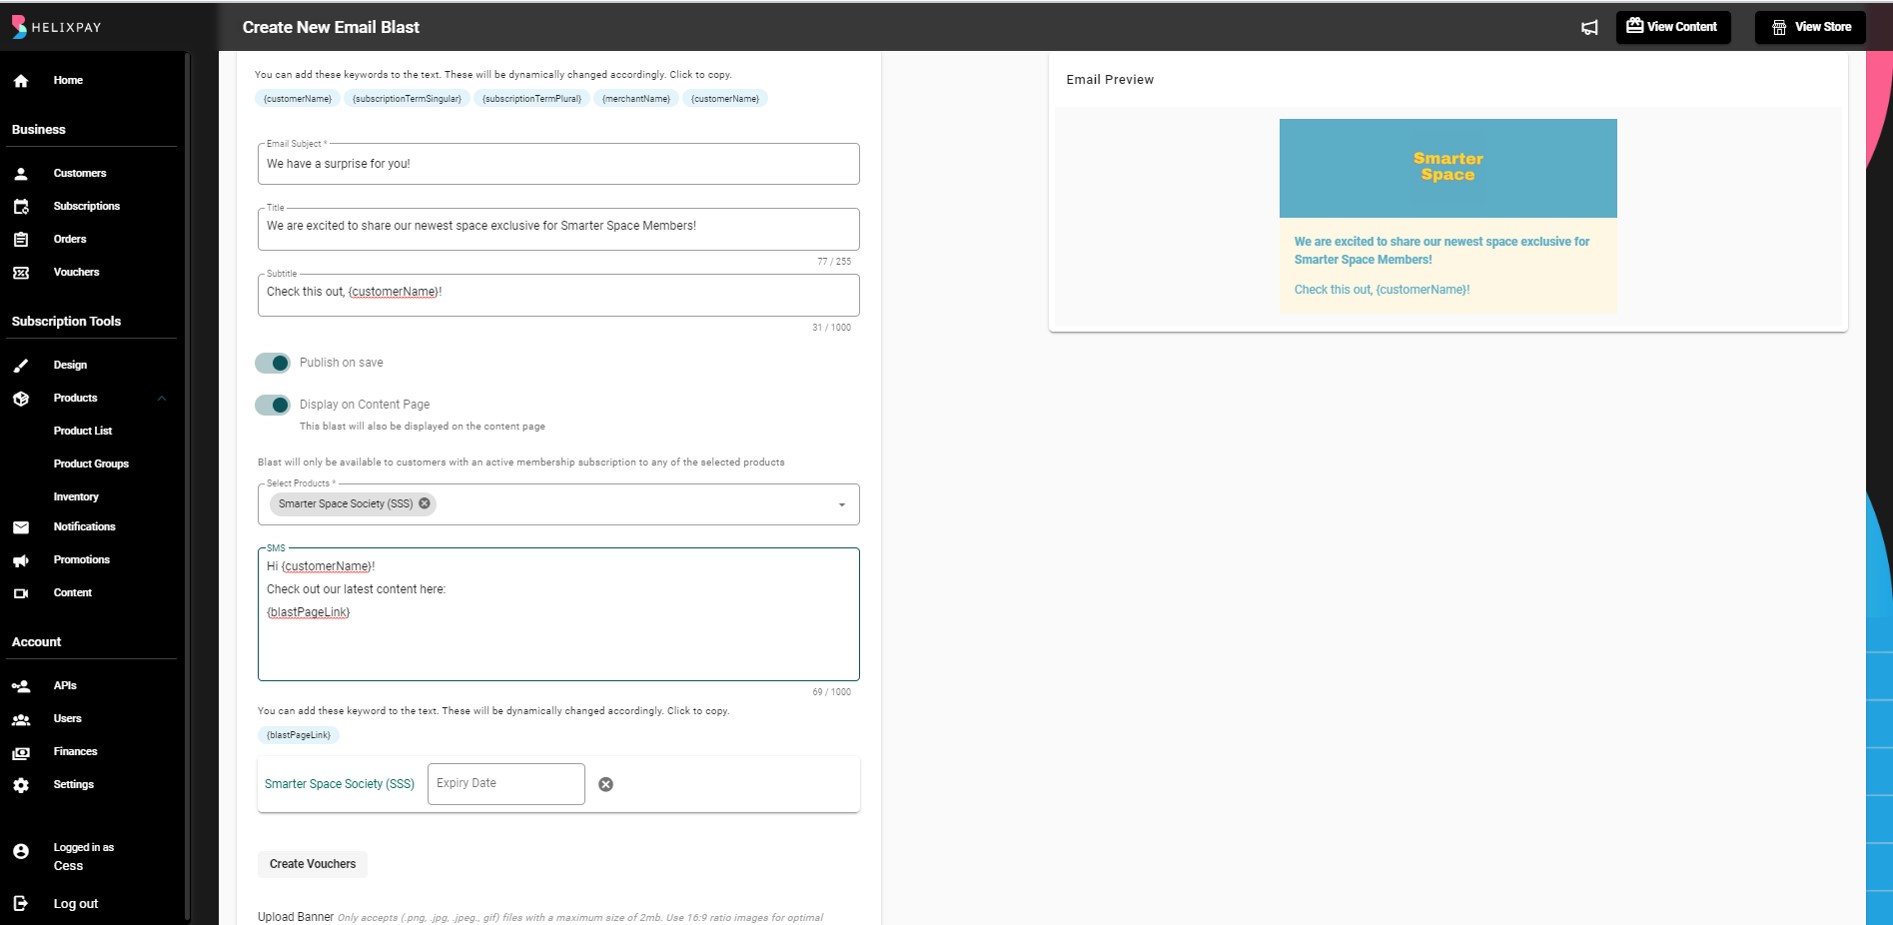
By disabling 'Publish on save', you will be able to schedule the date and time for sending the email blast.
SMS Blast for Members
You can publish email blast to content page by enabling 'Display on Content Page'. Once enabled, the customers with active membership subscription to any product under the selected product group will be able to view the email blast content from the content page. This option will also automatically send SMS with customizable content.
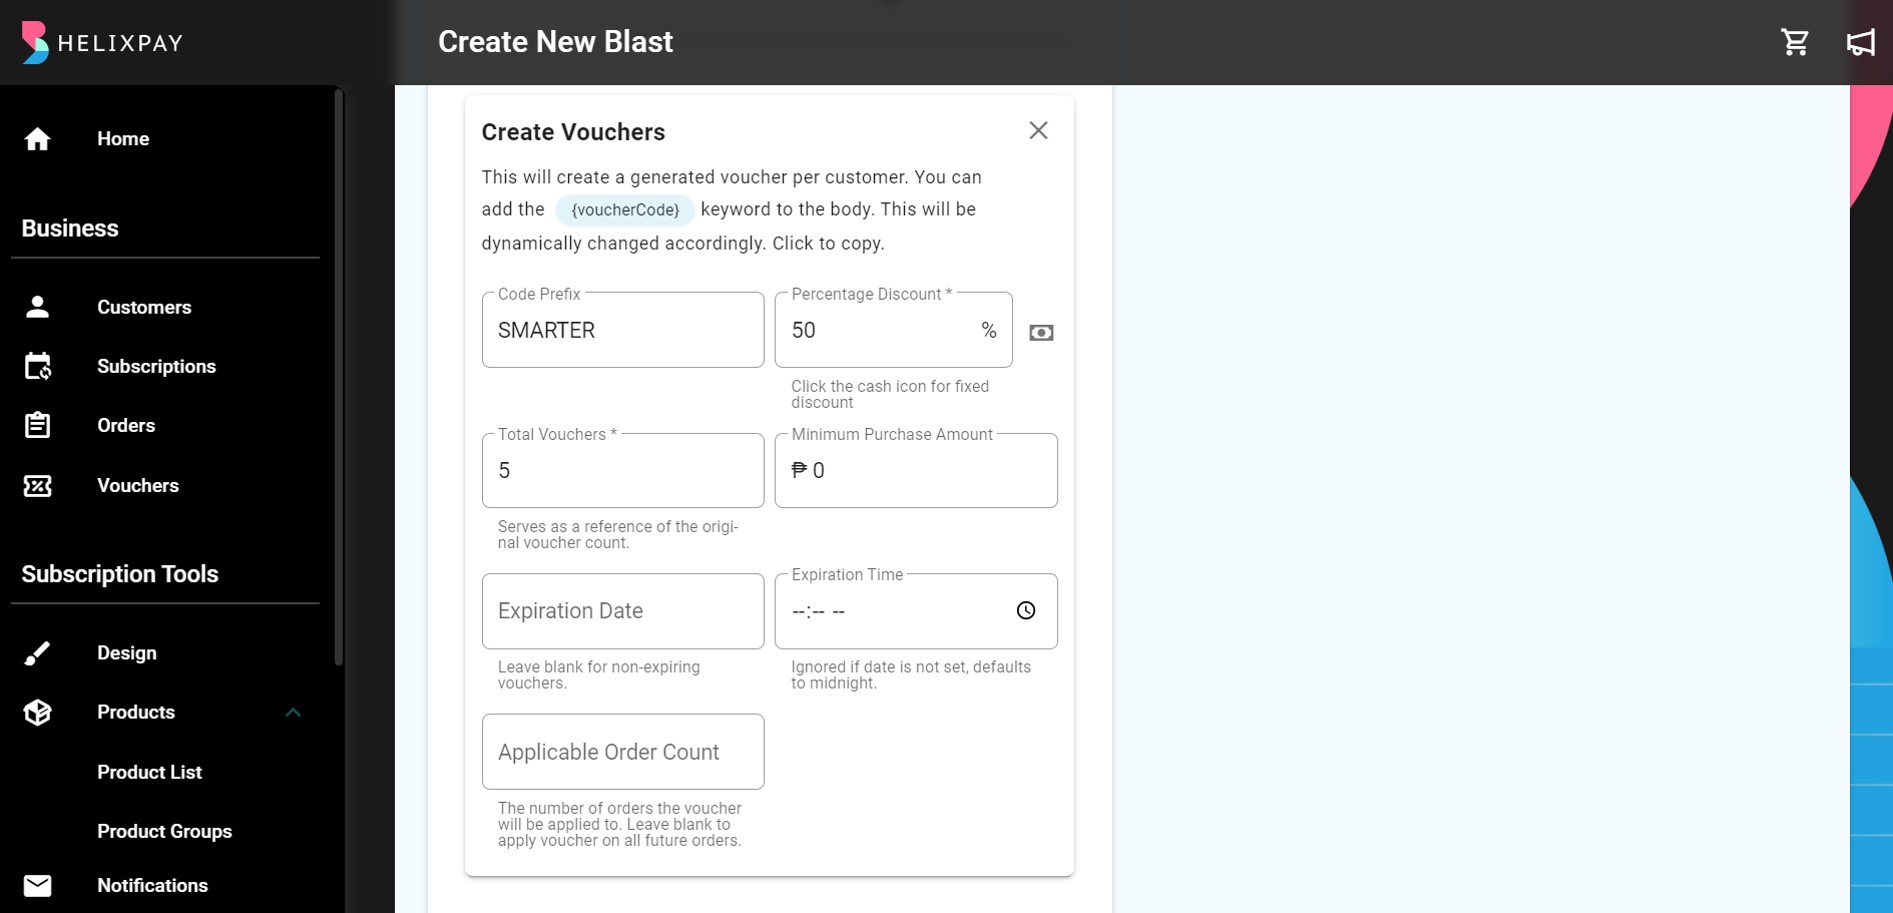
Step 4: Creating a voucher is an optional step. This feature just allows you to include custom vouchers to their email blast using the code prefix. Once set up, you can click the {voucherCode} placeholder to copy the keyword and paste it anywhere in the email body.
Step 5: Create engaging content by uploading a banner, linking a URL, embedding a video and audio clip, writing a message for the customers, or even customizing the font. You will see that the email content is created on the right side as you create the email blast.
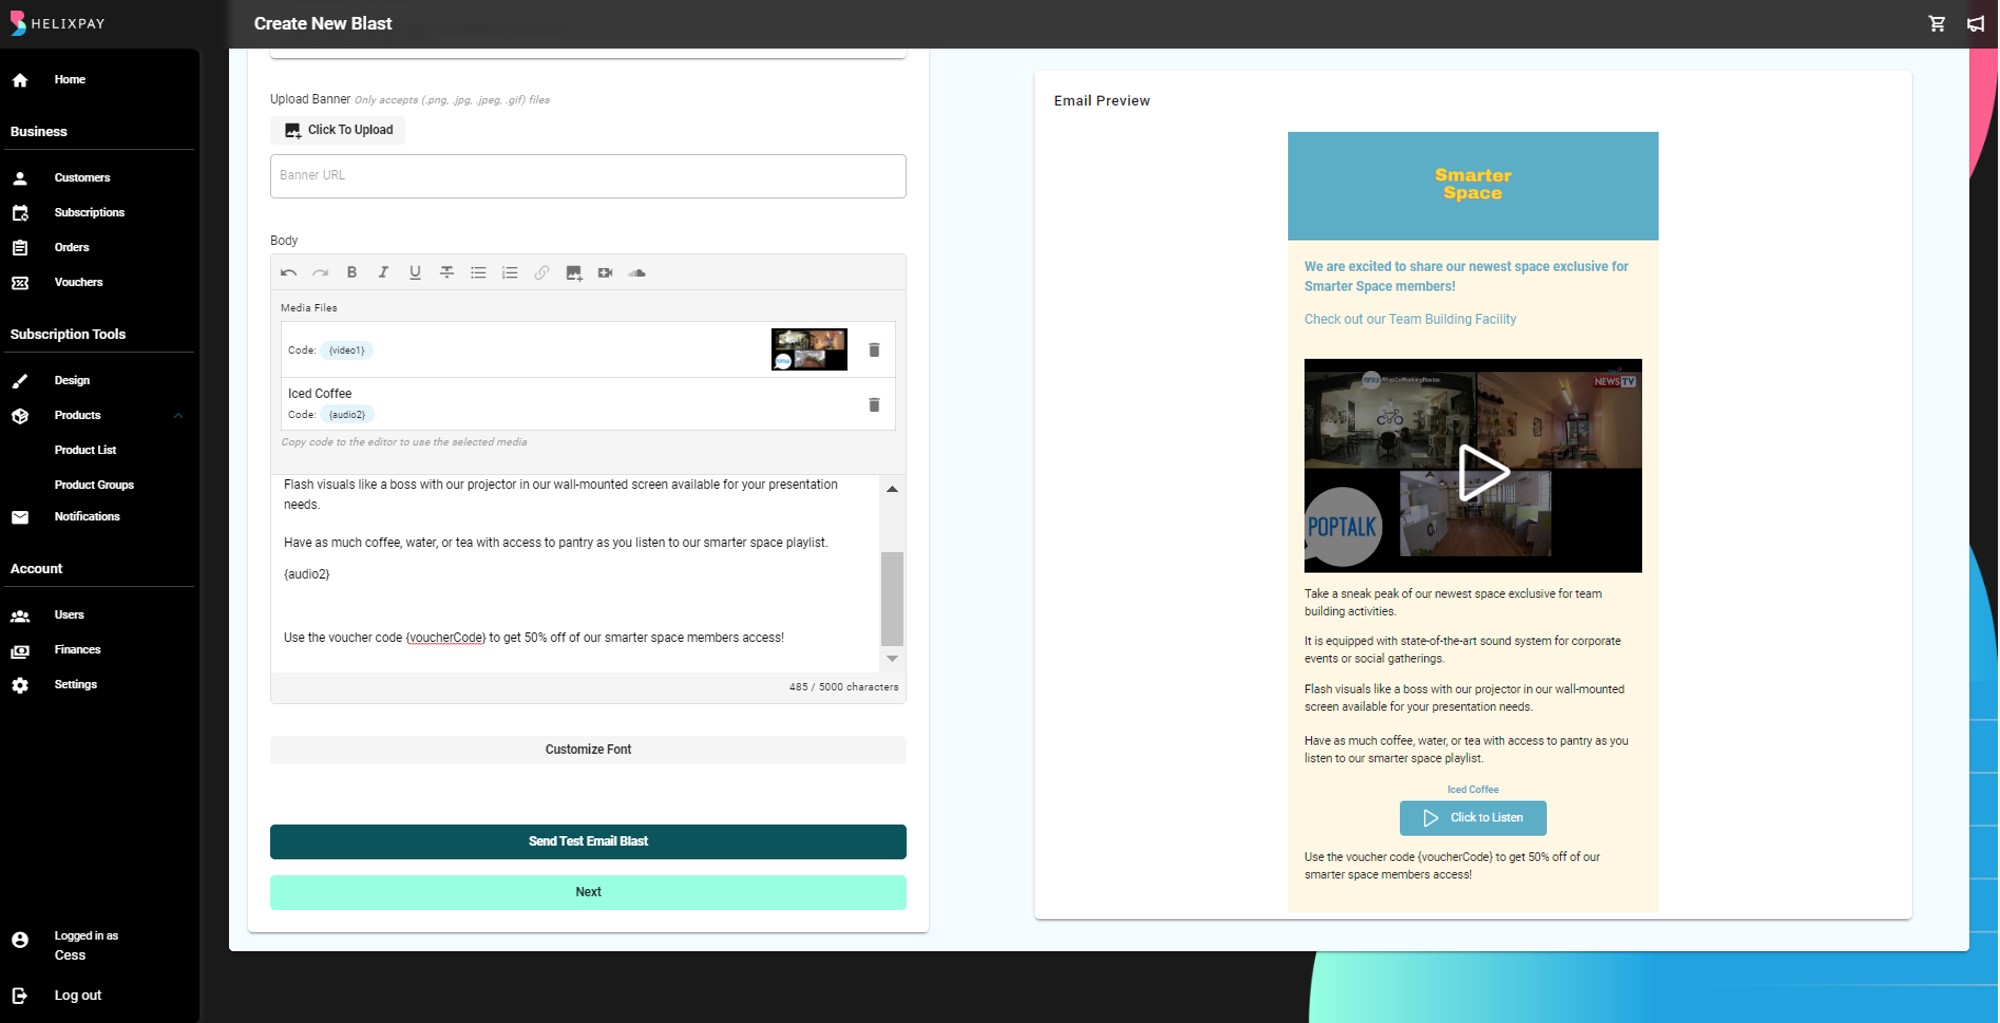
Step 6: Click 'Send Test Email Blast' to see the email preview or click 'Next' to send the email blast to the customers or save it as a draft.
You can see all the Blasts sent with the Open Rate and Click Rate in Customers > Blasts > Group Blasts
Updated over 2 years ago
