Subscriptions
The Subscriptions tab gives you visibility on all customer subscriptions and its statuses. It displays the customer details and what product(s) the customer is subscribing to.
The Subscriptions tab allows you to do the following:
Create subscriptions for new and existing customers
Steps in creating a subscription for new customers:
Step 1: Click the '+ Create New' button.

Step 2: Choose 'Create New'.
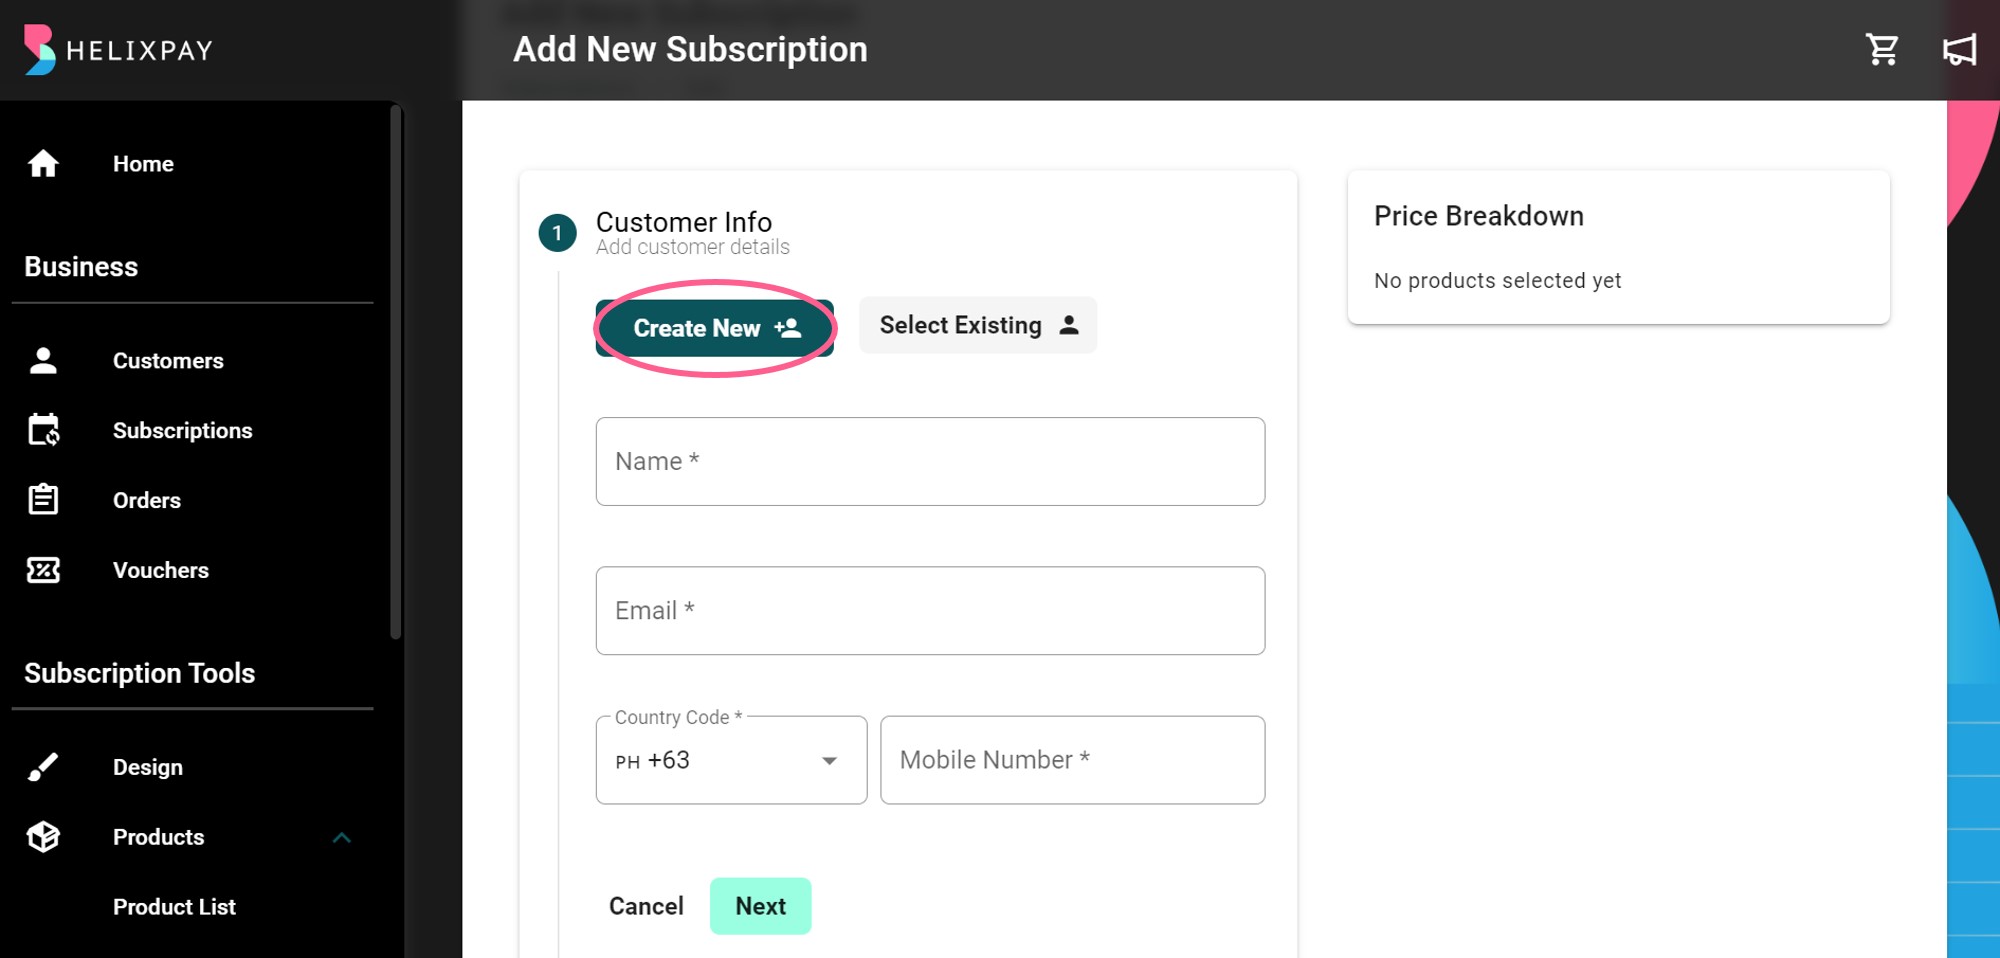
Step 3: Fill out all the required fields and click the 'Next' button.
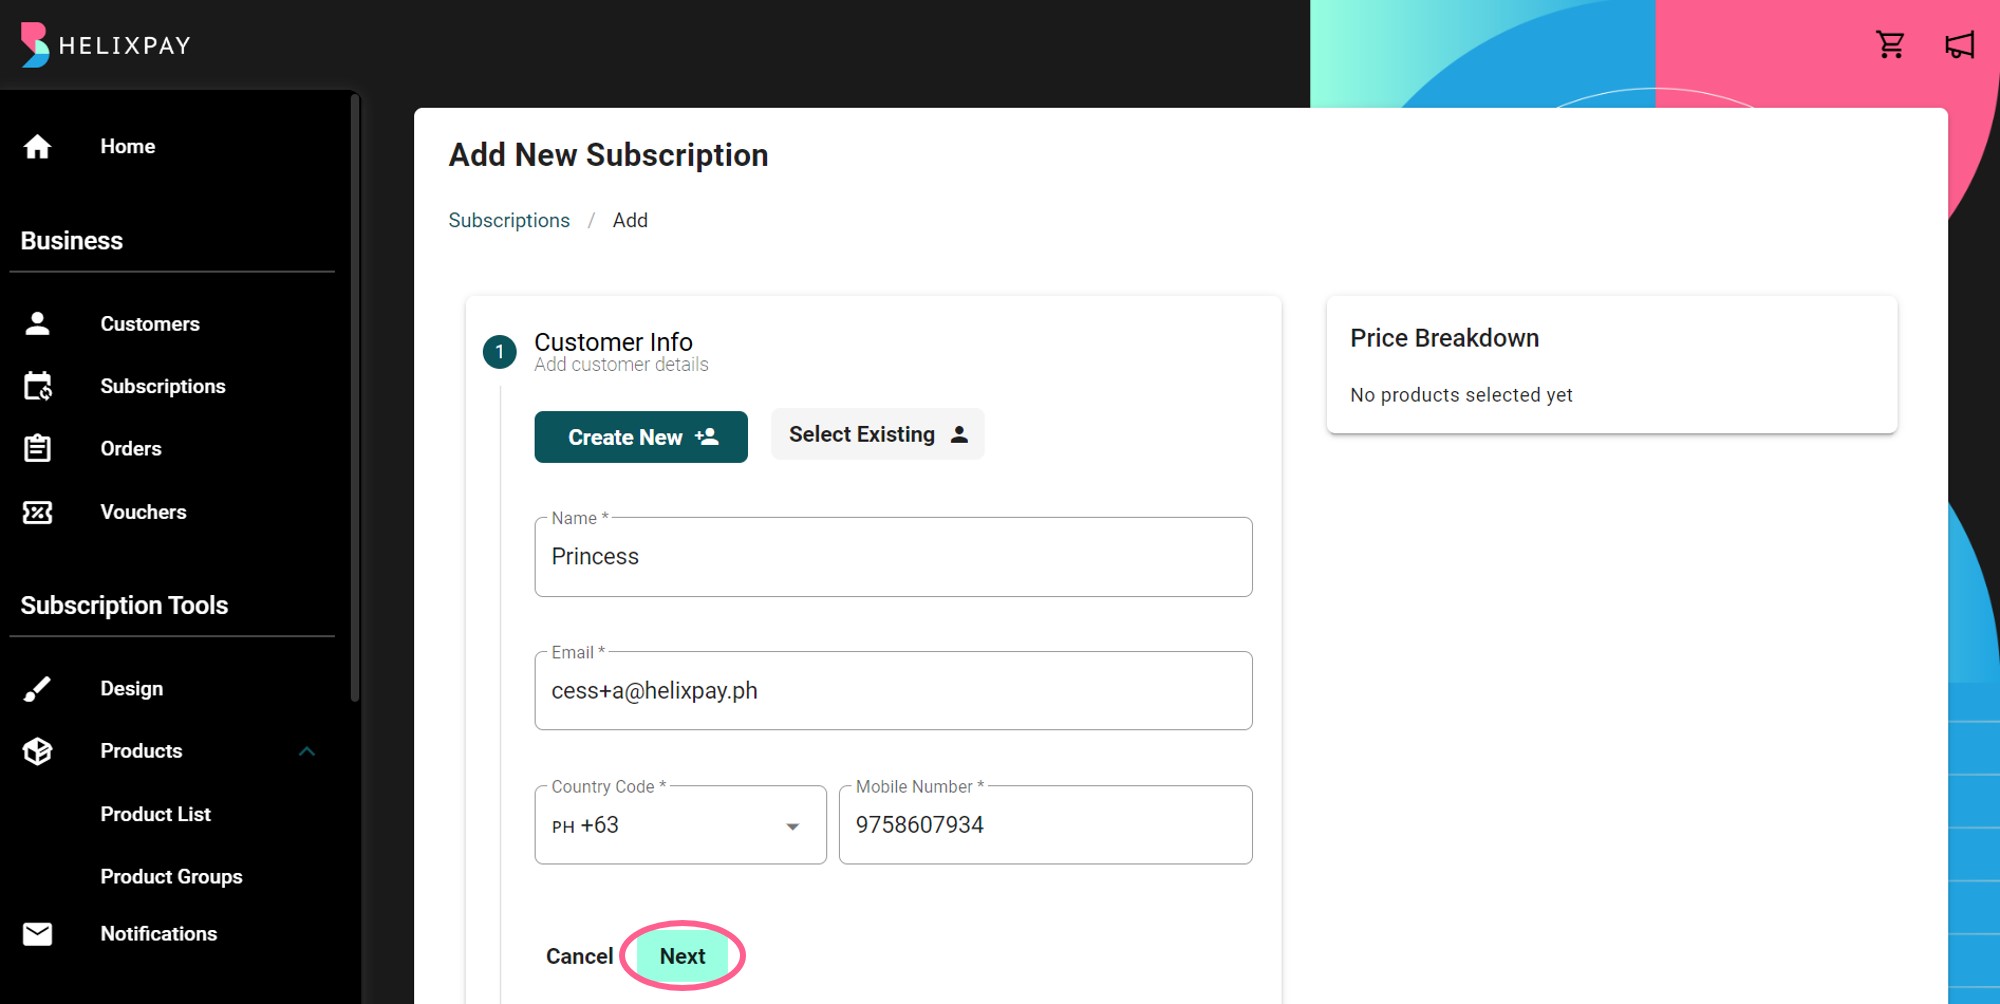
Step 4: Choose products by clicking the 'Open Product Selection' button.
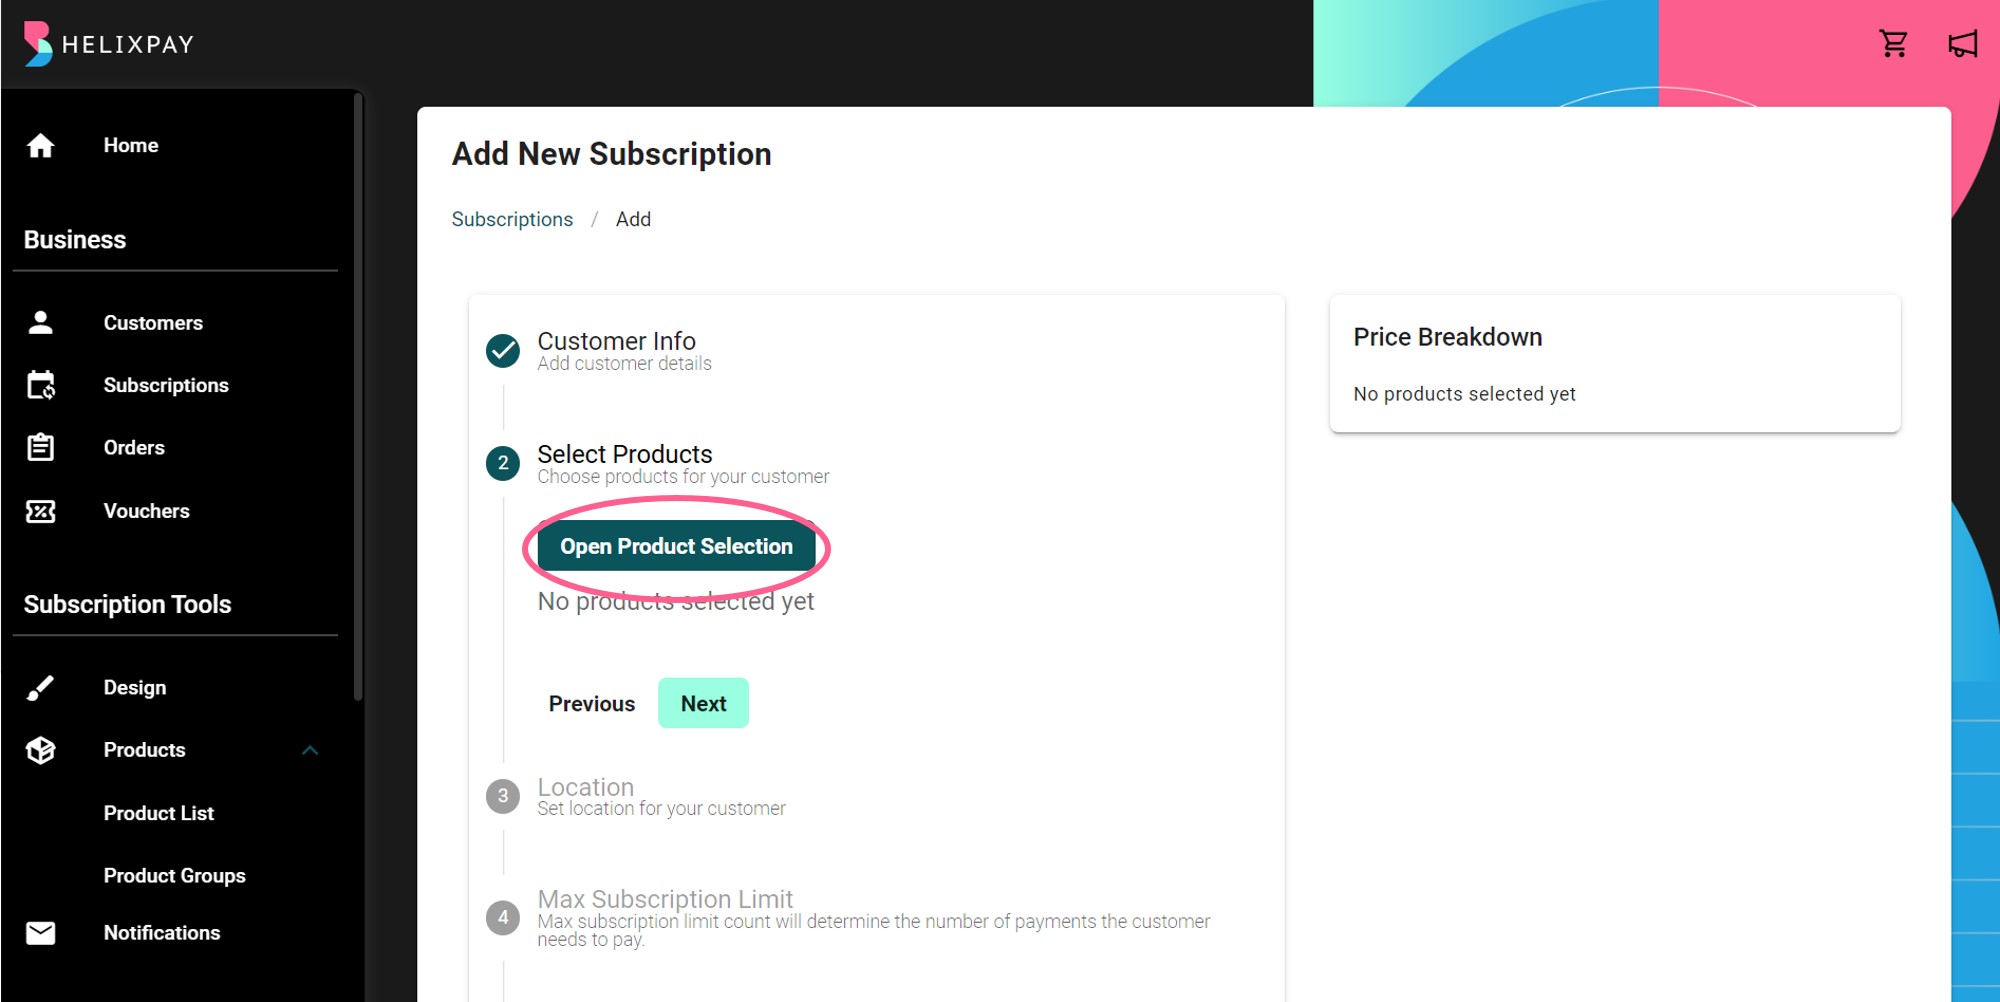
Step 5: Search or choose the product(s) from the list then click 'Next'.
Step 6: Choose 'Recurrence' and 'Payment Date'.
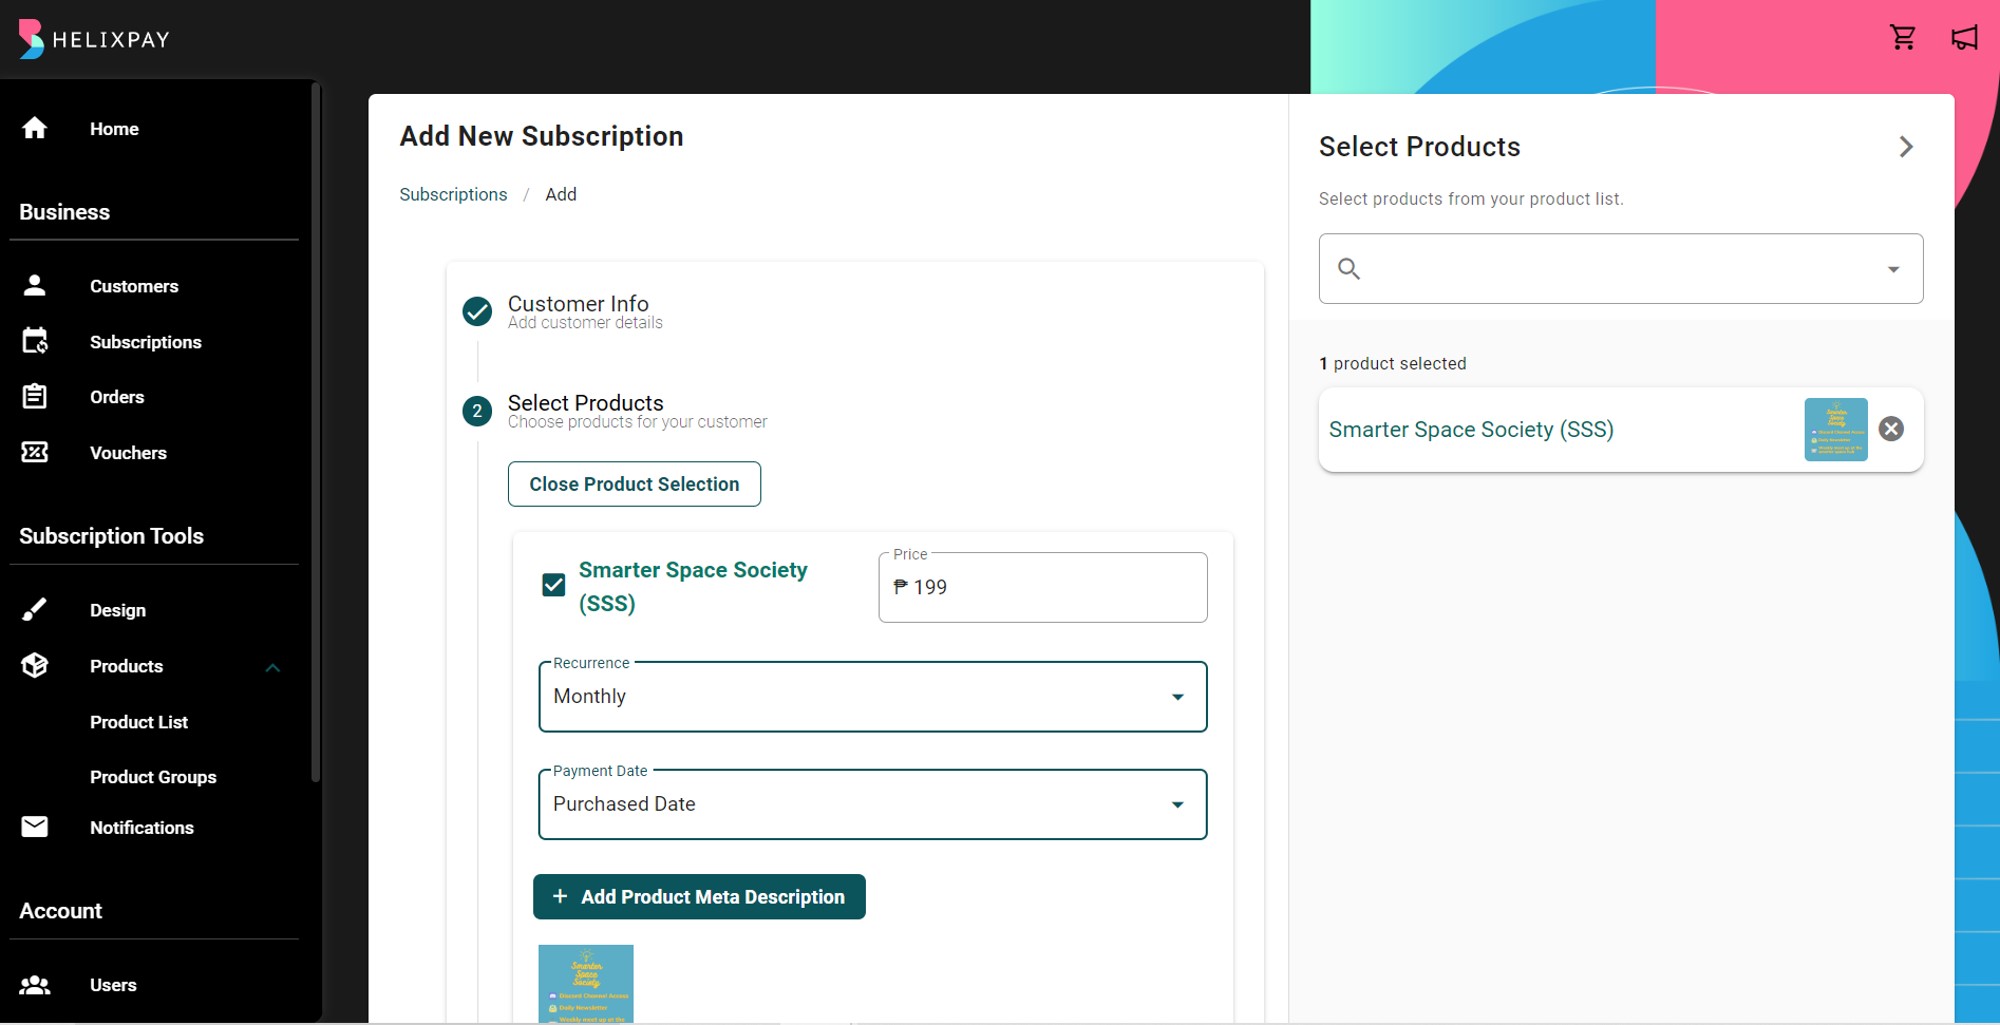
Recurrence can be Single Order, Weekly, Every Other Week, Monthly, Quarterly, or Annually.
Step 7: Click 'Next'.
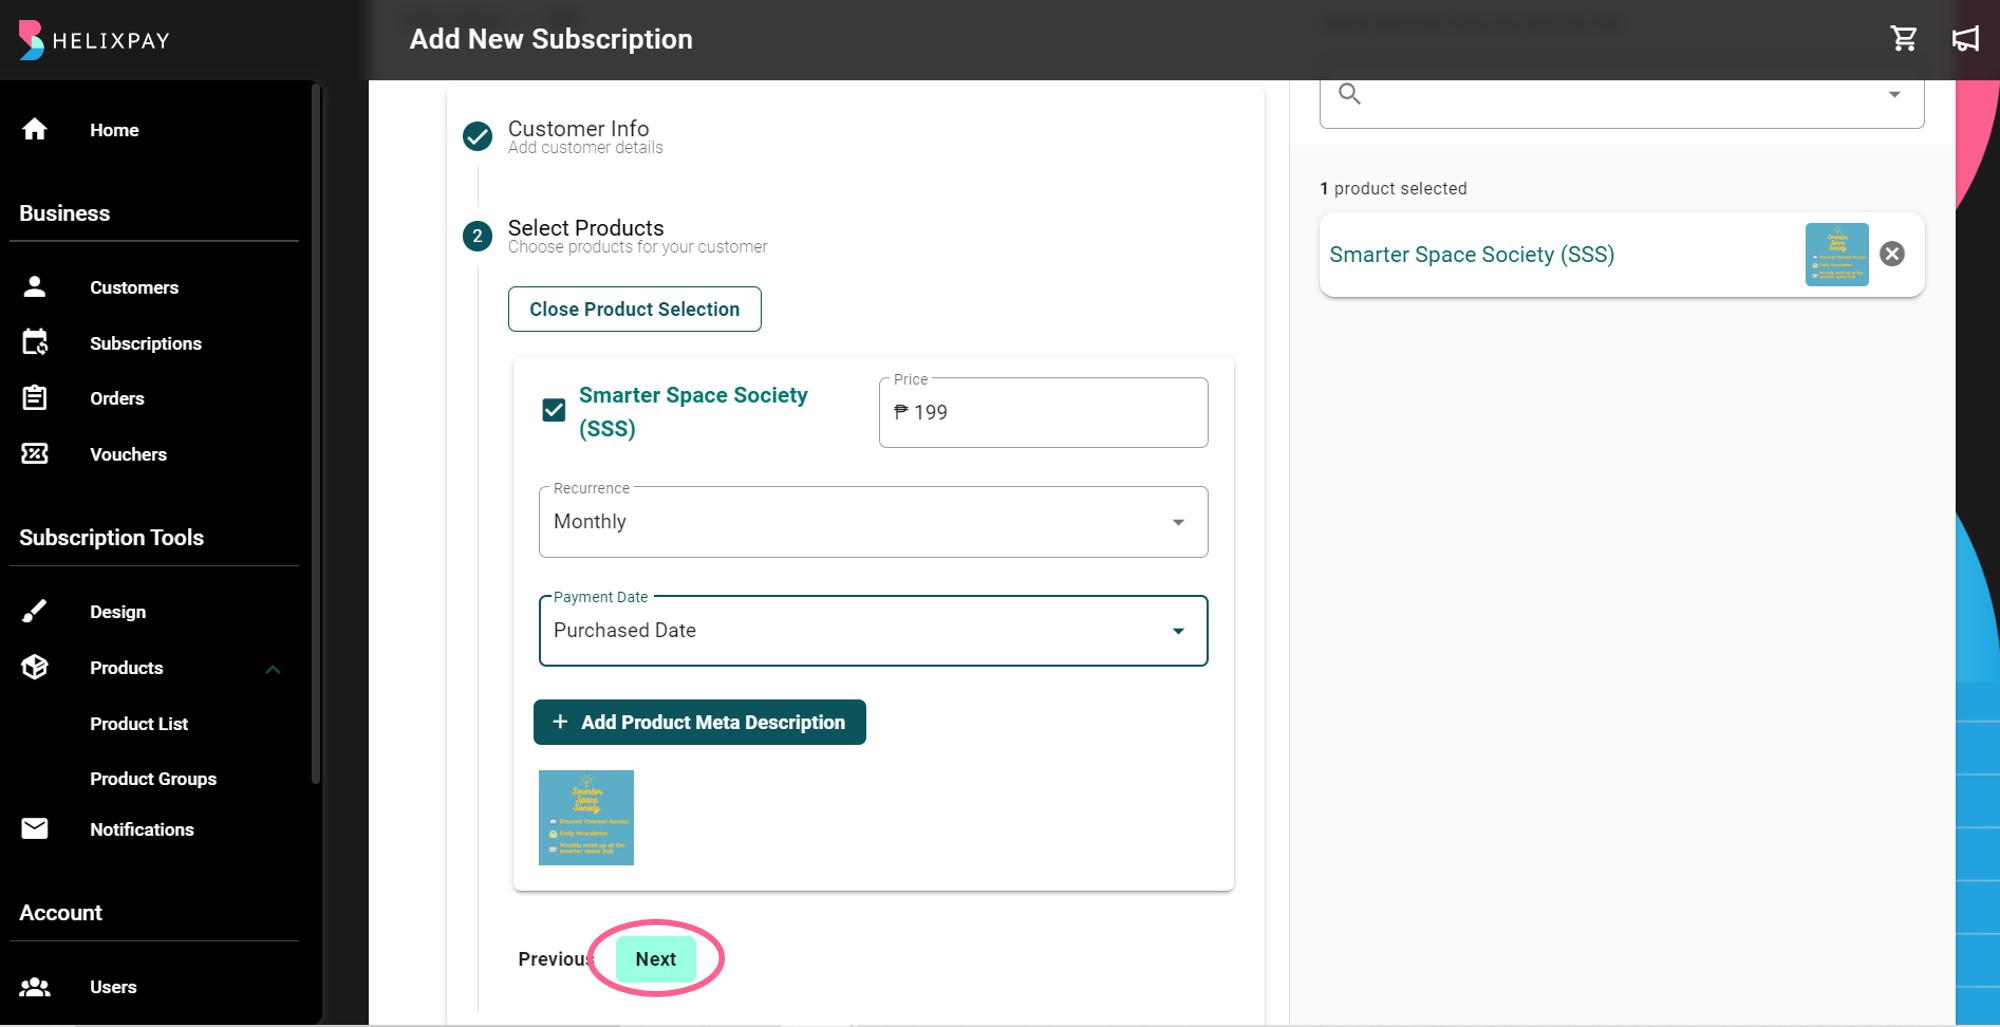
The recurrence and payment date will be applied to all succeeding orders. The merchants can check the selected product(s) and price breakdown on the right section of the page.
Step 8: After selecting the product(s) for the customer subscription, set the 'location' of the customer. Make sure to fill out all the required fields then proceed to the next step by clicking the 'Next' button.
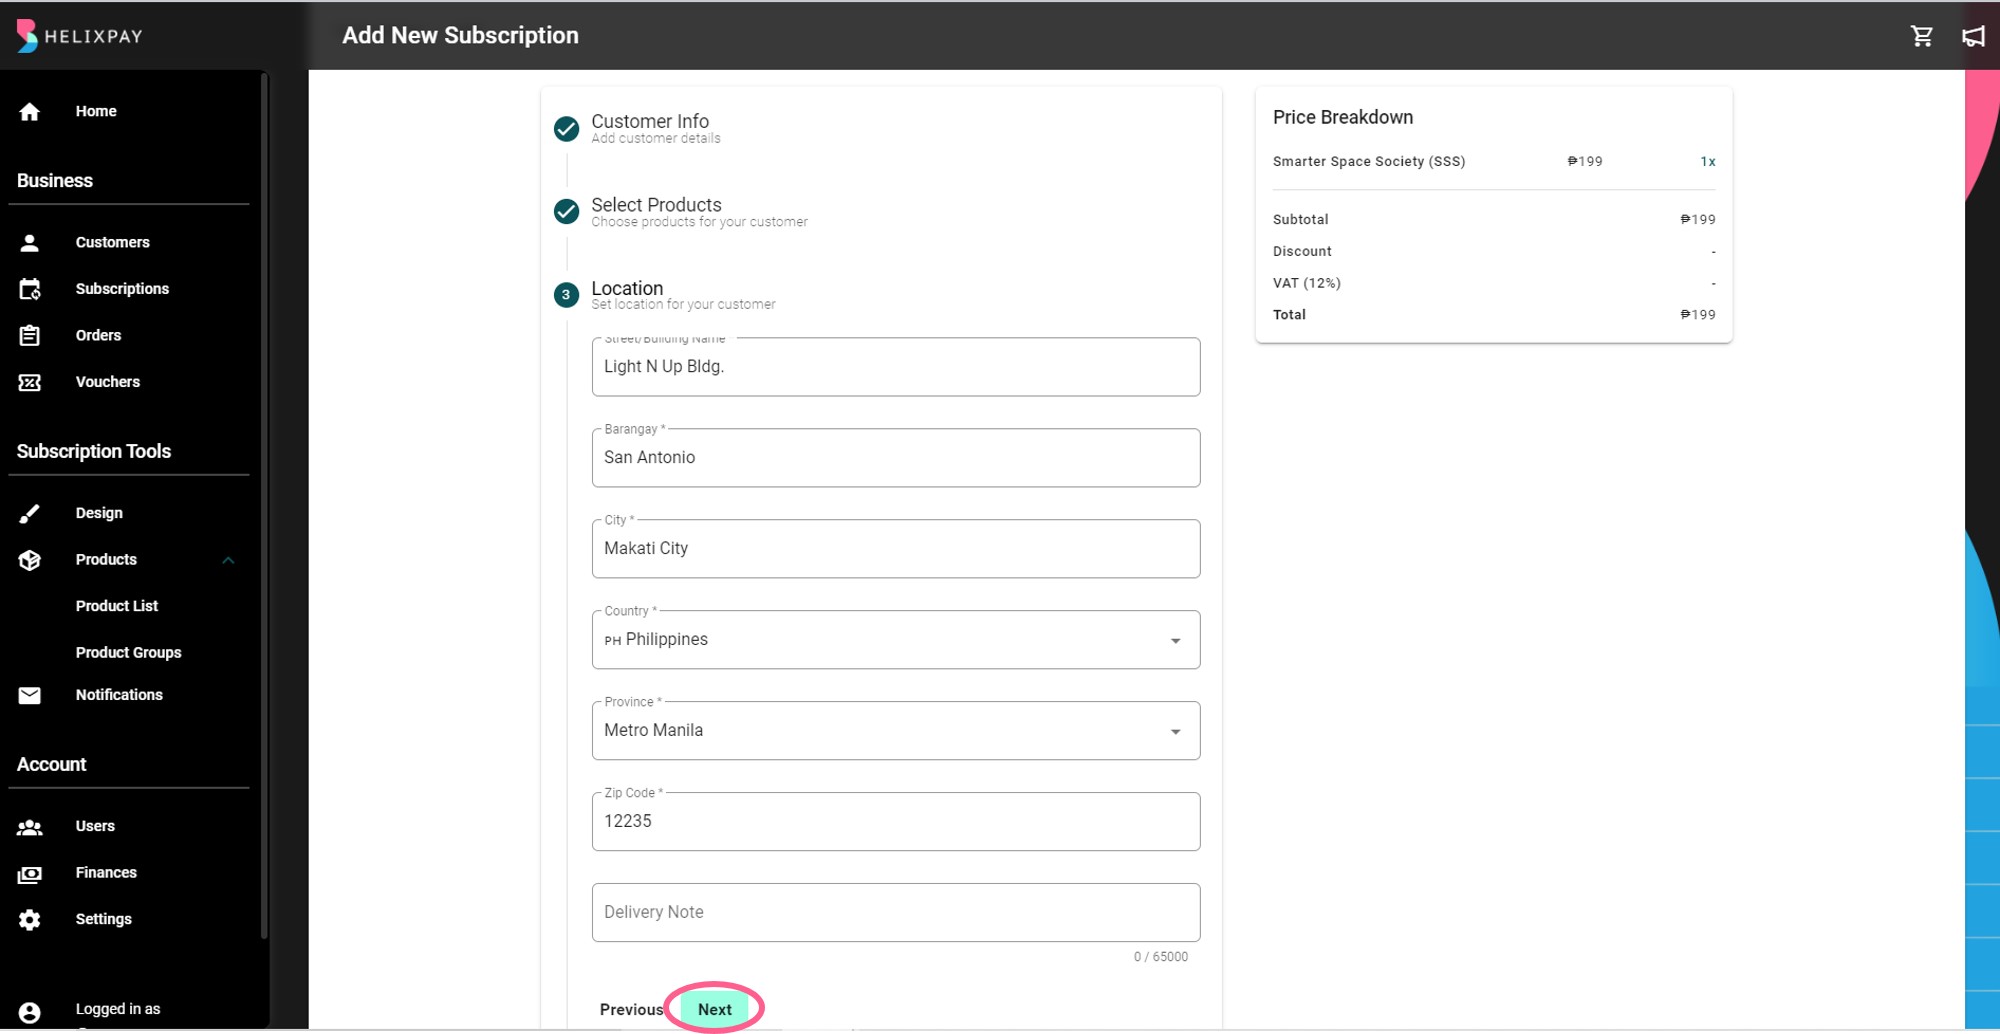
For ‘non-shippable’ services, it is still required to include the location address for each subscriber.
Step 9: Set 'Max Subscription Limit'.
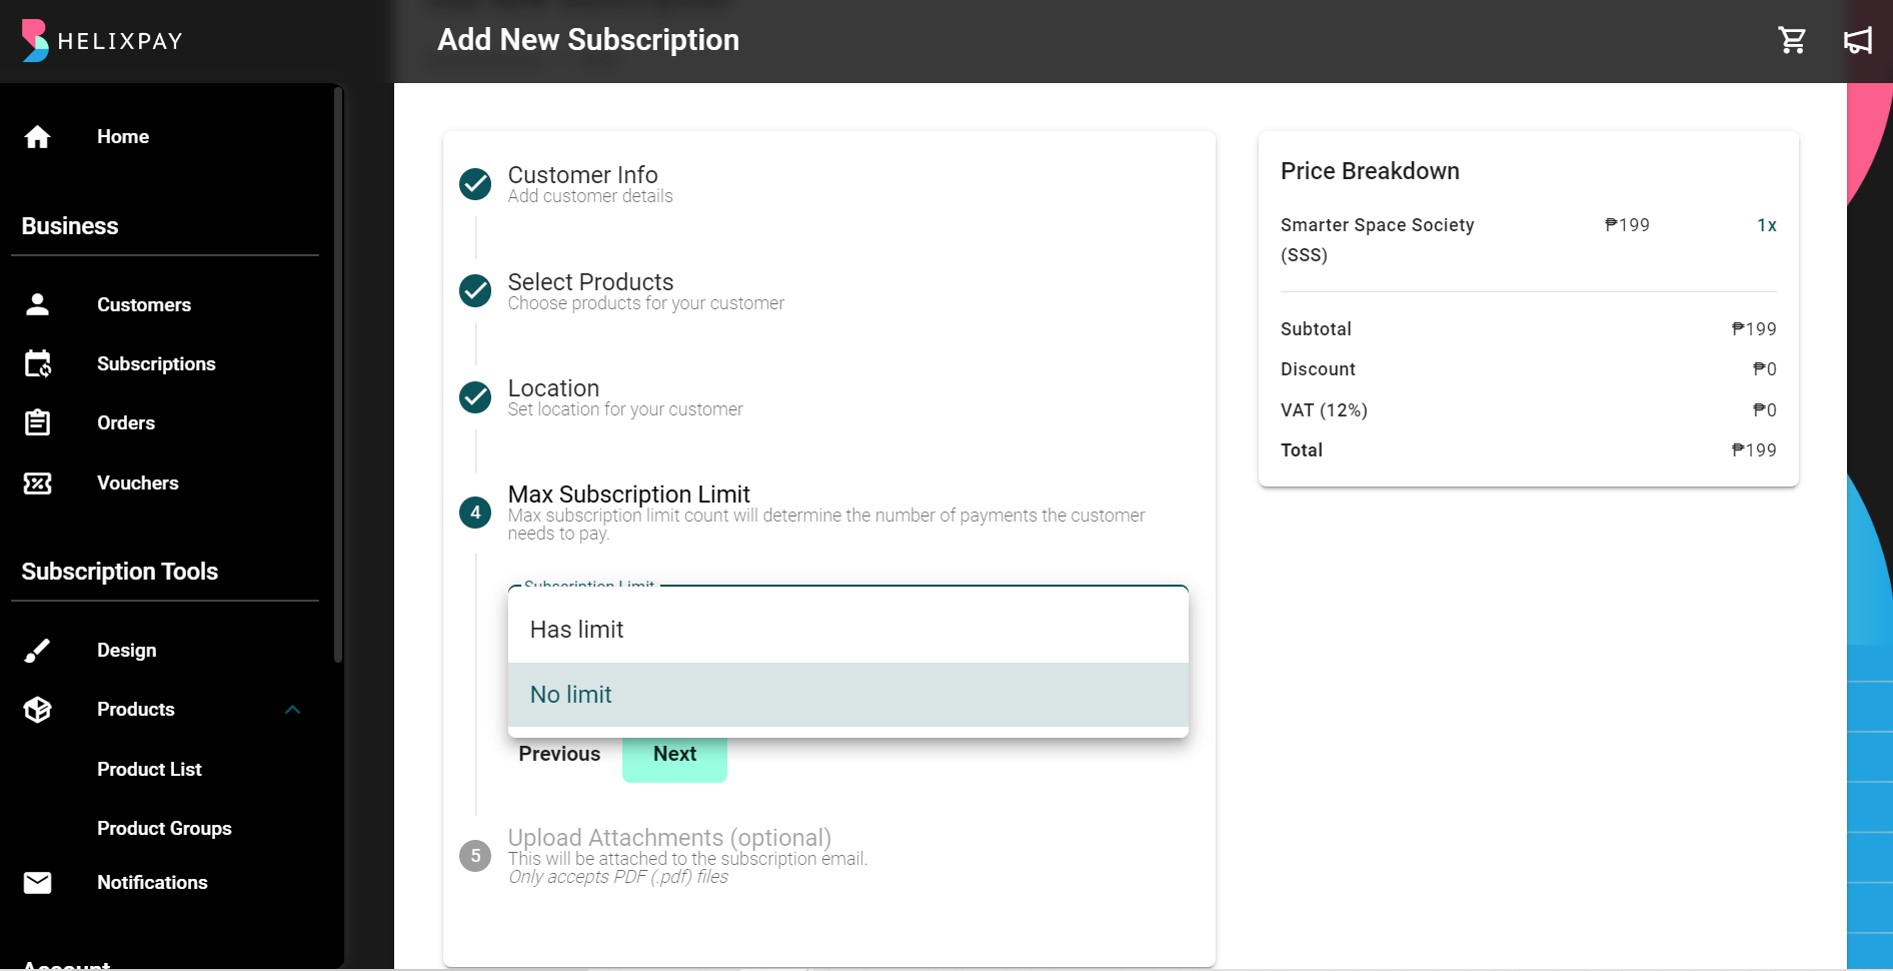
A subscription with ‘no limit’ will recur until the customer decides to end the subscription. On the other hand, a subscription that ‘has limit’ will recur until the set maximum limit is reached.
Step 10: ‘Create’ the Subscription!
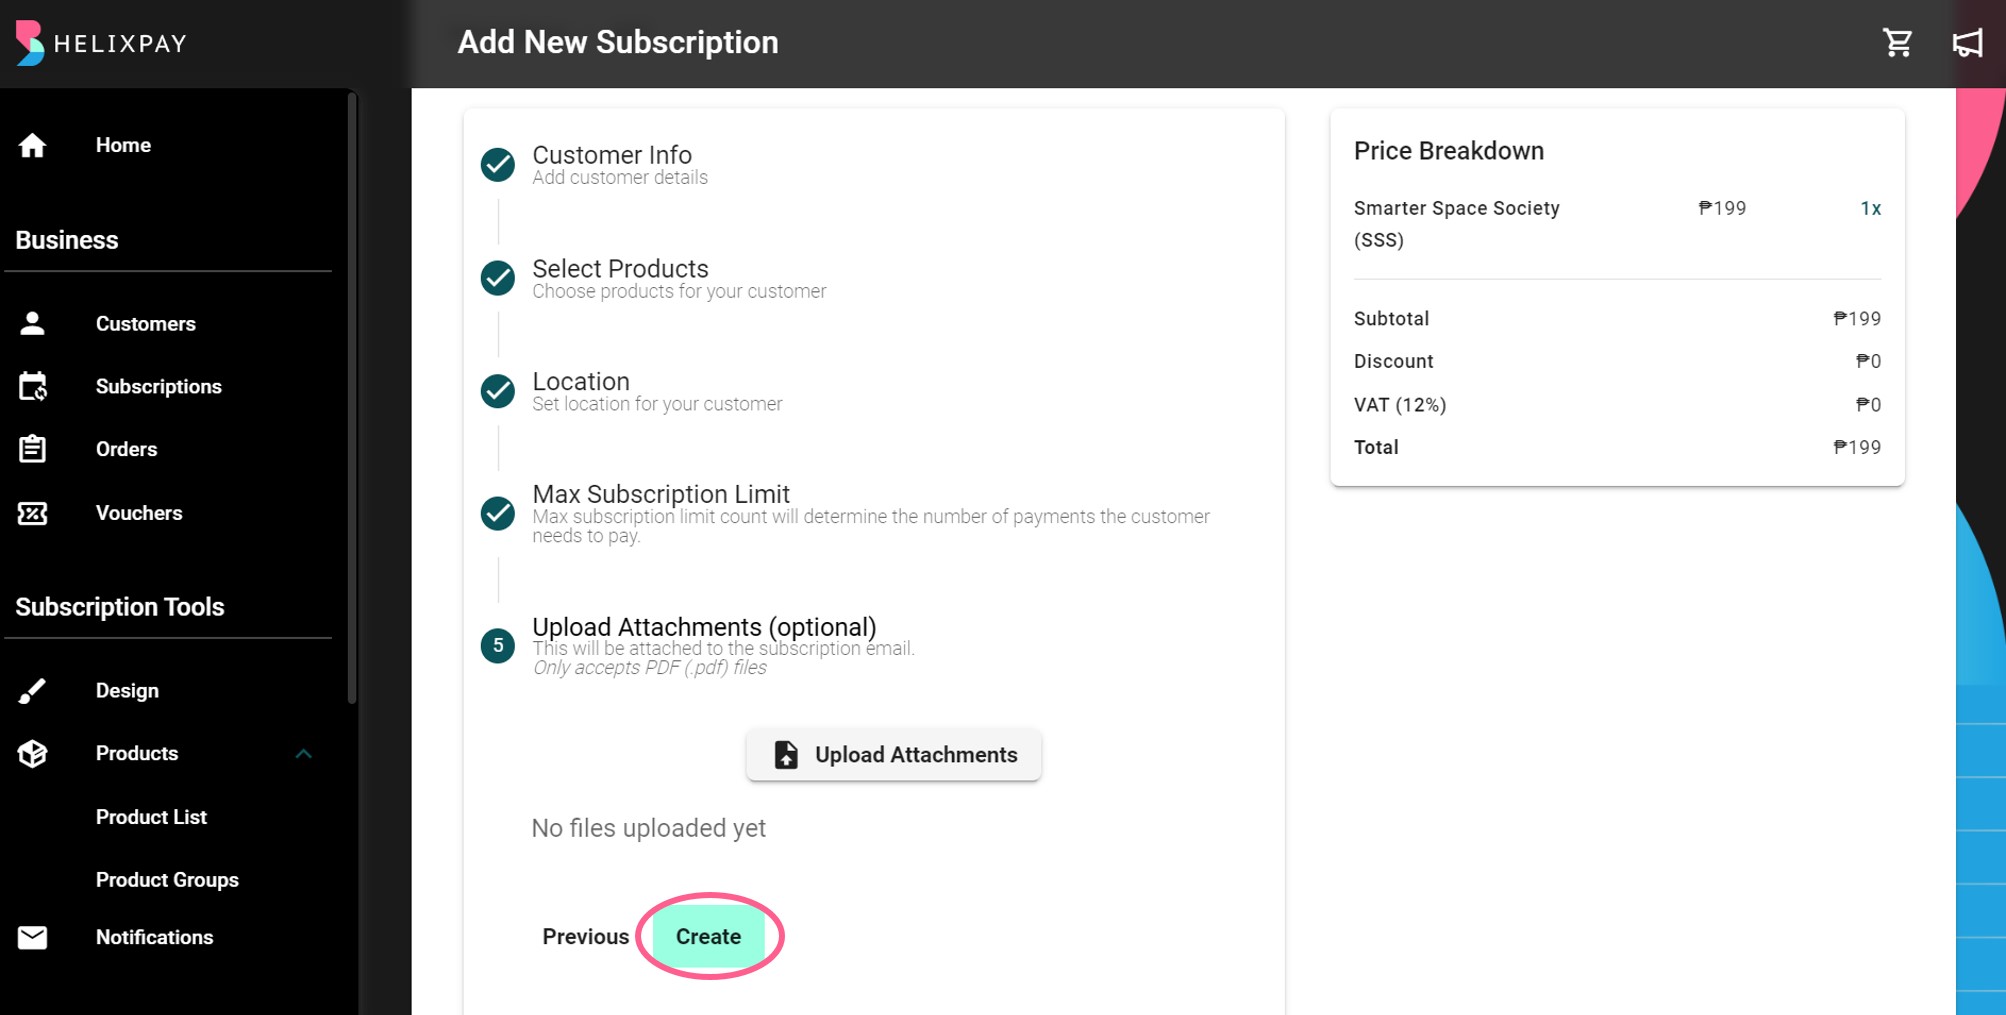
The customer will automatically receive an email and SMS notification informing them to pay for their first order, and then HelixPay handles all the recurring payments going forward from there.
Create Subscription for Existing Customers
To create a subscription for existing customers, follow steps 1 to 10 but choose 'Select Existing Customer' for step 2. All the required fields will then be automatically filled out with the customer information. All the fields from the 'Location' section will also be prefilled with customer location details. This can be edited if the customer prefers a different shipping address from the previous subscription. For 'non-shippable' services, it is still required to include the location address for each subscriber.
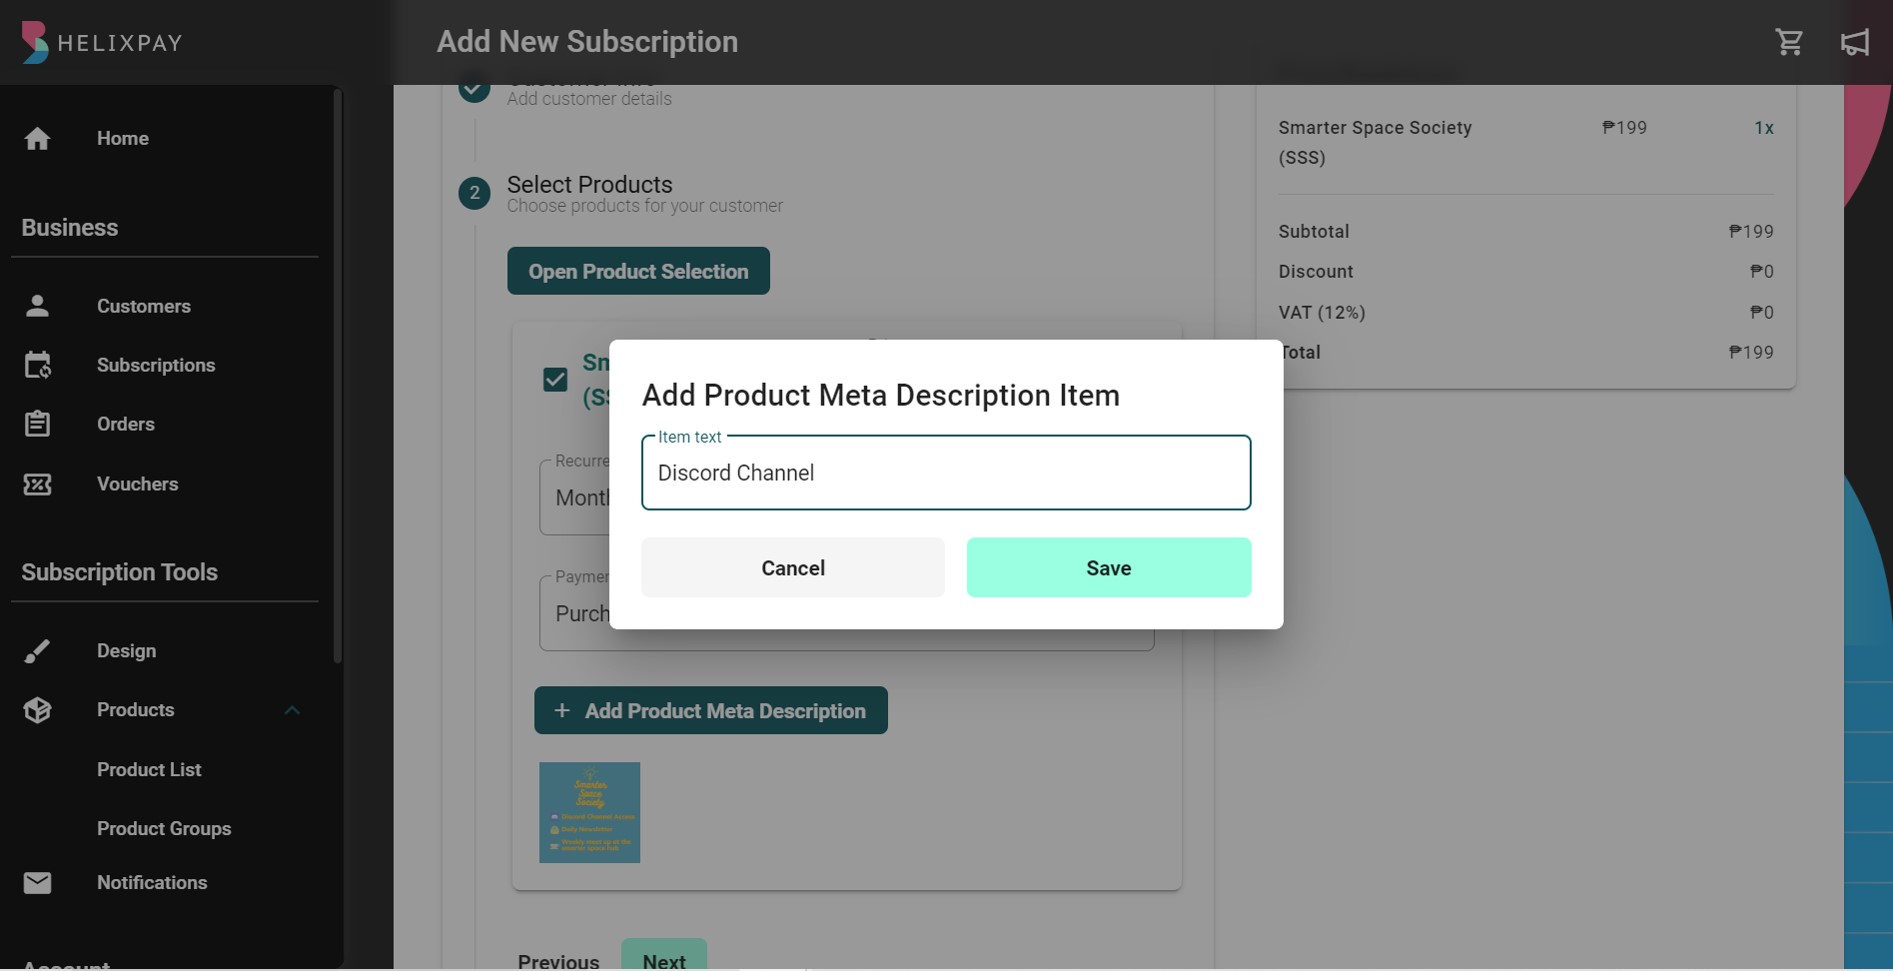
Add note to Product SKU
Adding notes to a product or an order is important to convey additional information to the customers. The note will be displayed in the order details below the SKU name to let the customer know if there is specific information about the product, for instance, an expiry date for a membership program or a condo size for association fee collection. Merchants can include a unique SKU description when creating a subscription from the console which will be displayed in the order details. Adding note per product SKU can be found under 'Select Products' step when creating a subscription.
Modifying the customer subscription
To modify the customer subscription, click the ellipsis button found on the rightmost part of the subscription details then choose what action to take.
Edit customer subscription
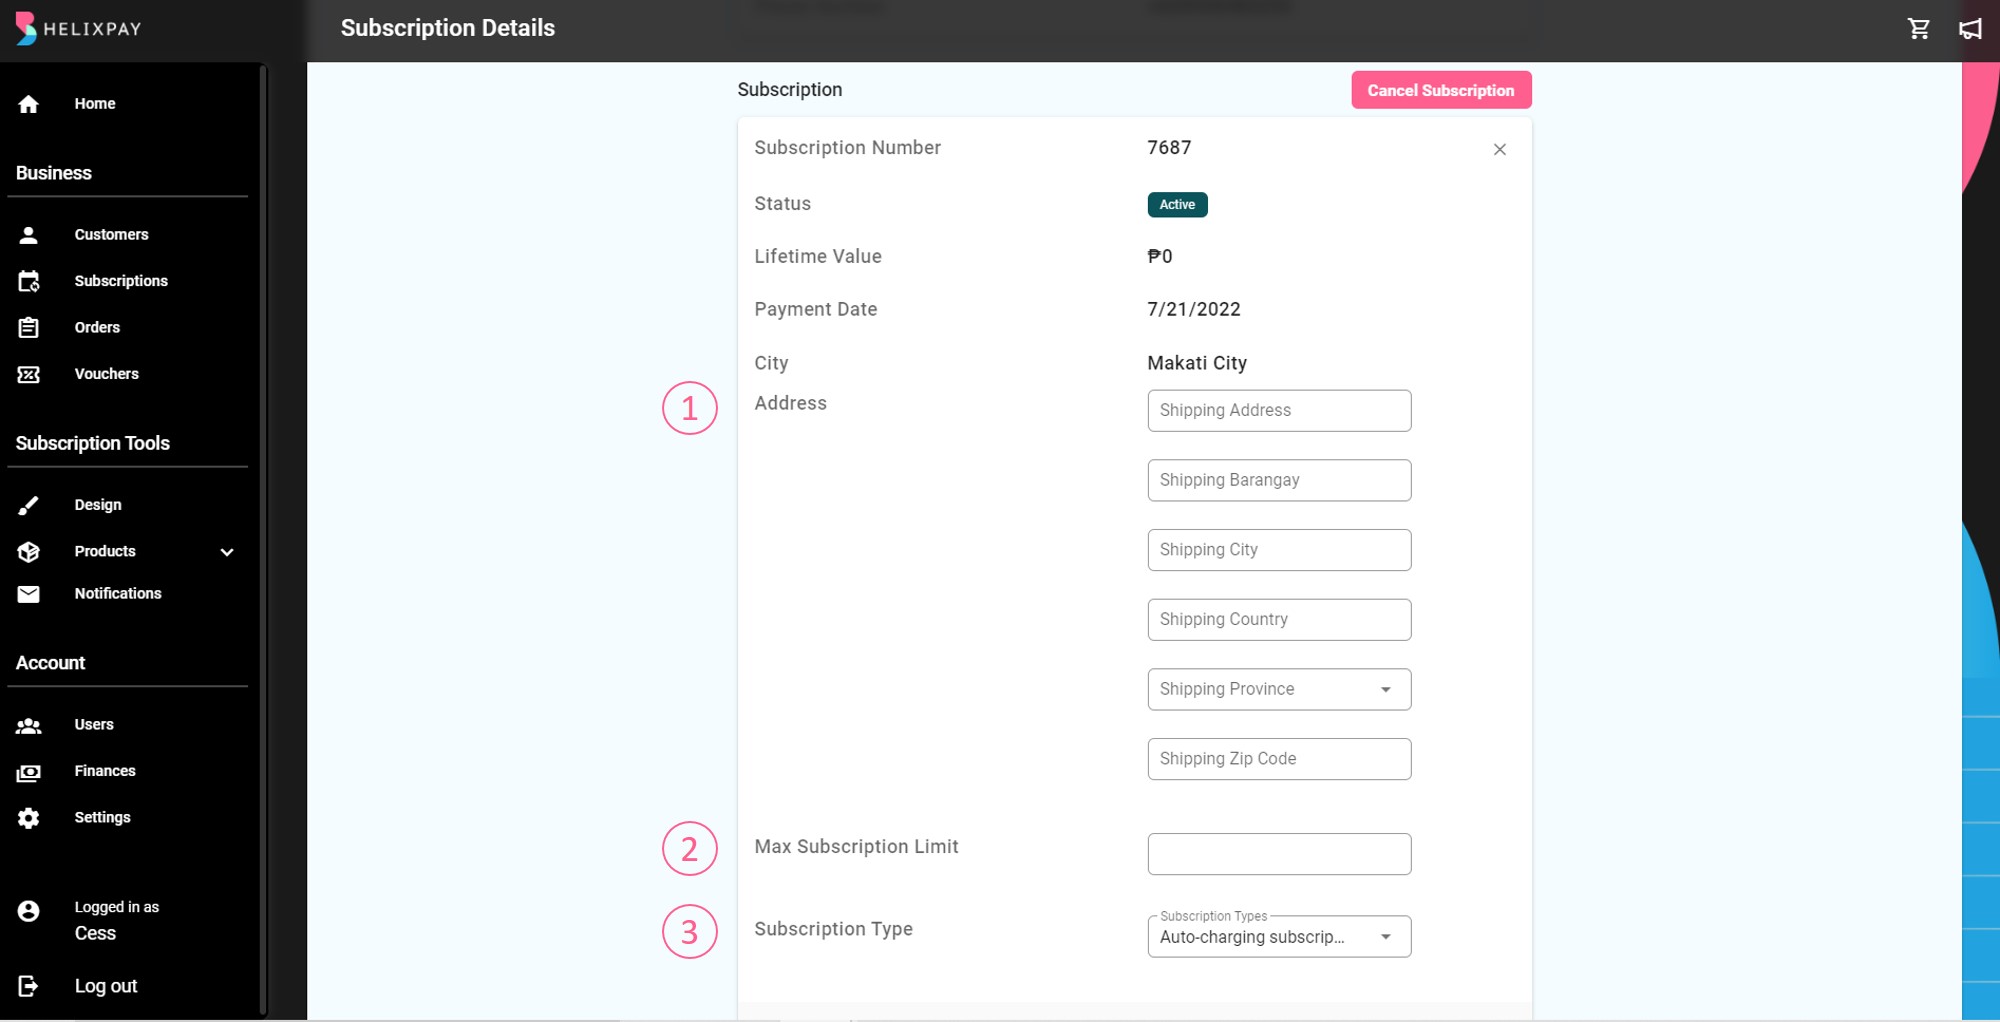
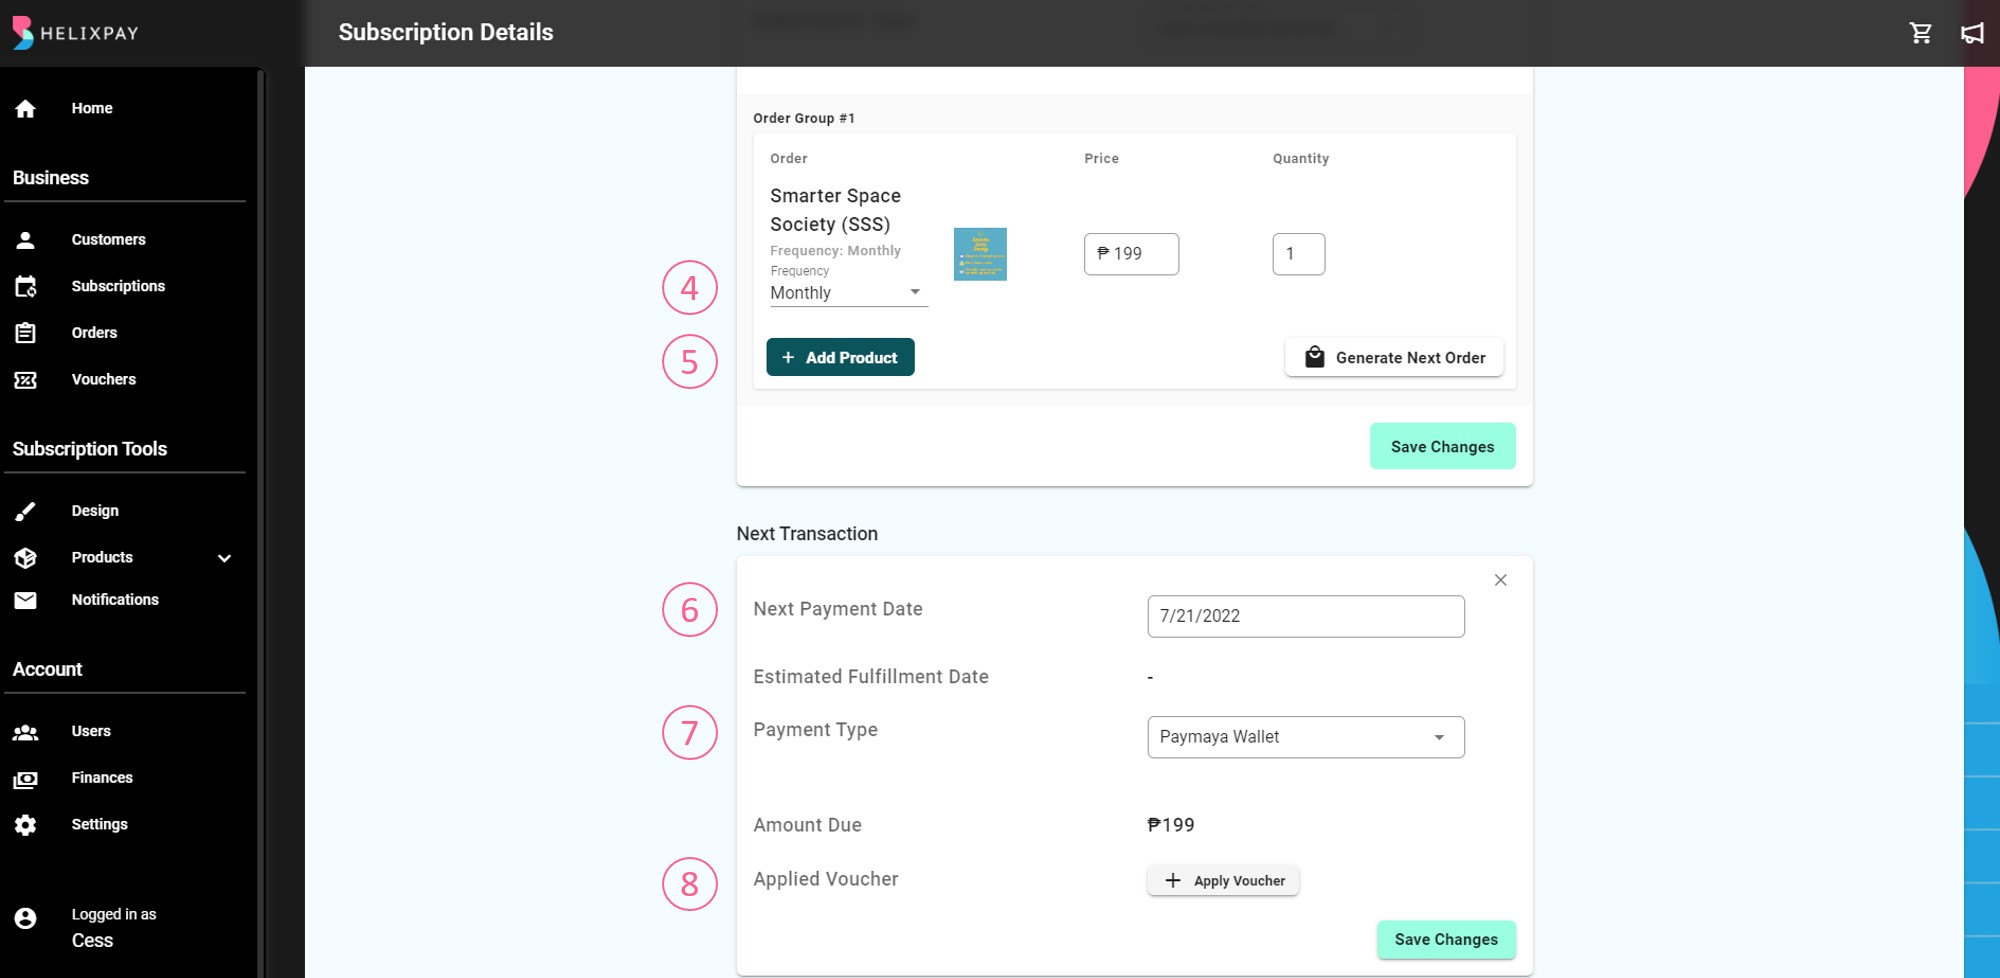
In editing the customer subscription, the merchant can do the following:
- Update 'Shipping Address'
- Set or update 'Maximum Subscription Limit'
- Select 'Subscription Type' if auto-charging or auto-reminder
- Change 'Subscription Frequency'
- 'Add Product' and/or ''Generate Next Order'
- Set 'Next Payment Date'
- Update 'Payment Type'
- 'Apply Voucher'
Cancel or Delete customer subscription
In cancelling or deleting the subscription, you will be asked to confirm the action. Once the action is confirmed, this cannot be undone.
Update subscription prices
HelixPay charges the customer with the same price of the subscription at the time the first payment has been made. If you update the price of the subscription product, it will only be applied to new subscriptions and not with the existing ones. The bulk update subscription price allows you to edit the price of multiple existing subscriptions.
To do this, download the template first by clicking the ellipsis button beside the ‘Search by’ field then select ‘Export Subscription Prices’. This will automatically download the excel file and you can find it from your device’s downloads folder.
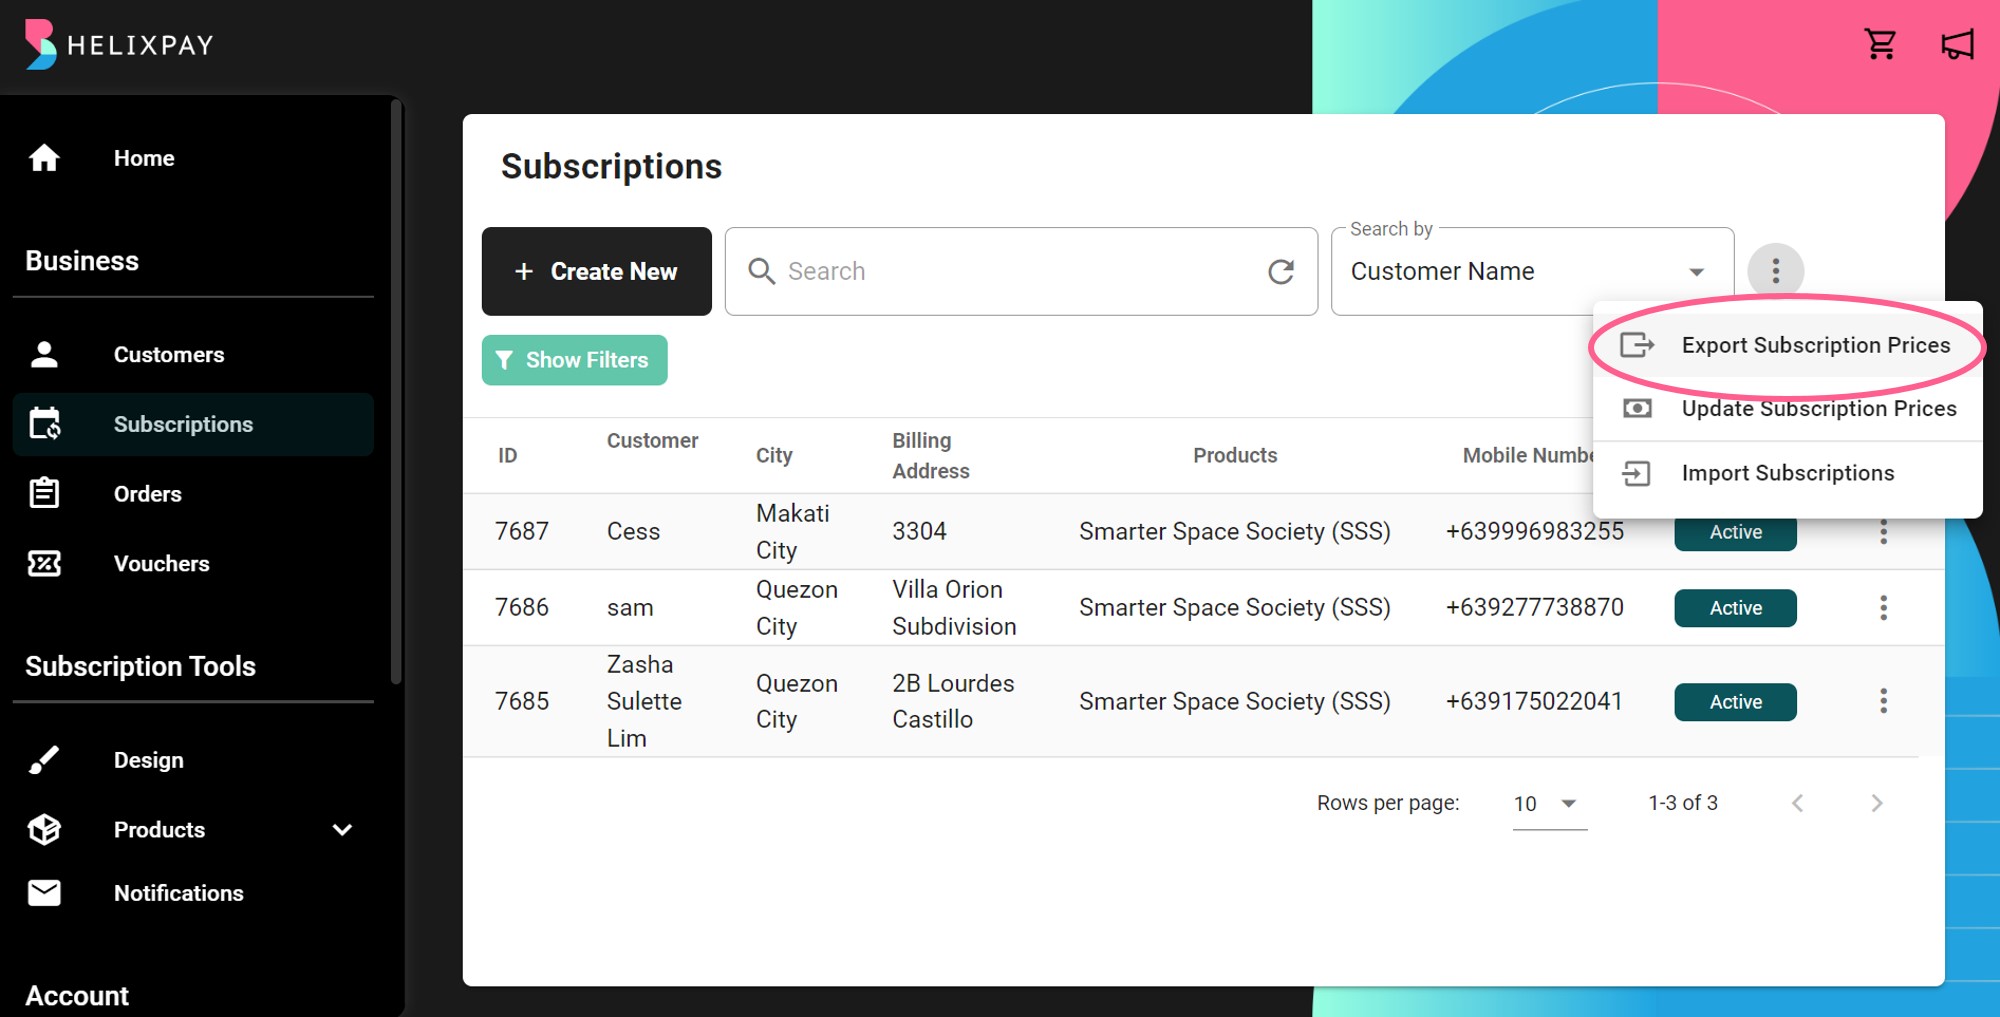
Once the download is complete, you will be able to see the list of all the subscriptions and you can start editing the price. To change the subscription prices, you need to upload the updated file to the console by clicking the ellipsis button then select ‘Update Subscription Prices’. You will be asked to select the file to be uploaded and will then see a message that the subscriptions are updated when the file was uploaded successfully
Bulk Upload Subscriptions
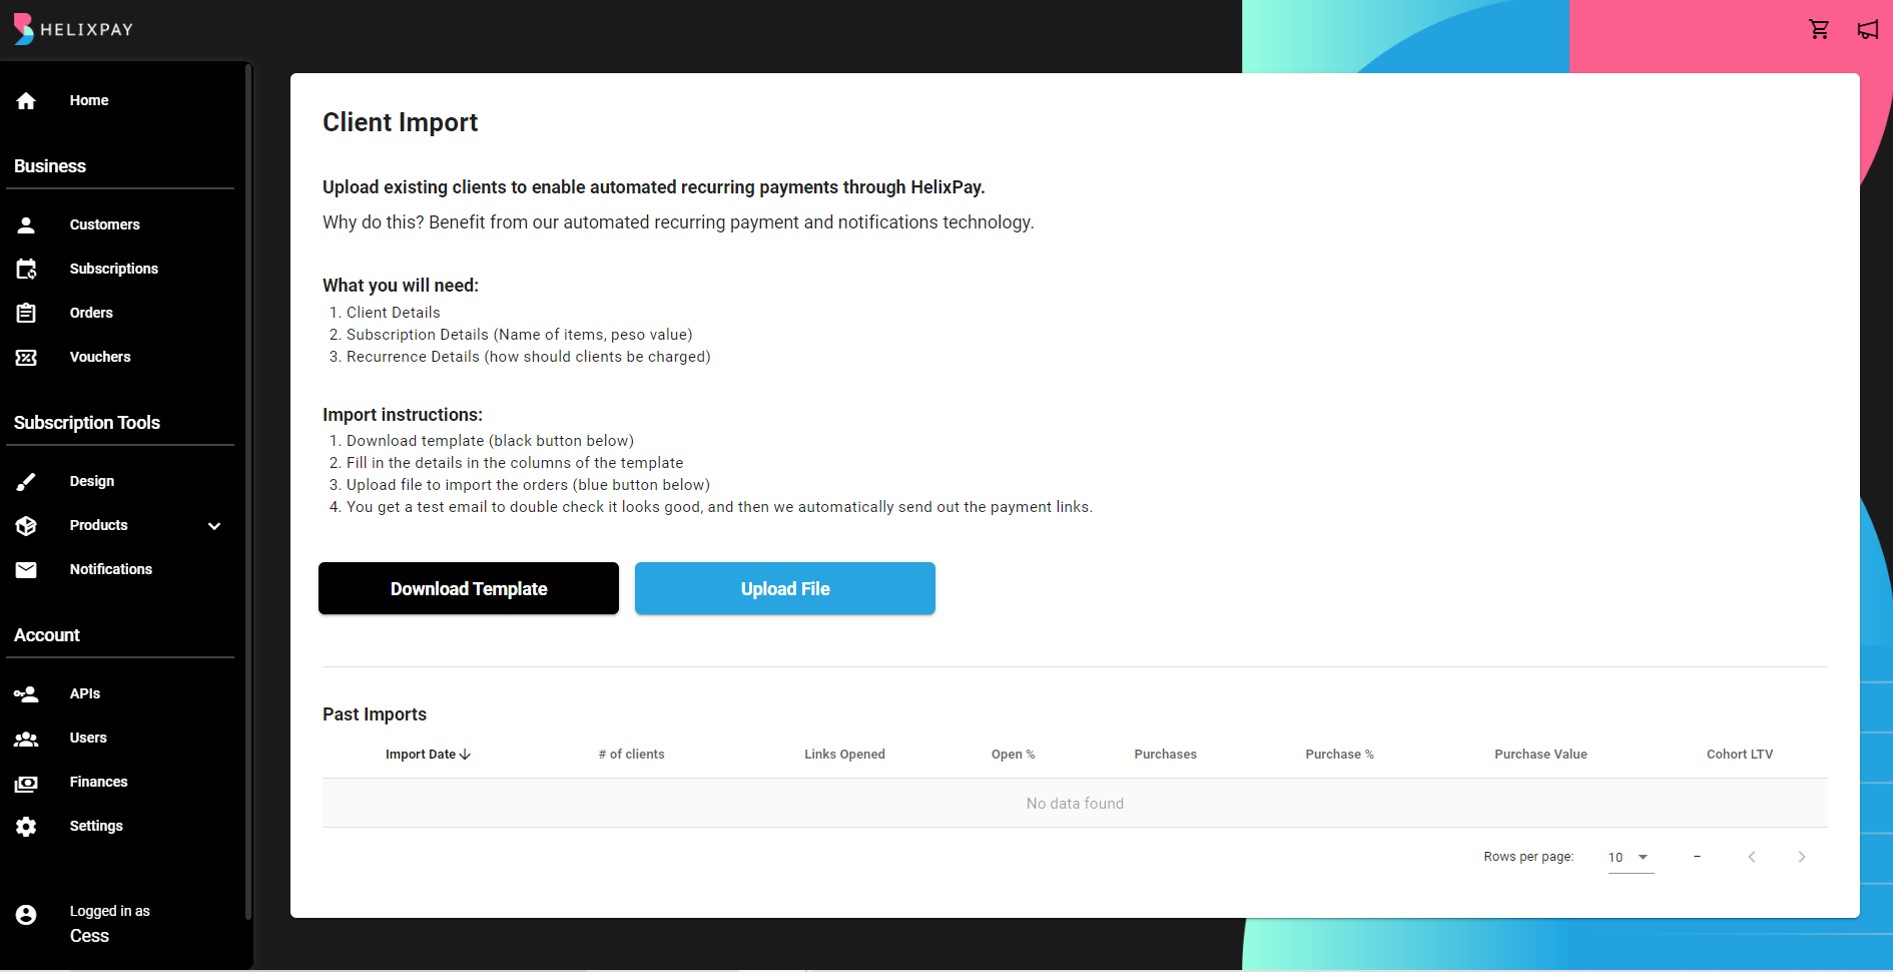
You can upload subscriptions in batches using the 'Bulk Upload Subscriptions' feature. This will enable automated recurring payments for your existing customers through HelixPay. This feature will allow you to upload a .csv file of your customer details.
The customers uploaded will then receive an email and SMS notification informing them to pay for their first order, and then HelixPay will handle all the recurring payments going forward.
Updated over 2 years ago
