Orders
The Orders tab gives you an overview of the order details including customer information, ordered product(s), amount, recurrence, fulfillment date, payment status, and order status. It can also help you to manage orders before and after fulfillment.
The following can help the merchants keep track of their orders:
Understanding statuses
Two statuses are displayed in the Orders tab, the first one is the Payment Status which can be differentiated as follows:
Unpaid - HelixPay automatically creates the recurring order for a subscription. This order will be shown as an ‘Unpaid’ order in the console until the customer pays on or after the billing date. This is also going to be the payment status for new orders created in the console until payment is made by the customer.
Paid - Orders are being updated to paid status if customers are able to successfully make payment and complete the transaction. For credit card, debit card, and paymaya wallet payments, the customer is automatically charged for their recurring orders. For bank transfers, Gcash, and GrabPay payments, HelixPay sends an automatic billing reminder to the customer to complete their recurring payment. If you have shippable products, you can proceed with arranging the fulfillment of all the paid orders.
Failed - When a customer payment is not successful, the payment status is tagged as failed. Failed payments usually happen when the customer was not able to complete the transaction or an error occurred while the payment is being processed. Click here to know more about failed payments.
Overdue - Orders that are not paid 5 days after the billing date are automatically tagged as 'Overdue'. Learn how to configure Overdue Balance setting here.
Skipped - You can allow customers to skip a payment if they want to and you will see this in the console as a ‘Skipped’ payment.
Refunded - In case you need to return a customer payment, you can update the order payment status to ‘Refunded’ from the Orders tab in the console. To request a payment refund for a subscription payment, please message your HelixPay Account Manager.
The other status that is shown in the Orders tab is the Order Status. For 'shippable' products, all orders are in ‘To Ship’ status by default, you can then update this to ‘Shipped’ after the order is delivered. For 'non-shippable' services, you will see ‘To Fulfill’ as a default order status. You can then update this to ‘Fulfilled’ after the service is completed.
Updating the payment and/or order status will notify the customer through email.
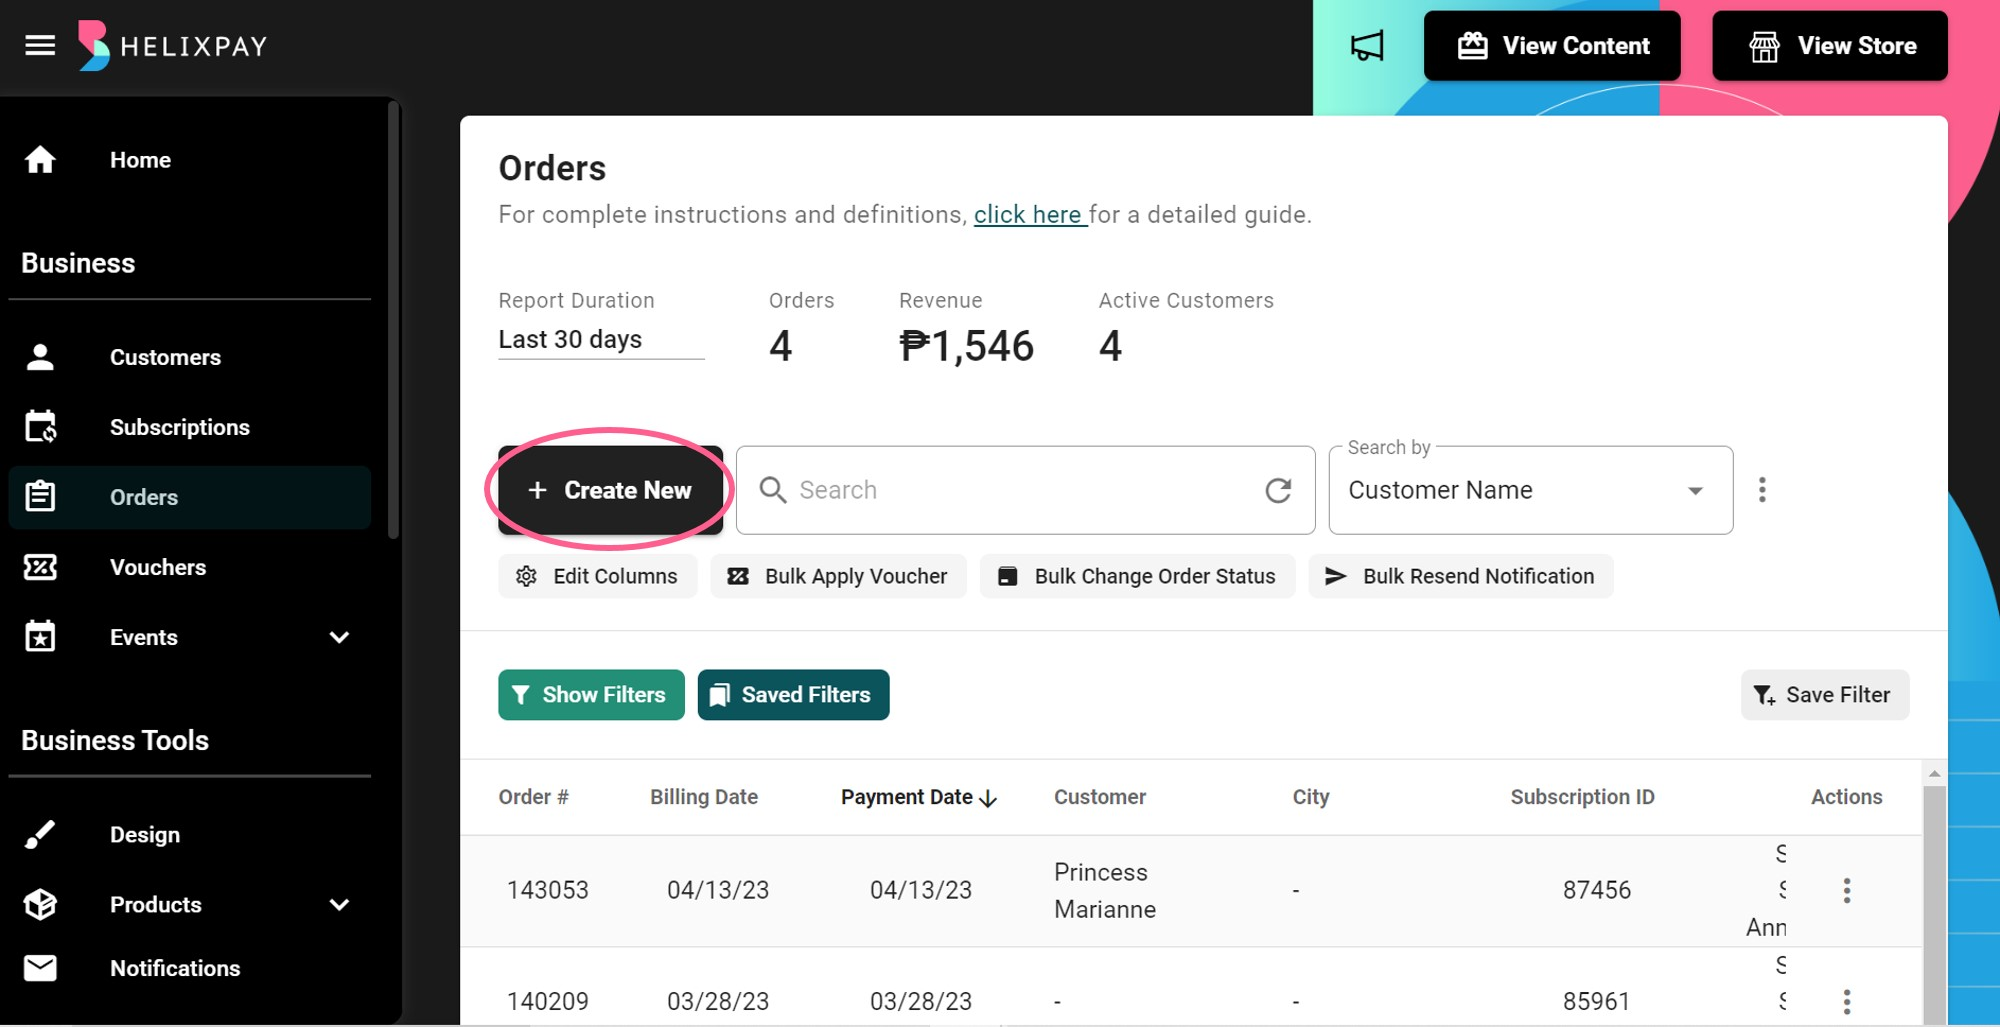
Create new order
When creating a new order, the merchant has two options for customers to pay. The first one is by sending a payment link to the customer and the second one is by generating a QR code that will open the checkout page for customers to choose their preferred payment method.
Create new order and send payment link
Steps in creating new order:
Step 1: Click the '+ Create New' button.

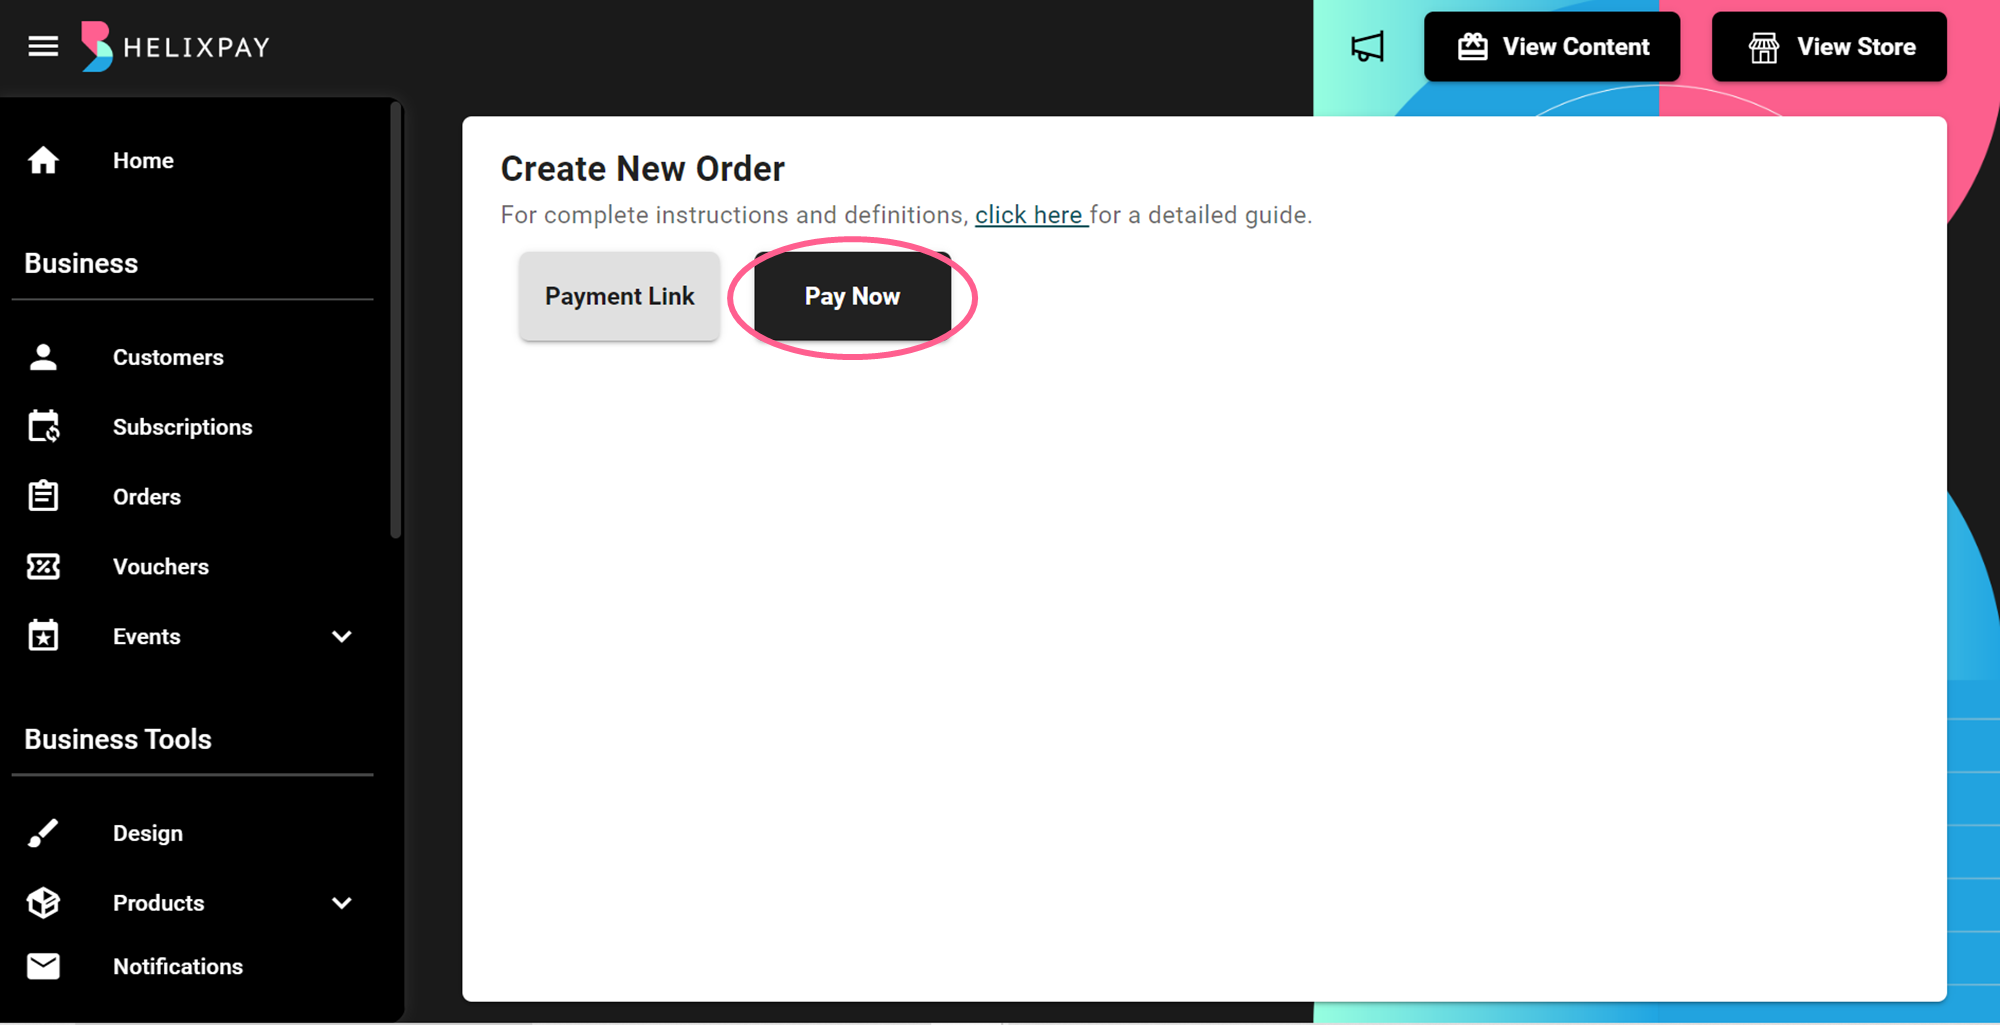
Step 2: Choose 'Payment Link'

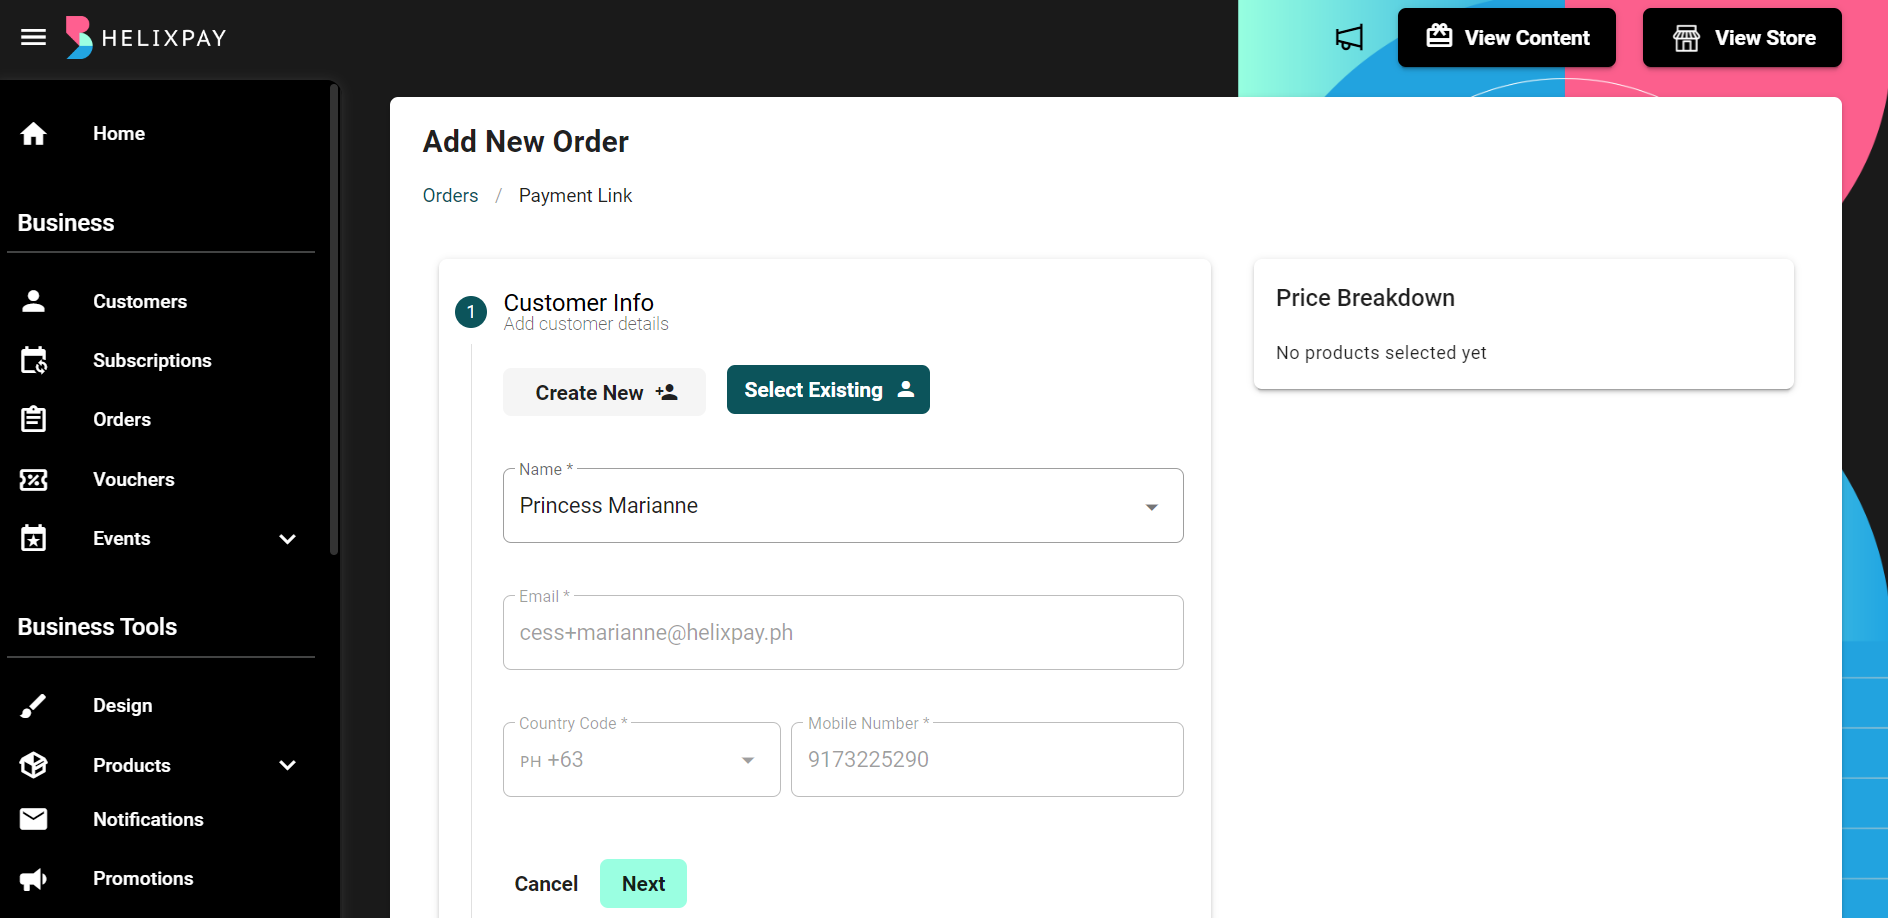
Step 3: Add customer details. You can create new customer or select from existing.
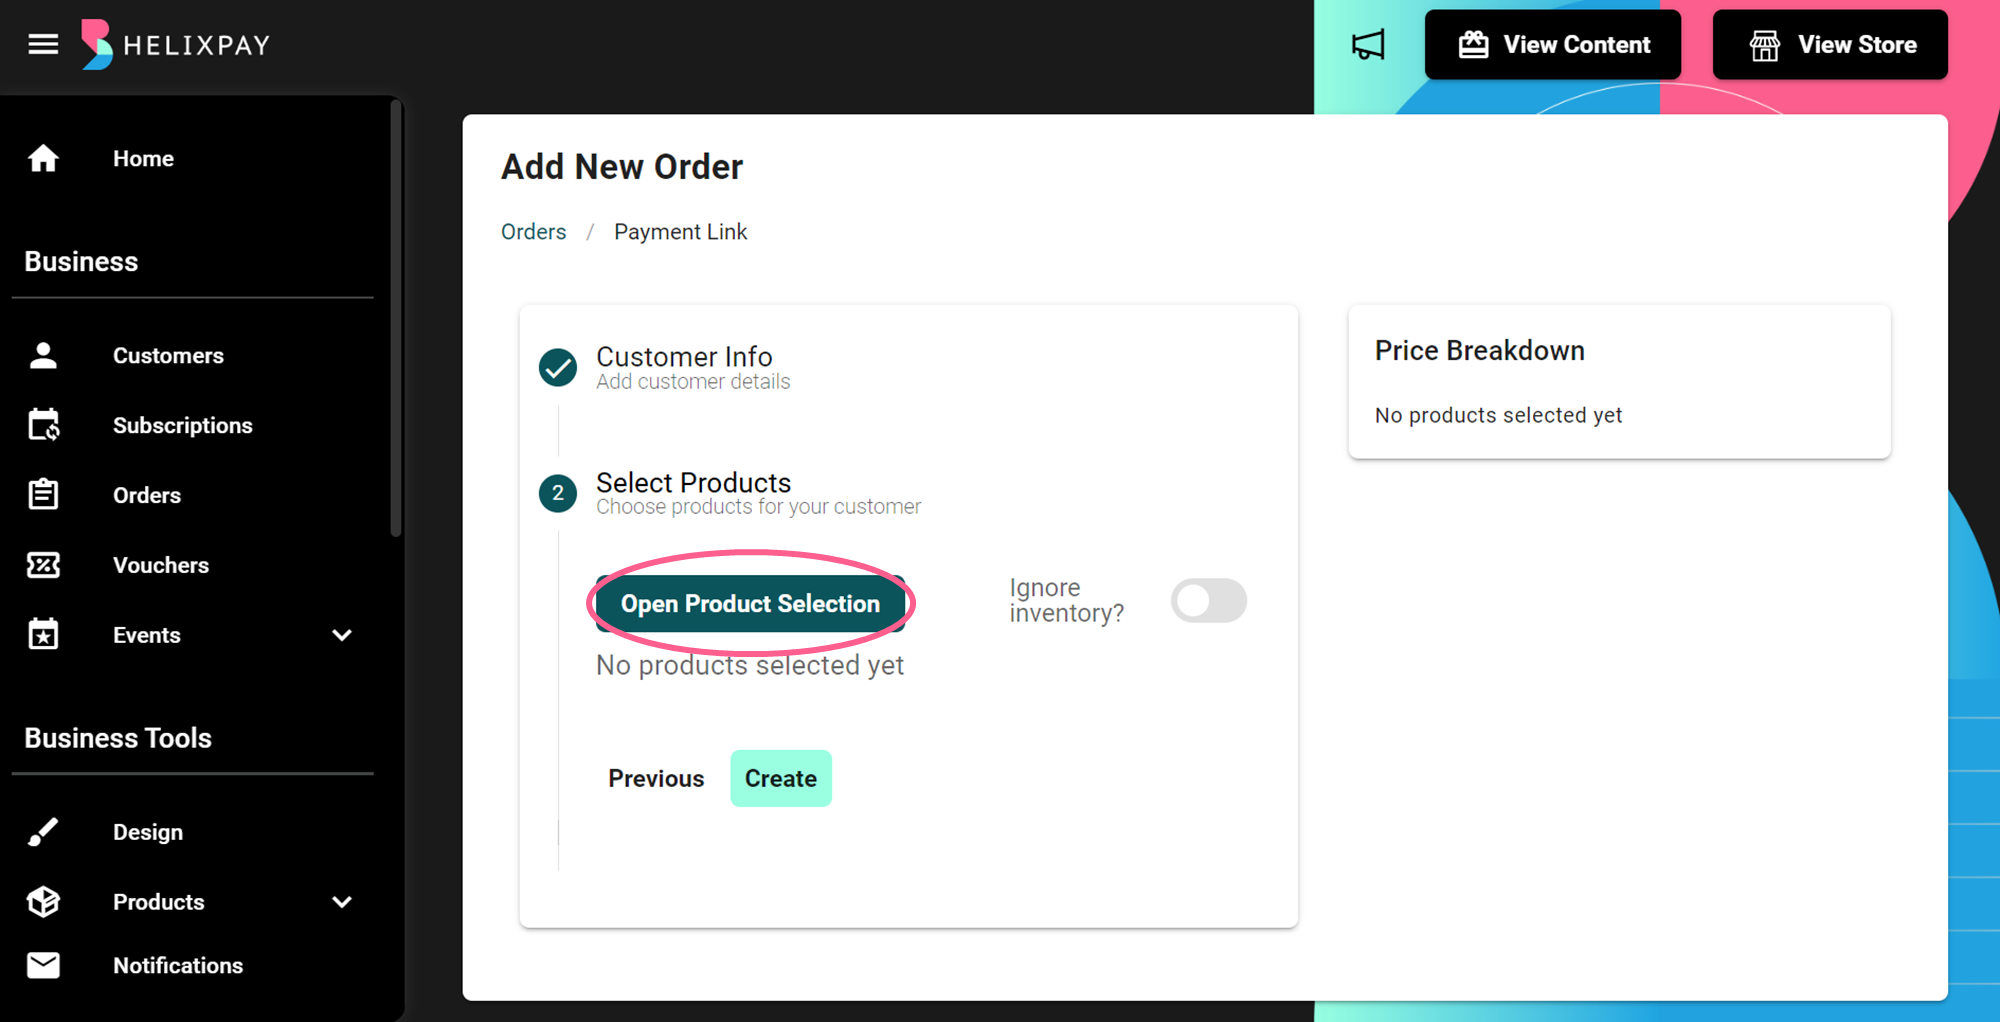
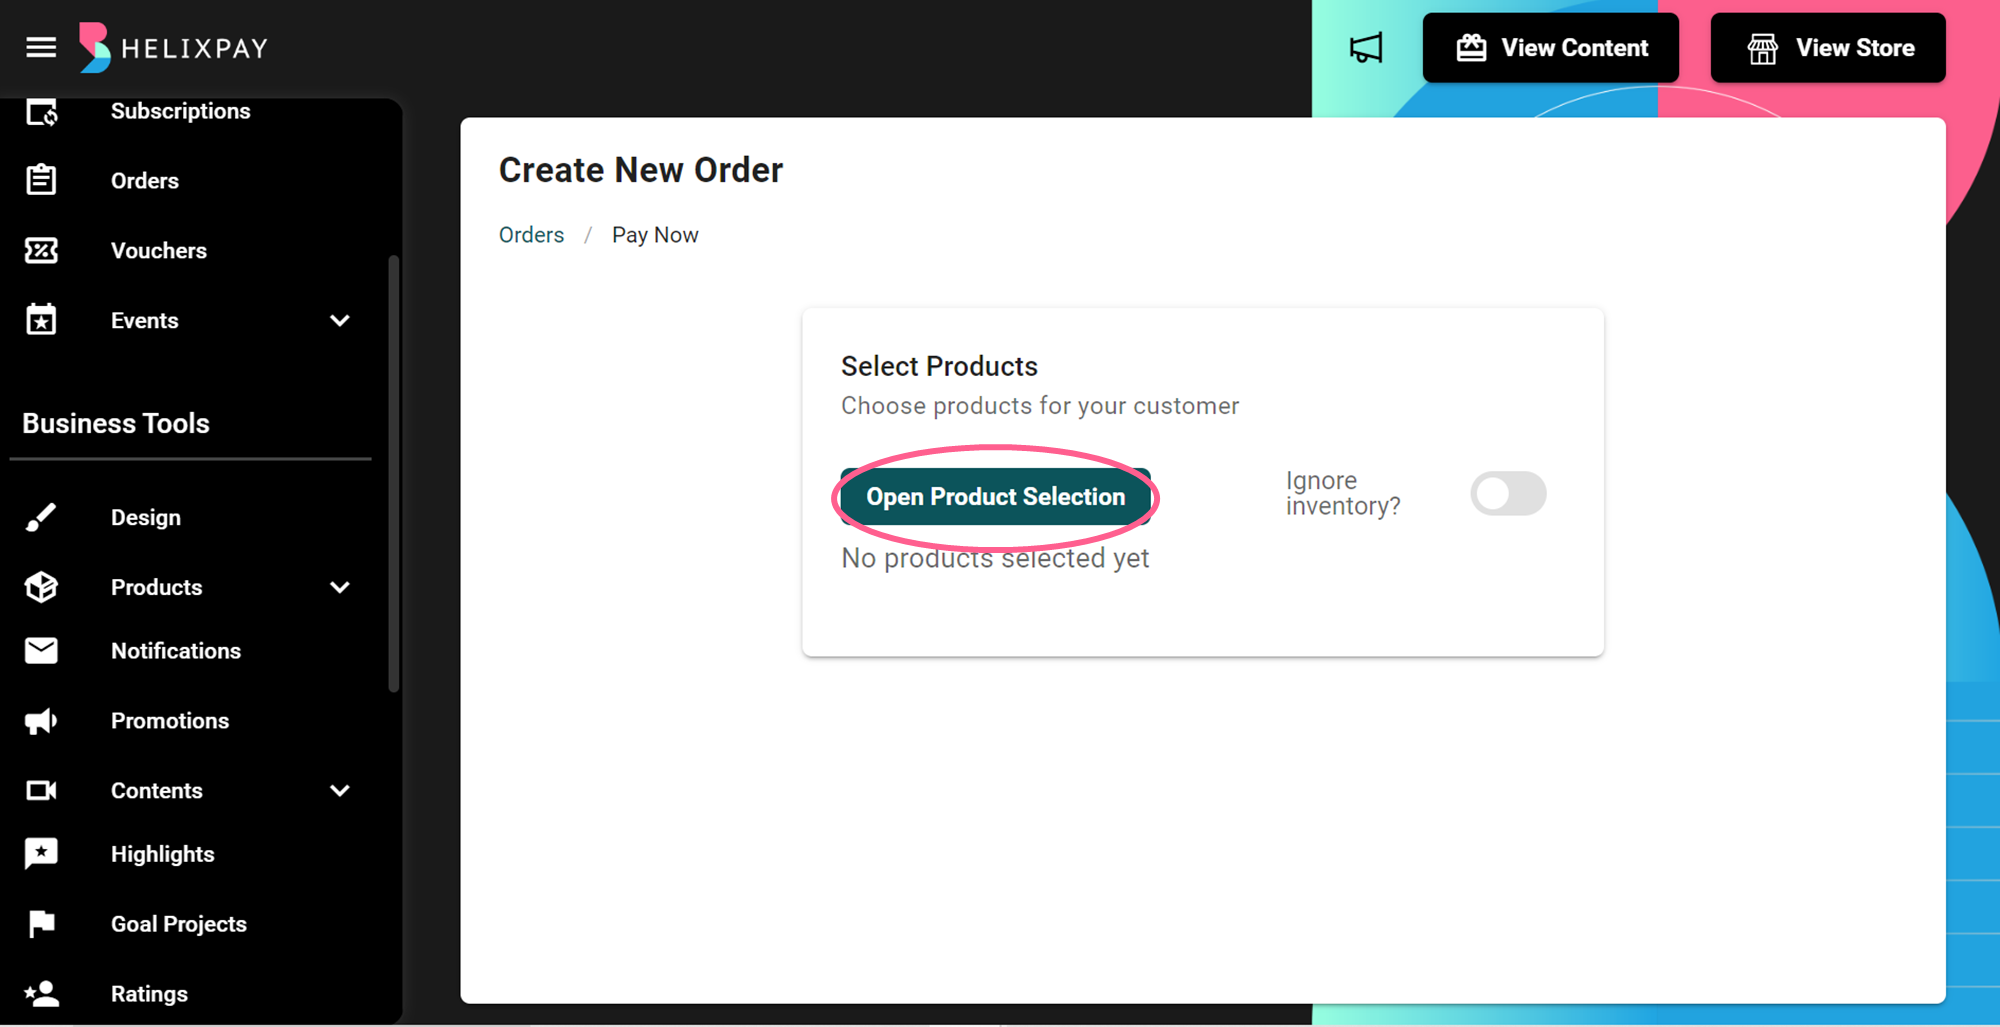
Step 4: Choose products by clicking the 'Open Product Selection' button.
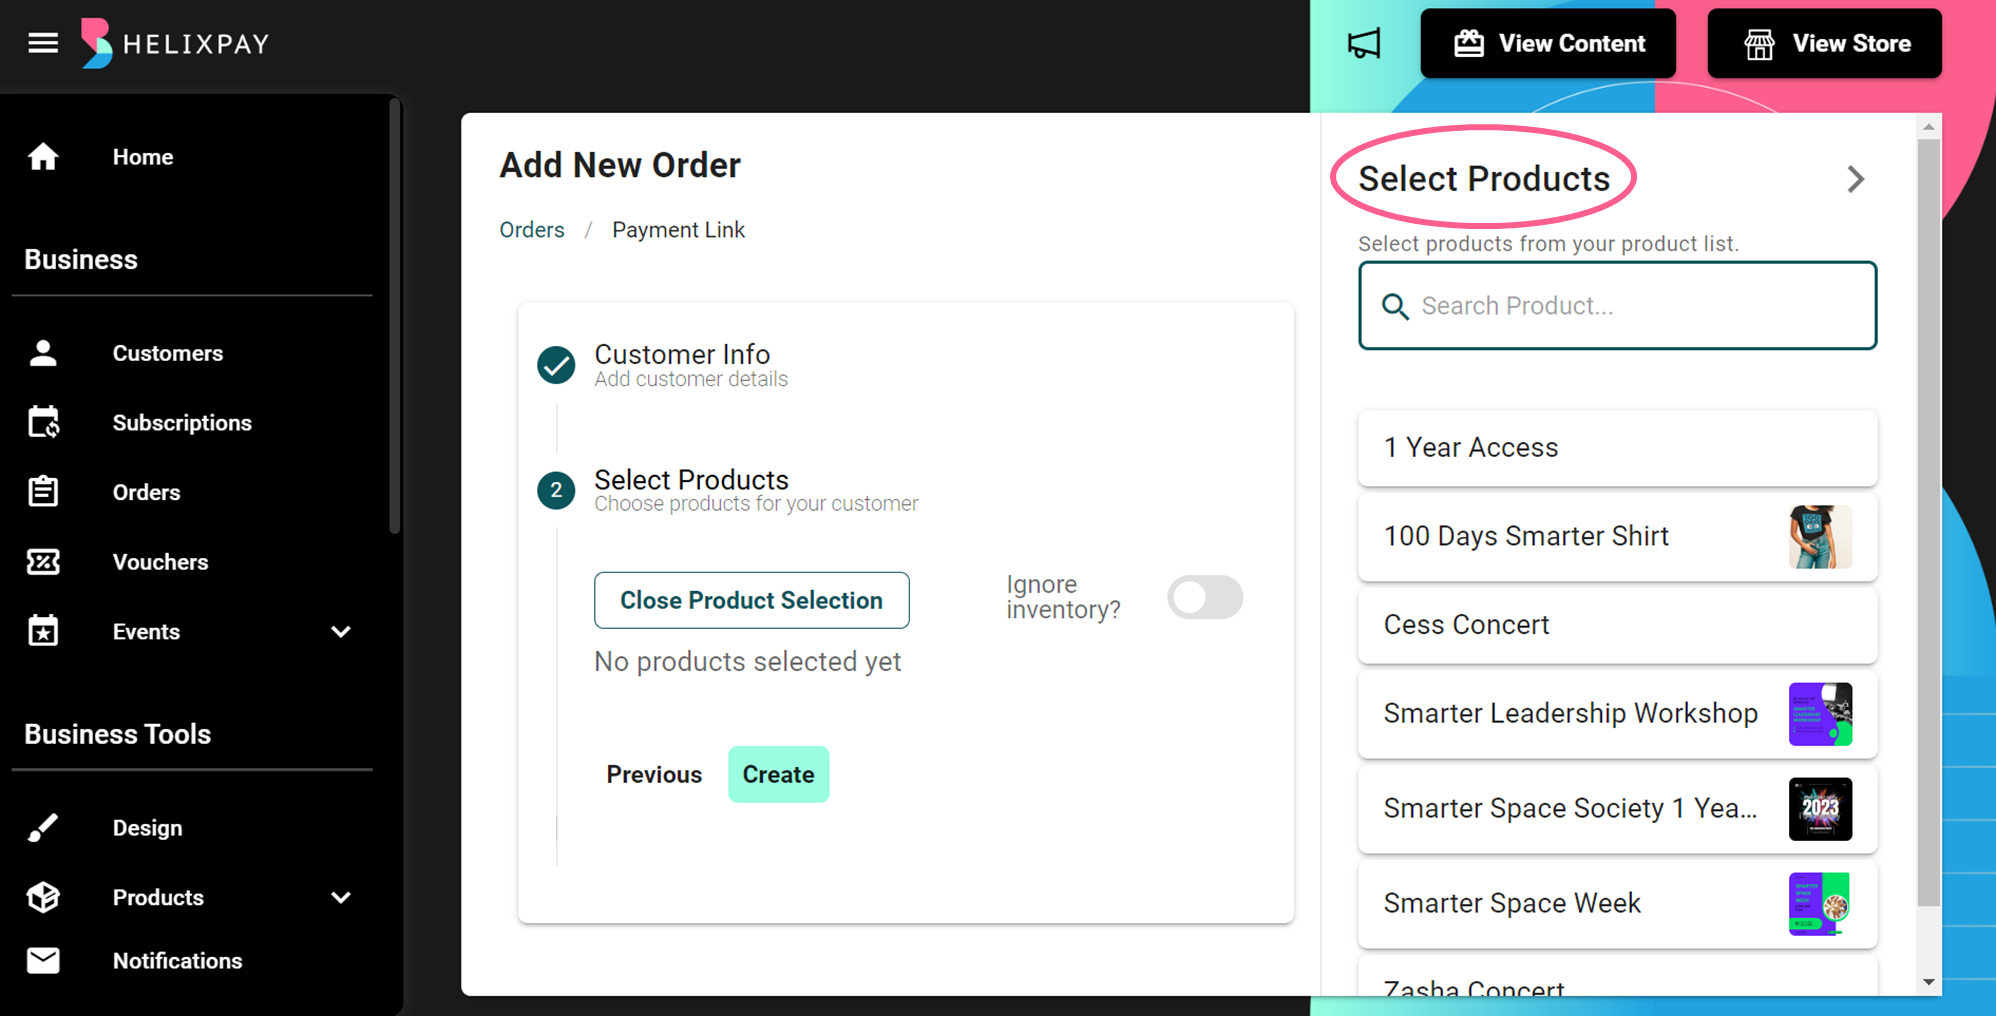
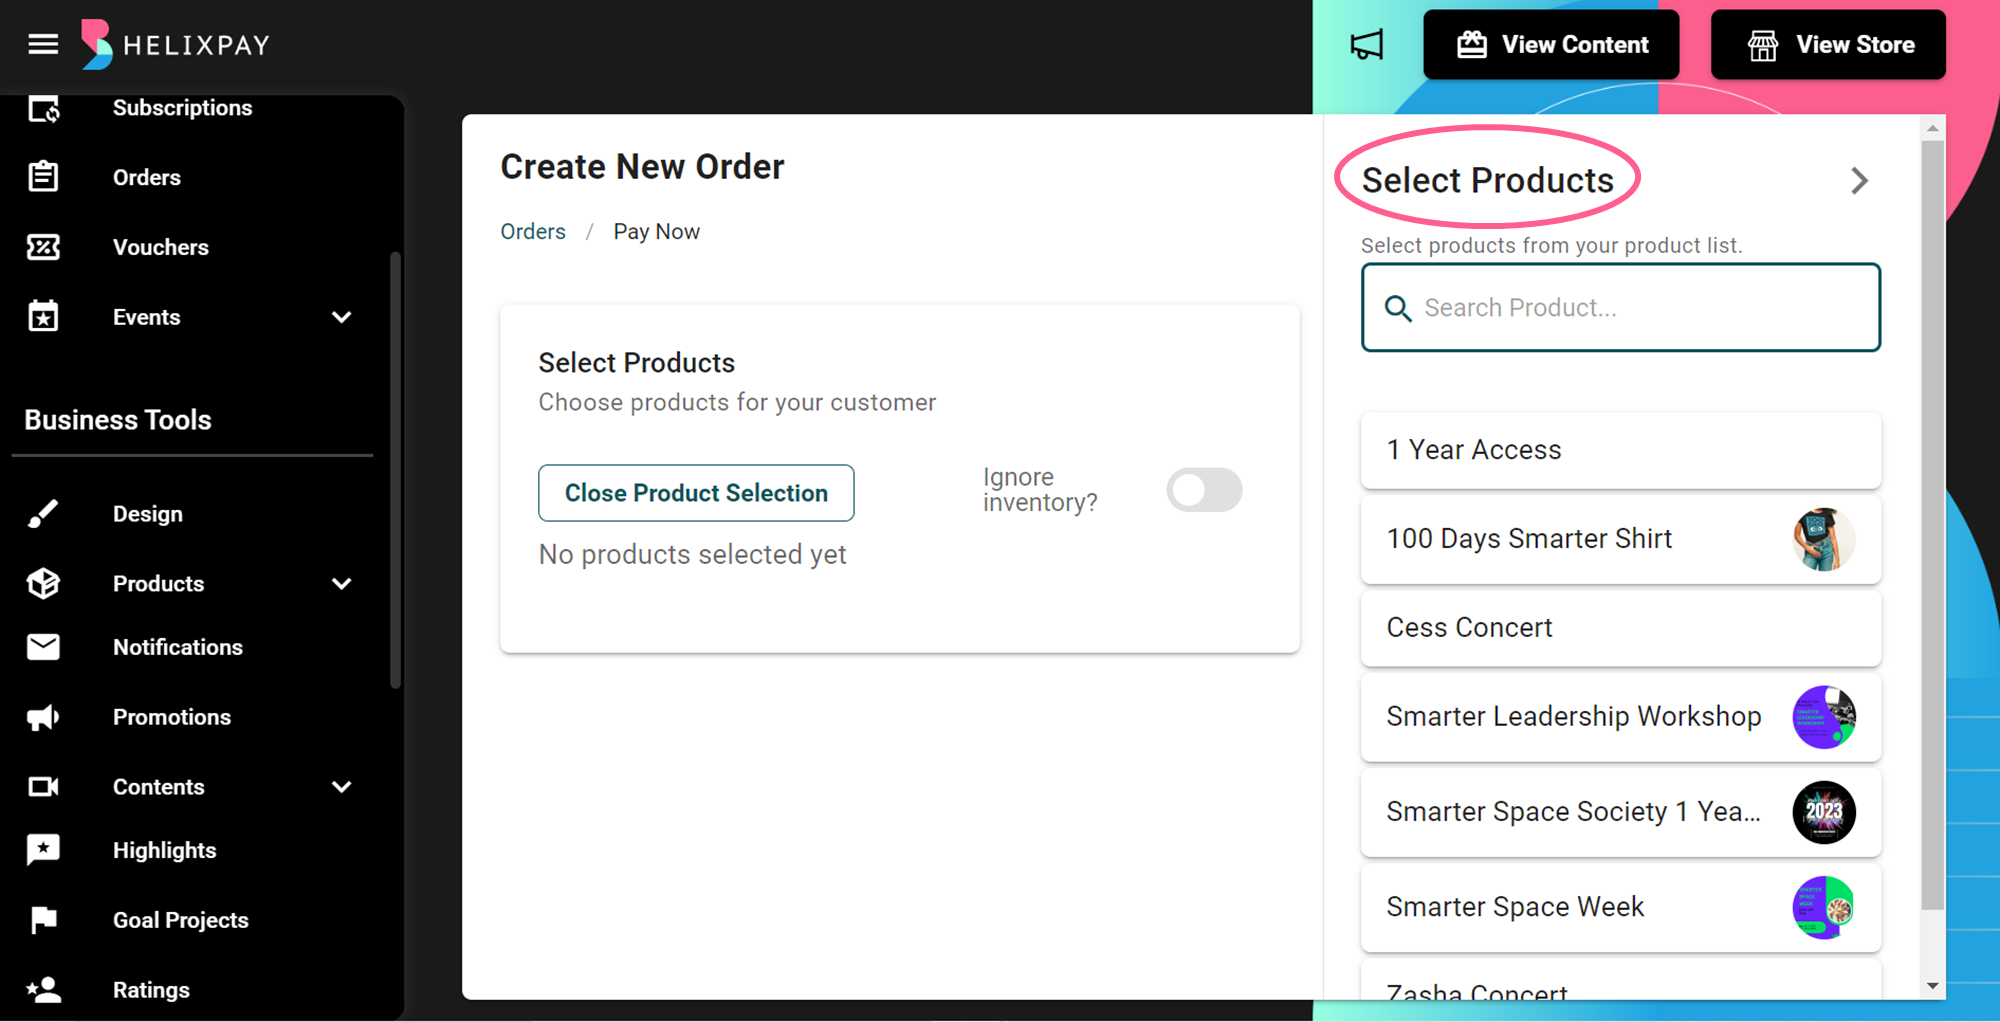
Step 5: Search or choose the product(s) from the list then click 'Create'.
Step 6: 'Create' the Order!
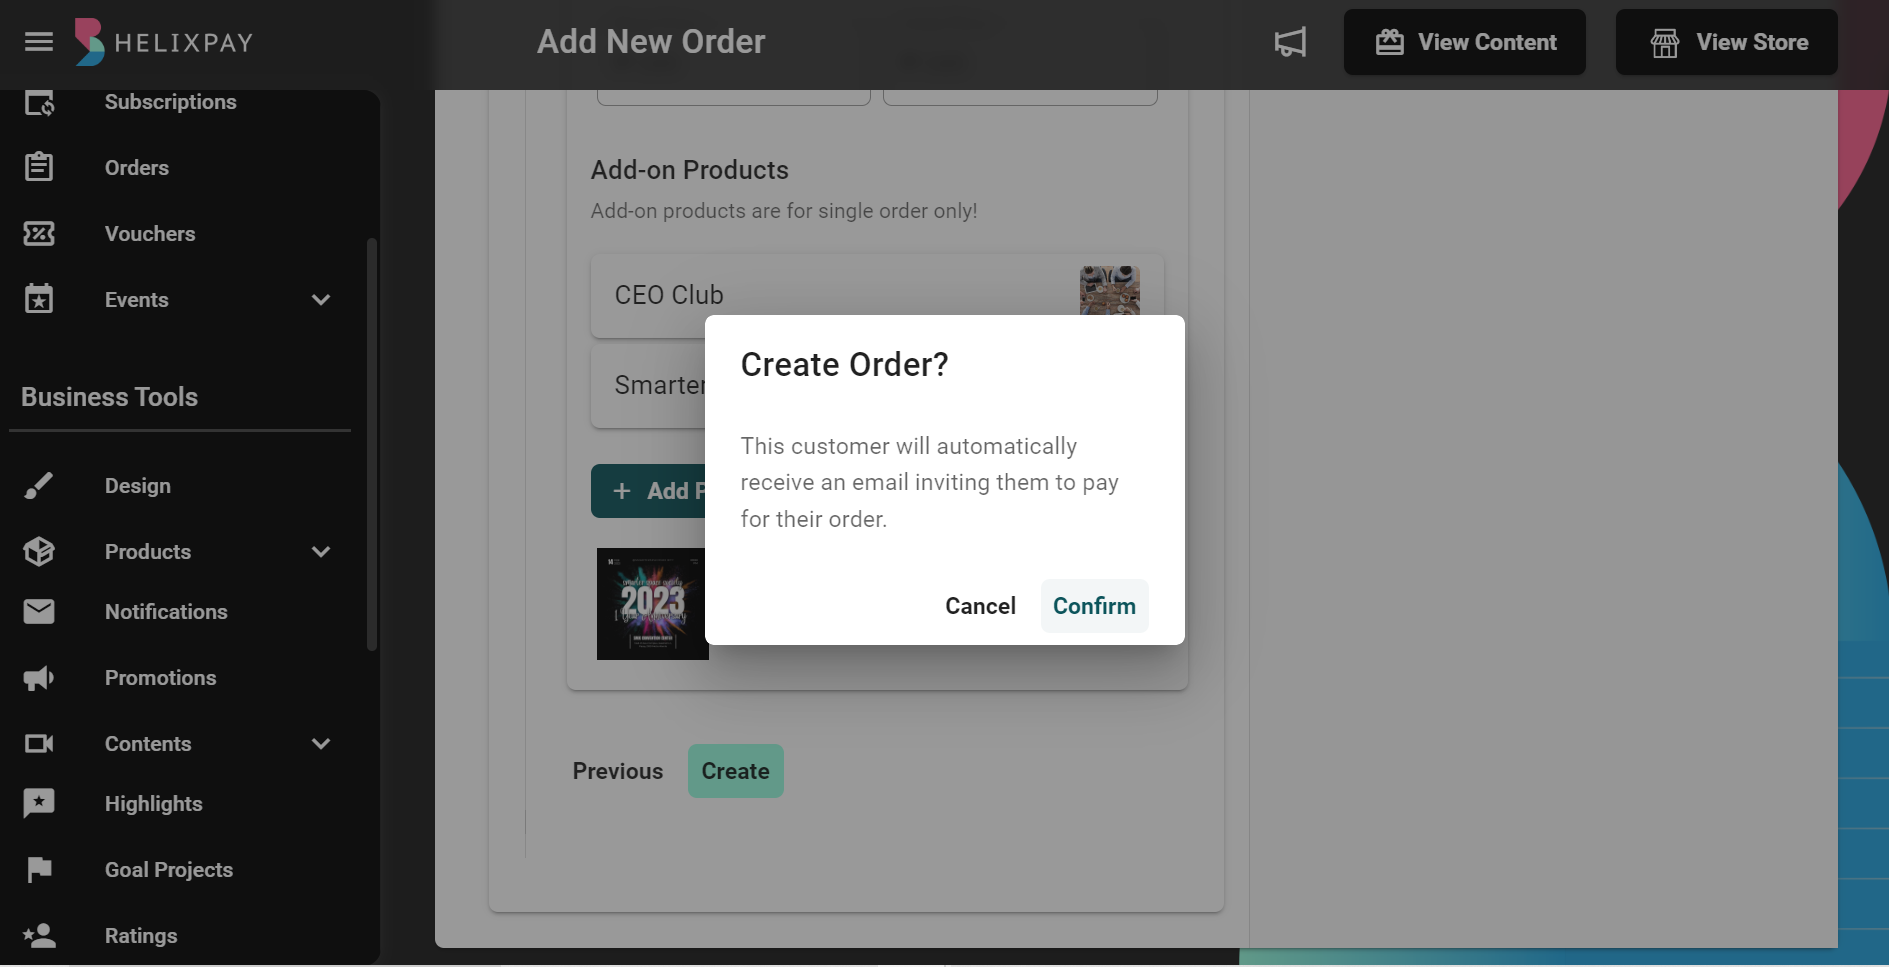
The customer will automatically receive an email and SMS notification informing them to pay the order.
Create new order and generate QR Code
Steps in creating new order:
Step 1: Click the '+ Create New' button.
Step 2: Choose 'Pay Now'
Step 3: Choose products by clicking the 'Open Product Selection' button.
Step 4: Search or choose the product(s) from the list then click 'Create'.
Step 5: Click 'Request Payment' to generate the QR Code.

Step 6: Ask the customer to scan the QR Code. It will open the checkout page where the customers can type in their information and select their preferred payment method.
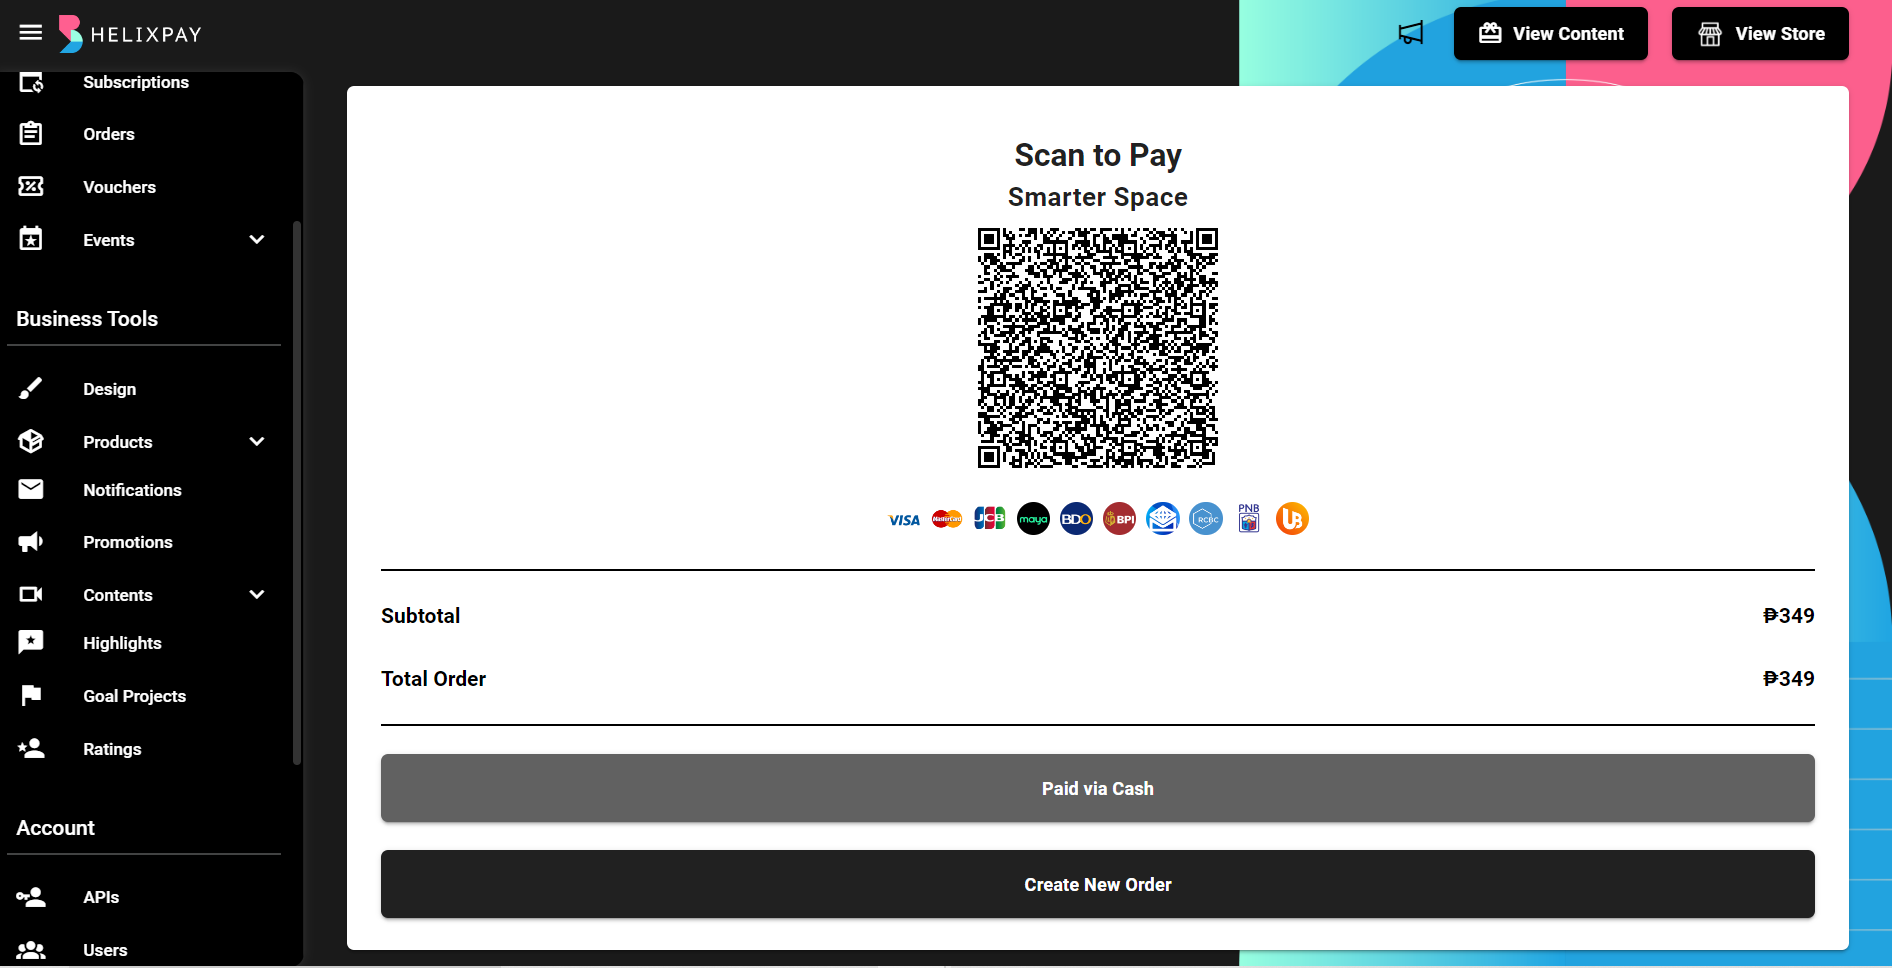
You can also easily tag the order as paid via cash but it will not show the customer's information on the orders tab.
Modify order details
To modify a subscription order, click the ellipsis button found on the rightmost part of the subscription details then select 'View Details'.

In editing the subscription order, you can do the following:
- Update 'Price' and 'Quantity'
- Add 'Custom Field' and/or 'Product'
- 'Upload Attachments' like order invoice.

Bulk Upload Attachments
The merchant can also do bulk upload attachments from the orders page in the Orders module.
- Update 'Payment Status'
- Update 'Order Status'

Setting payment status to Paid will change the order’s payment method to Cash. This will not affect the succeeding orders. You can also check easily the customer details and subscriptions from the order details page using the Quick Links.
Send payment reminders through email
The payment reminder allows you to notify the customers to process the payment for their subscription order before you continue with fulfilling the order. HelixPay automatically sends out payment reminders but you can also manually trigger an additional reminder from the console. To do this in the Orders module:
Step 1: Click the 'ellipsis button' on the rightmost part of an order you want to resend the email to then select 'Resend'.

Step 2: Choose from the drop down list the schedule for resending the payment reminder then click the 'Send' button.

Resending the email can be scheduled 3 days before payment date, 3 days after payment date, on the payment date, or when a subscription order is edited.
Follow-up Email
The merchants have the ability to customize more payment reminders for unpaid orders by adding follow-up emails.
Export order summary as CSV or Google Sheet File
In the Orders tab, click the ellipsis button beside the 'Search by' field then select 'Export Order Summary'. You will be asked to choose the export type. For CSV files, it will be automatically downloaded and you can find it from your device’s downloads folder. To export as Google Sheet, you need sign-in with your Google Account and allow file access permission.

Managing order prices
In managing order prices, you can do the following:
Check current order prices by exporting it as an excel file.
To do this, click the ellipsis button beside the ‘Search by’ field in the Orders module then select 'Export Order Prices'. This will automatically download the excel file and you can find it from your device’s downloads folder.

Update order prices.
You may charge different rates depending on a customer’s consumption or usage. This consumption-based pricing is very common for types of business like utilities and Software as a Service (SaaS) where you might need to periodically adjust the billing amount. HelixPay solves this by allowing you to update the order prices.
To update order prices, download the template first by clicking the ellipsis button beside the 'Search by' field in the Orders module then select 'Download Order Price Template'. This will automatically download the excel file and you can find it from your device’s downloads folder.

Once the download is complete, you can fill the template with the required order details and upload it to the console to update the order prices. To do this, just click the ellipsis button then select 'Update Order Prices'. You will be asked to select the file to be uploaded and you will then see a message that the orders are updated when the file was uploaded successfully.
Bulk upload attachments
You can upload attachment(s) to your customer order and the ‘Bulk Upload Attachment’ feature helps the you to do this efficiently by uploading multiple attachments at the same time.
Steps in bulk uploading attachments:
Step 1: In the Orders tab, click the ellipsis button beside the 'Search by' then select 'Bulk Upload Attachments.

Step 2: You will be redirected to the bulk upload page. Click the 'Attach Files' button and select the attachments to be uploaded.

Images and PDFs are the only file types allowed for the attachment. Make sure to use the order id as a file name. For orders with multiple attachments, use order id as a prefix and include the count of attachments as shown from the example on the picture above.
Step 3: Attachments are uploaded by batch with a maximum of 20 files or a total size of 2 MB per batch. Click the 'Review' button to verify the attachments.

Step 4: Start the Upload!

Once the upload is complete, you will be redirected to the Orders page and you will see a message that the attachments are uploaded.
Update multiple orders at the same time
HelixPay understands that you may need to update orders and you want to do it as quickly and as efficiently as possible. With the bulk update features, you can apply voucher, change order status, or even resend notification to multiple orders at the same time.

Vouchers can only be applied to unpaid orders.
Customize displayed column
Not all merchants have the same requirements as to what order details they want to see from the console that is why HelixPay lets you edit the columns displayed on the Orders tab. The following are the steps in editing the columns:
Step 1: Click 'Edit Columns' .

Step 2: Select the columns to be displayed from the drop down options then click 'Apply'.

The order in which the columns are selected is also the order it will be displayed in the console. You can easily revert the changes by clicking 'Restore Default'.
Save filter view
Save your frequently used filters to easily apply it on your next session by following these steps:
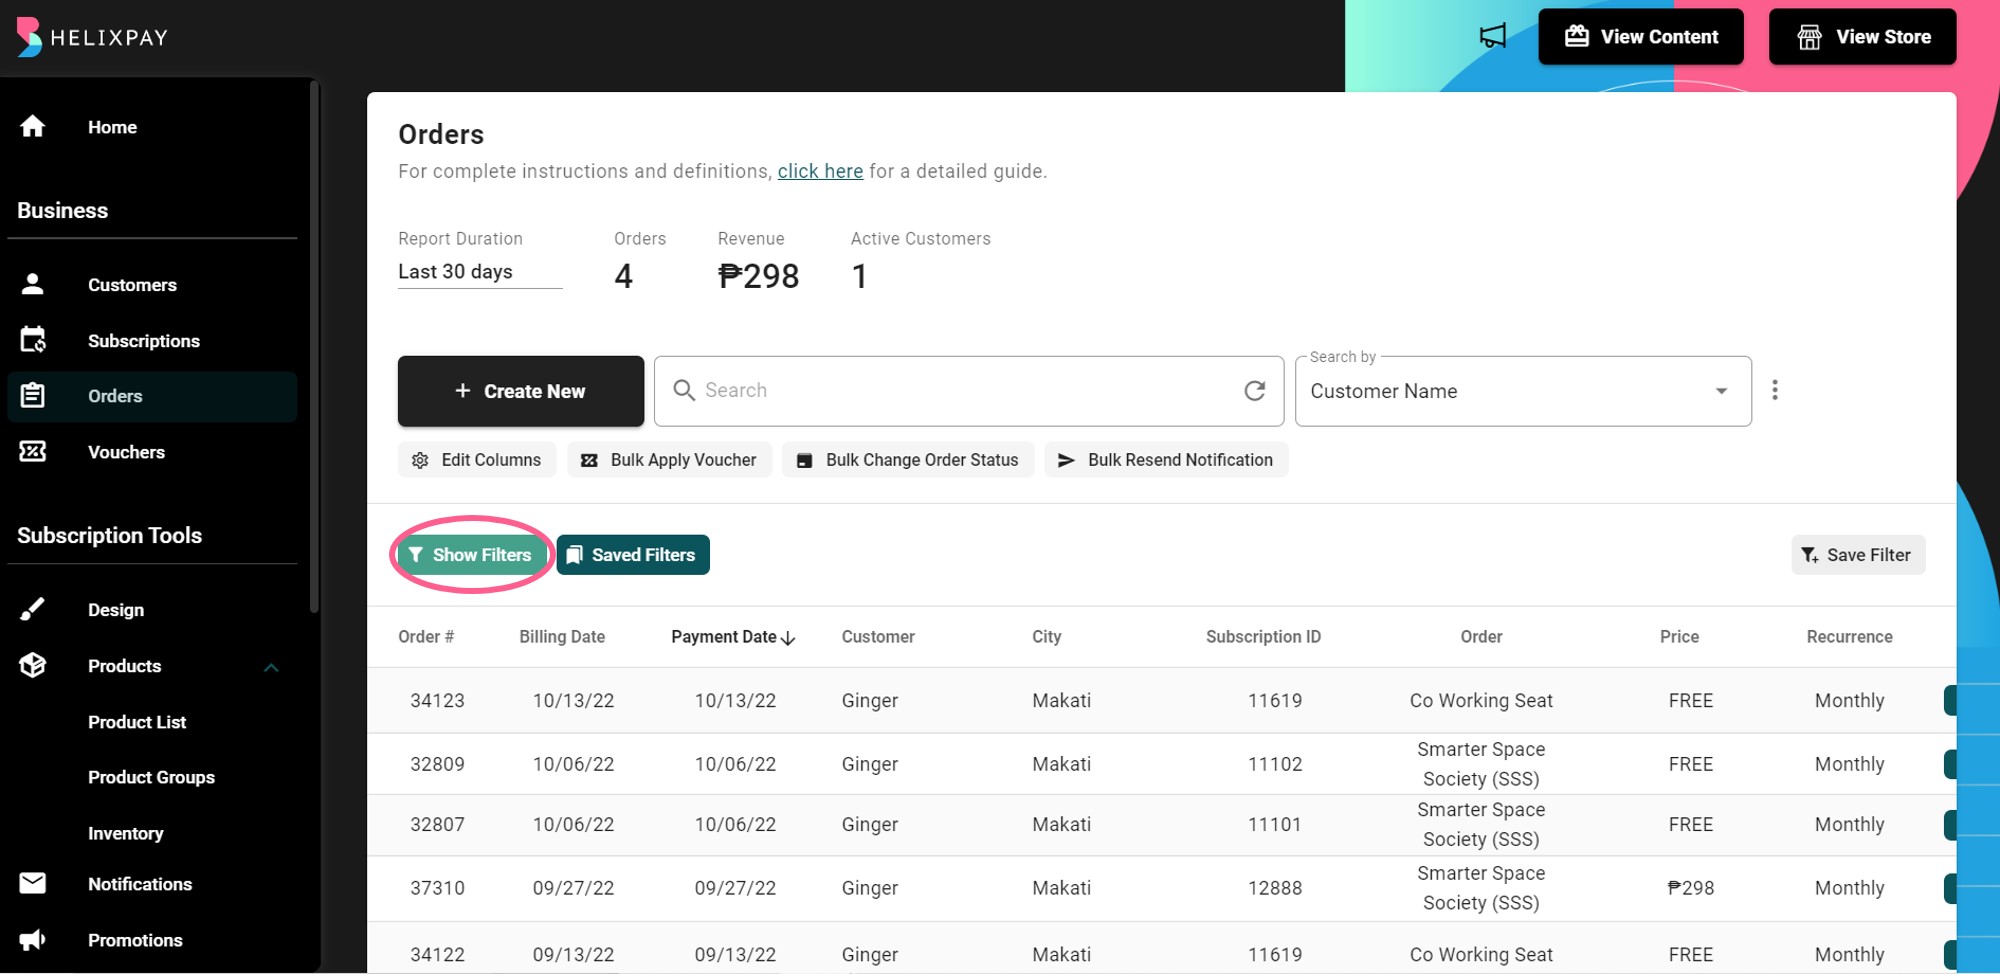
Step 1: Click 'Show Filters'.
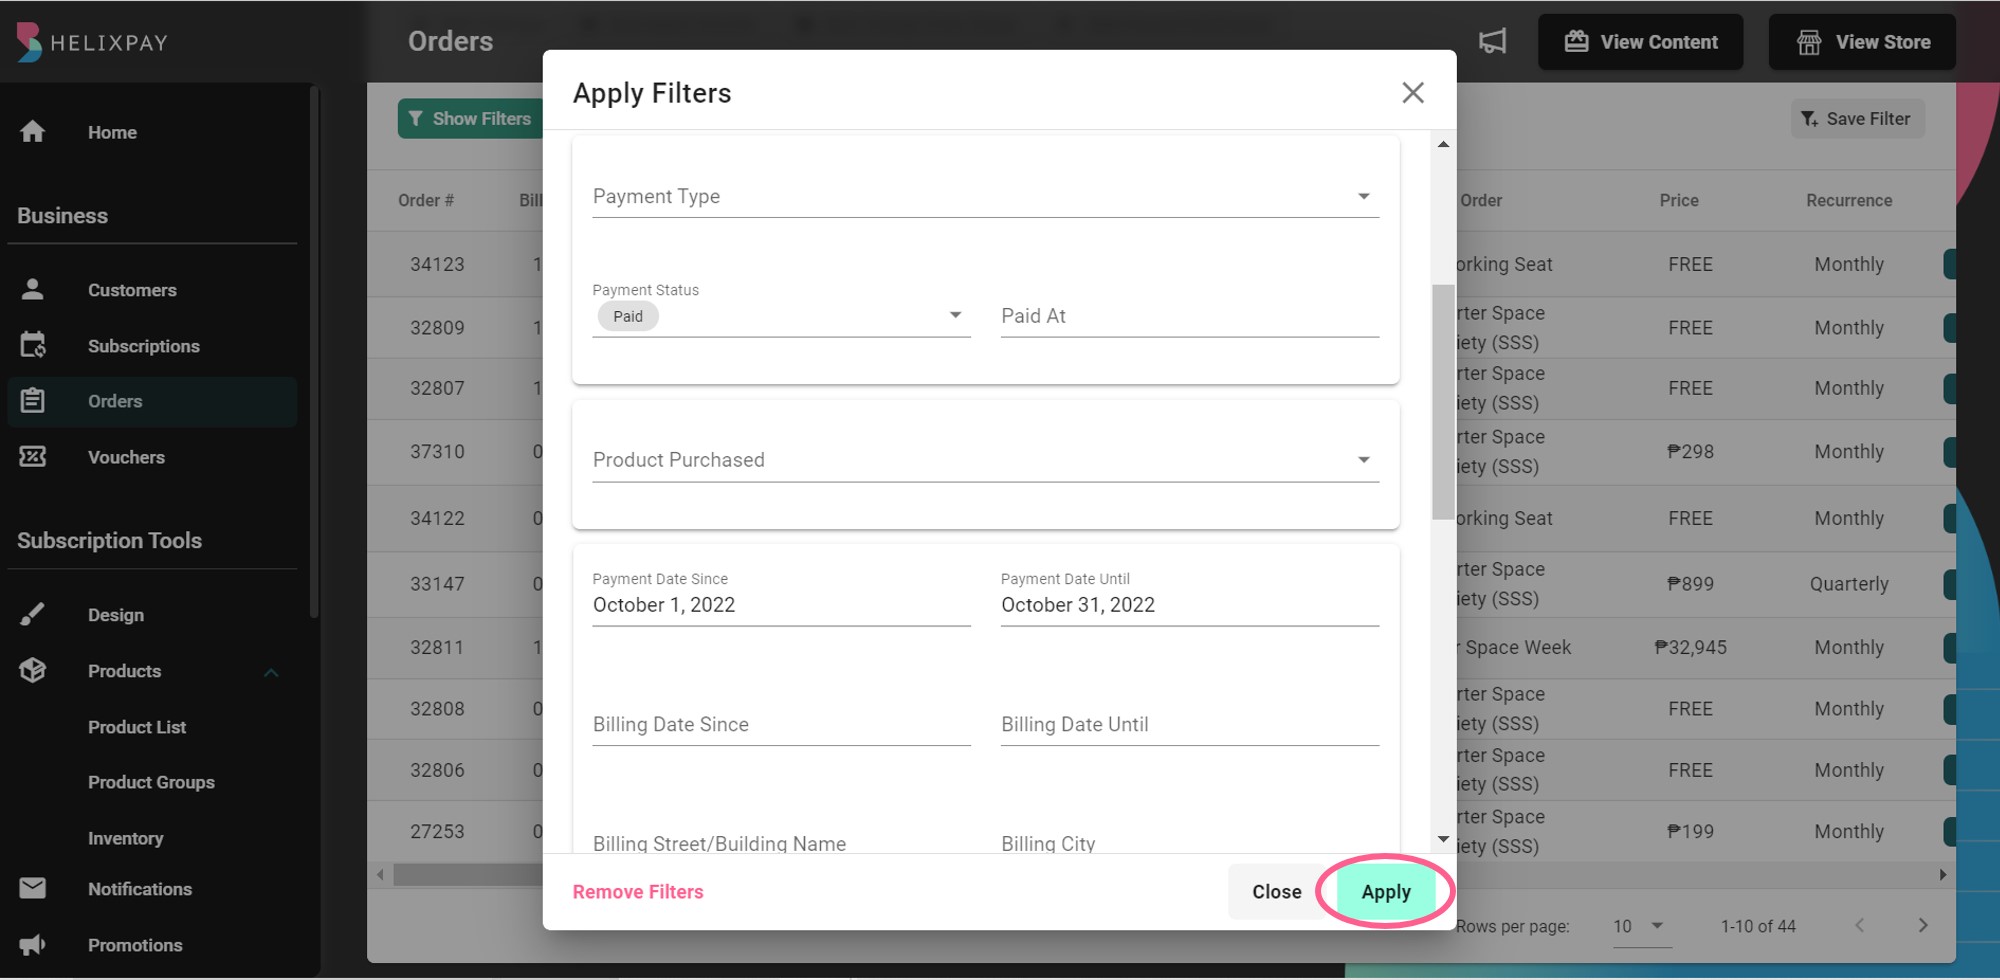
Step 2: Choose the filters then click 'Apply'.
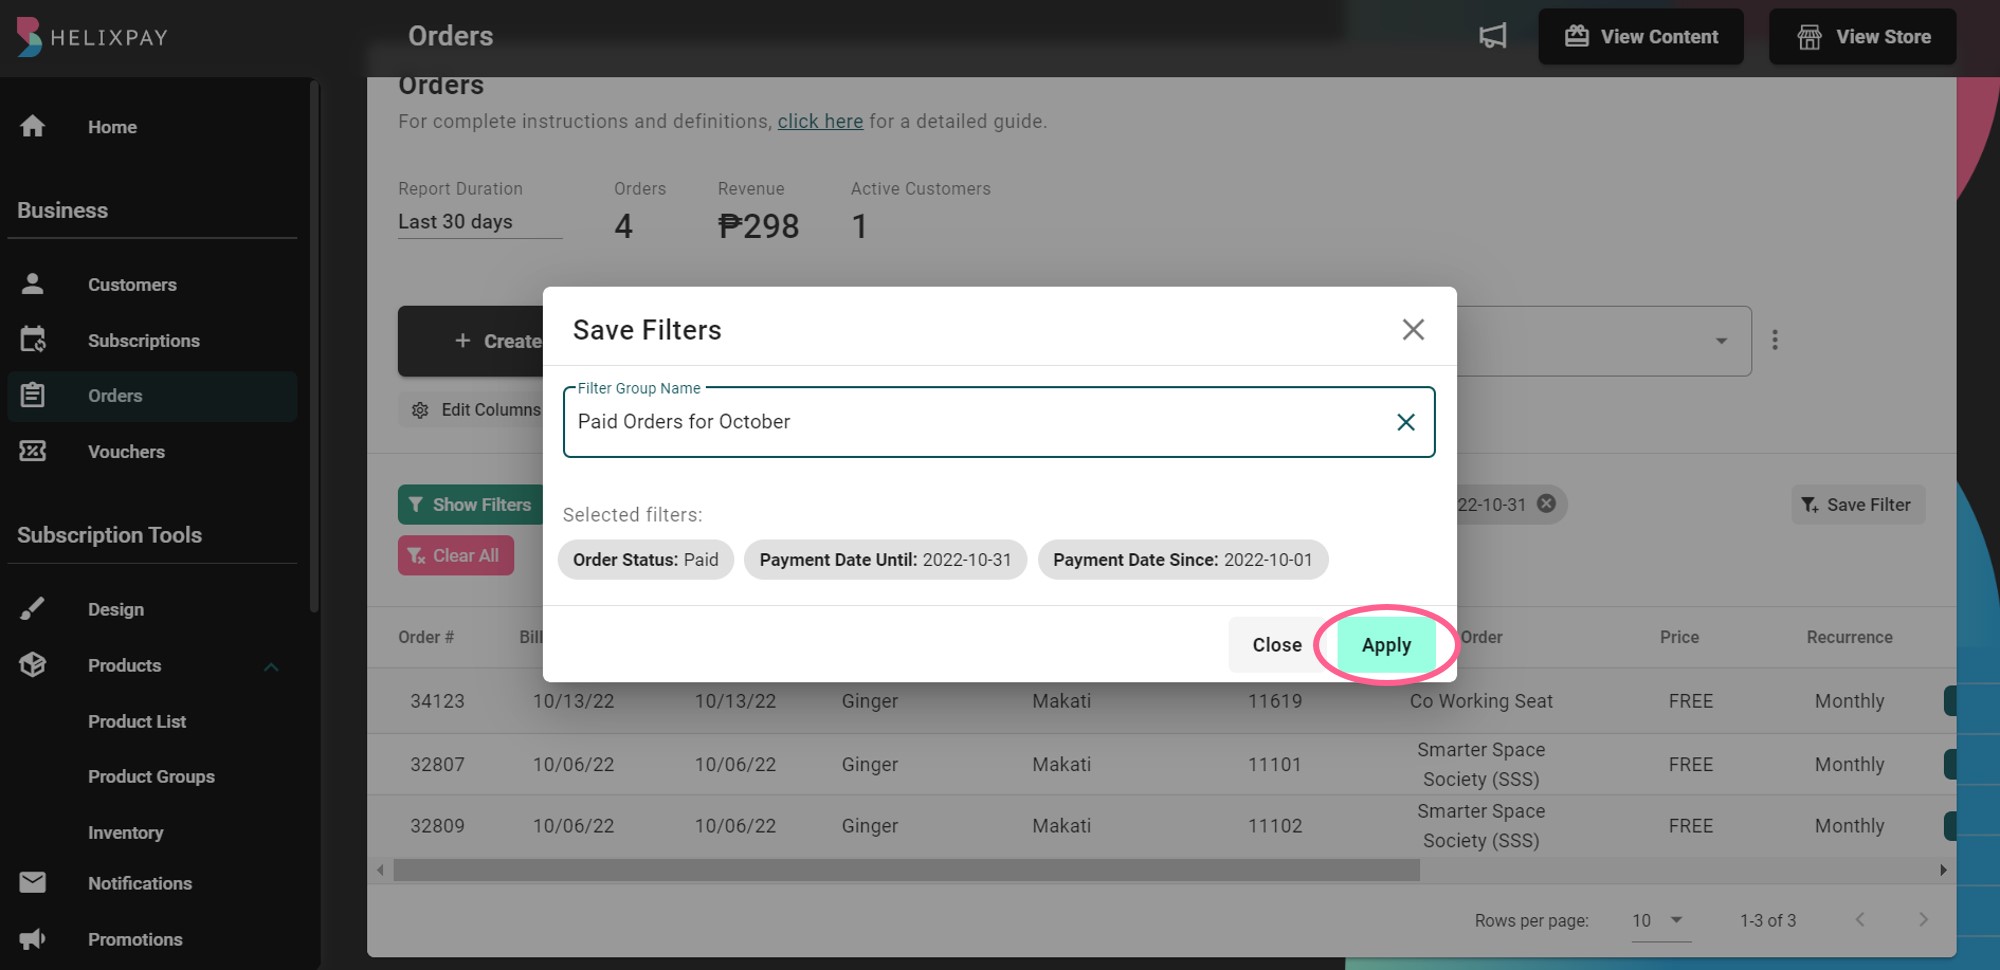
Step 3: Once the filters are applied, click 'Save Filter'.

Step 4: Name the filter group then click 'Apply' to save your filter view.
Send Direct Email Blast to an Order
Fulfill an order and send an email by following these steps:
Step 1: Click the 'ellipsis button' under the Actions column of the order you want to send the email to then select 'Send Blast'

Step 2: Fill out all the required fields. You can add place holders to your email which will change accordingly by copying the 'keywords' available. You will then see a preview of the email content on the right side as you create the email blast.
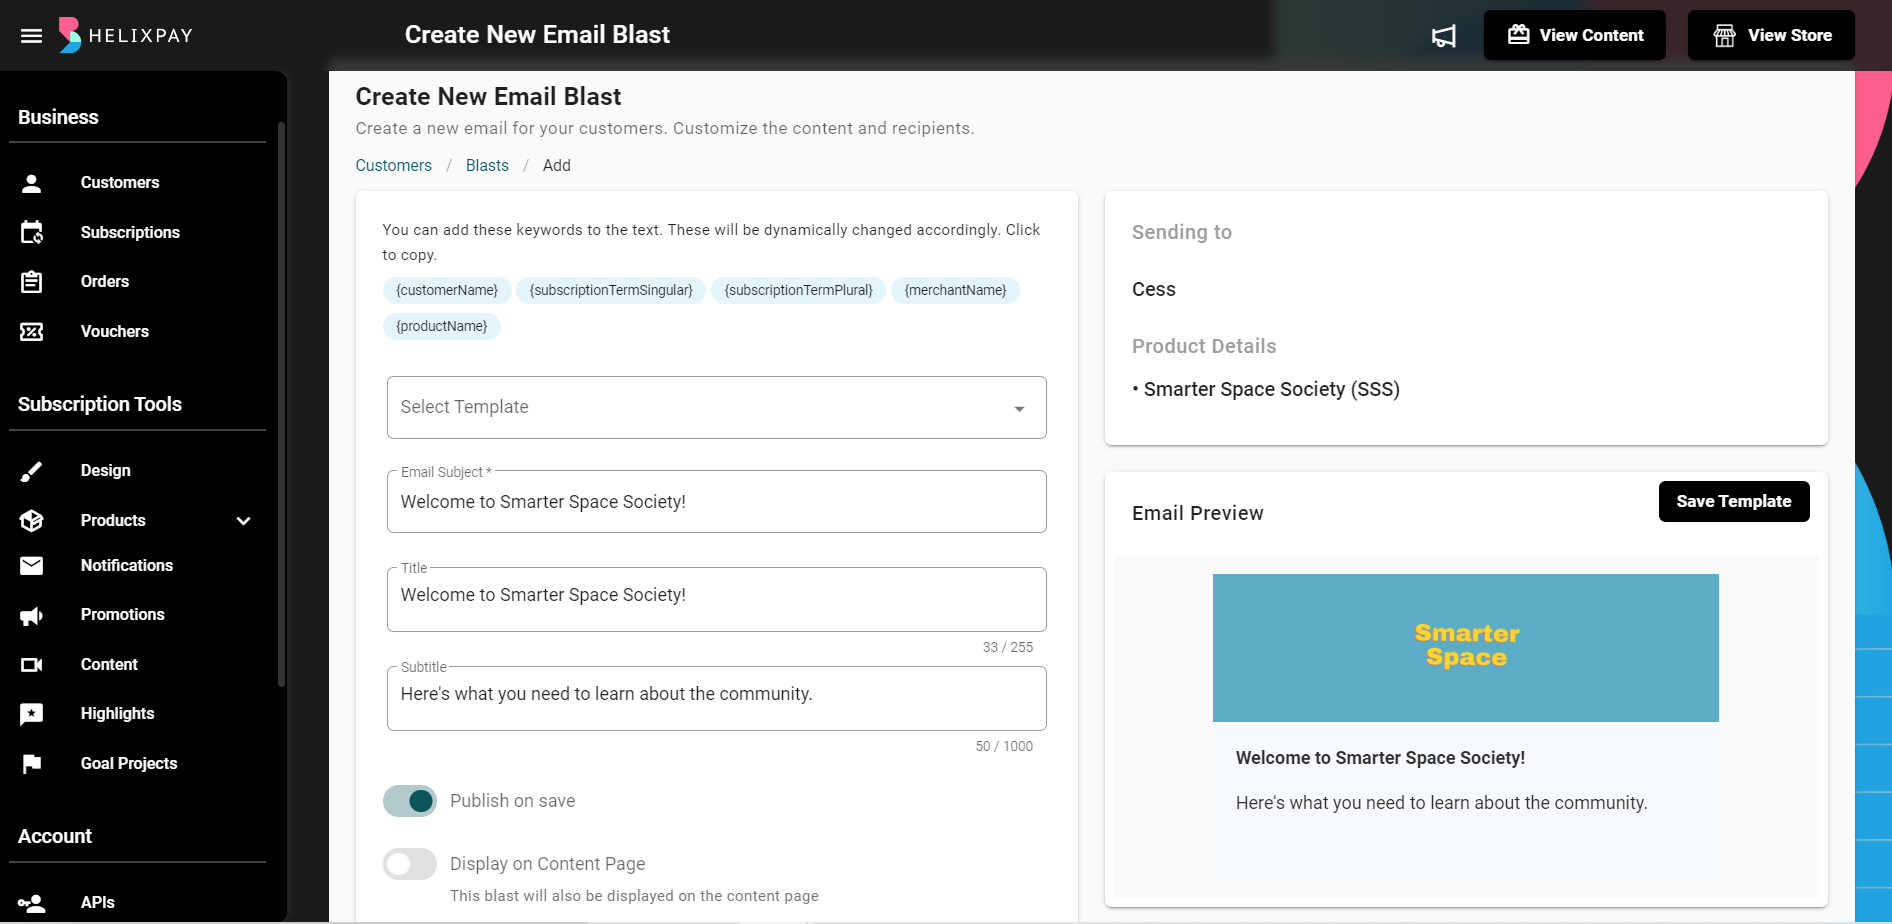
By disabling 'Publish on save', you will be able to schedule the date and time for sending the email blast.
Step 3: Create engaging content by uploading a banner, linking a URL, embedding a video and audio clip, writing a message for the customers, or even customizing the font. You will see that the email content is created on the right side as you create the email blast.
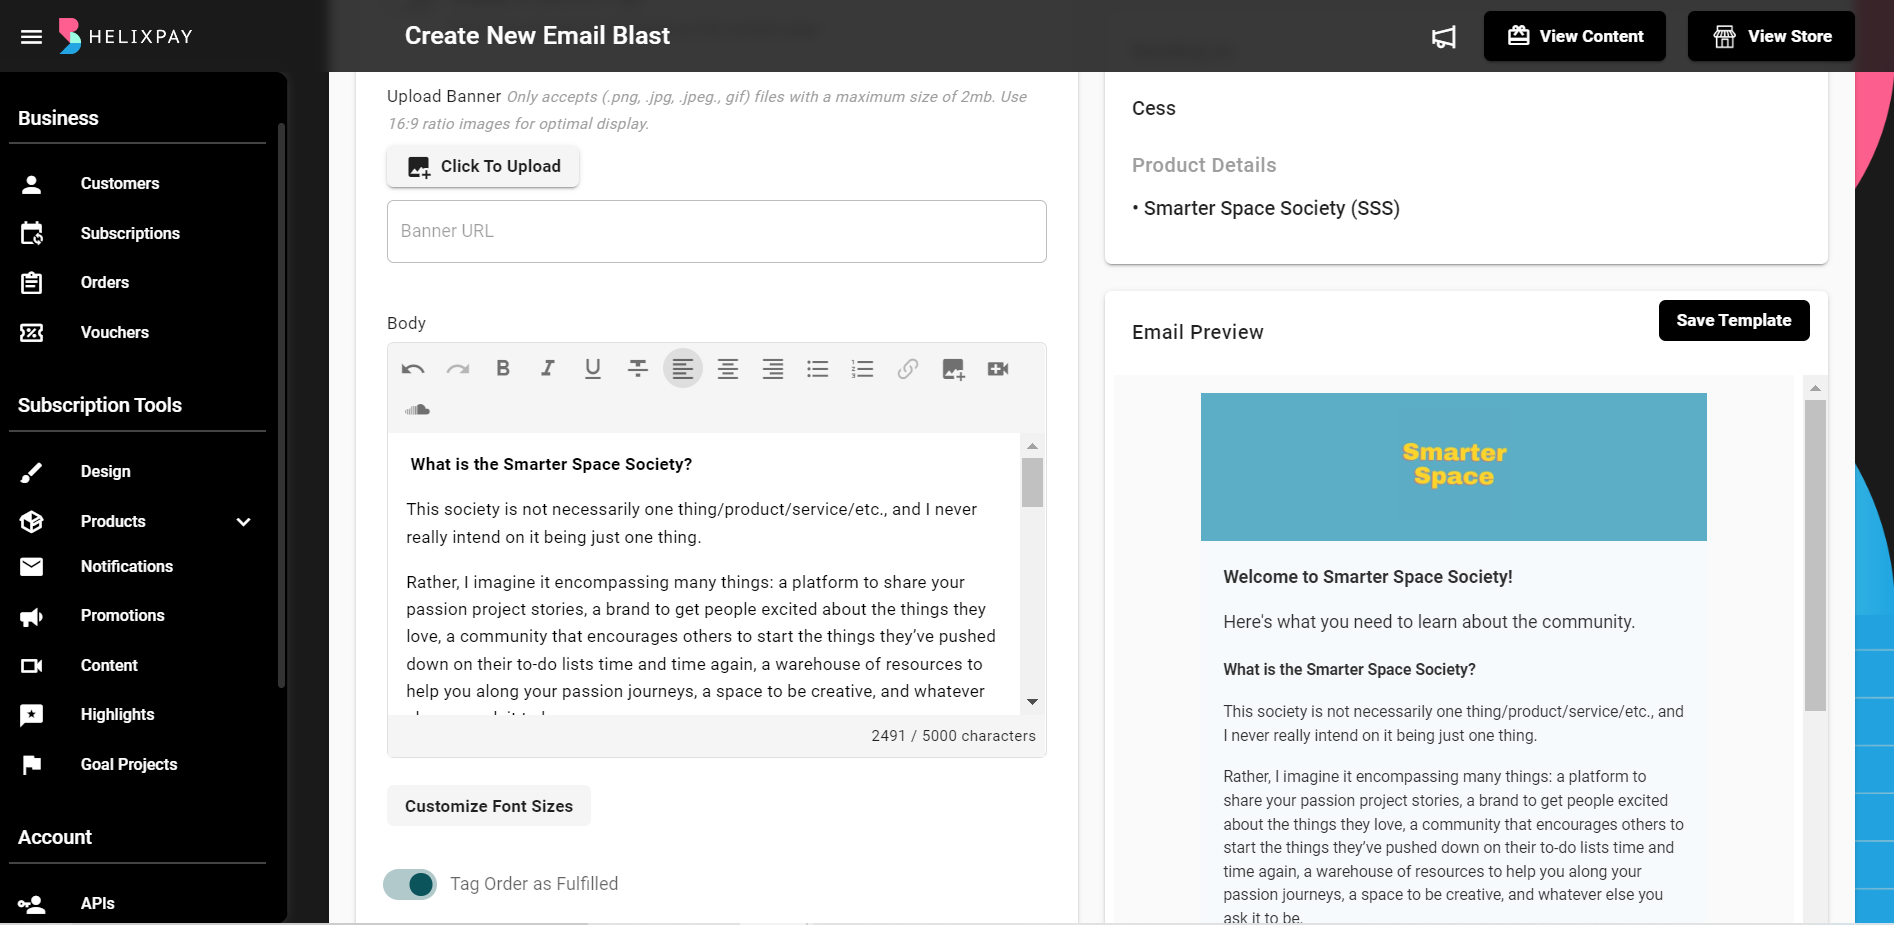
Enable the button to automatically tag the order as 'Fulfilled' once the email is sent.
Step 4: Click 'Send Test Email Blast' to see the email preview or click 'Send Blast' to send the email blast to the customer.
You can see all the Blasts sent in Customers > Blasts > Single Blasts
Updated about 2 years ago