Remittance FAQs
This section explains how HelixPay remits the funds to merchants.
1. Where can we see the breakdown of our transactions that has been remitted?
The merchant can see their weekly remittance report in the merchant console under the Finances module. HelixPay Payments Team also sends a weekly transaction report through email every Friday.
2. What's the remittance process for Credit Card, Debit Card, Bank Transfers, and Paymaya transactions:
The merchant will receive the remittance for transactions using these modes of payments every Friday. Days covered for the weekly remittance are from Thursday of the previous week to Wednesday of the settlement week. The total amount for these transactions is sent to the account details provided by the merchant. Any bank or digital wallet is acceptable and no additional transfer fees are charged to the merchant.
3. What's the remittance process for Gcash and Grabpay Transactions?
Helixpay is partnered with Xendit for Gcash and Grabpay transactions. Once the merchant is live and activated with Xendit for both payment methods, Gcash and Grabpay remittances will go through Xendit. Please check Question # 5 to check the process in more detail.
4. Why are there different remittance processes for different payment methods?
HelixPay partners with payment companies that have the best payment tools. HelixPay use their secure payment systems, and HelixPay adds very powerful subscription and membership management tools on top. Working with different payment processors allow HelixPay to offer the best rates and experience for their merchants. However, this will mean that the merchants will have different remittance flows depending on the payment method used by their subscribers.
5. How does the Gcash and Grabpay remittance flow work in more detail?
To withdraw balance from Xendit, please follow these steps:
Step 1: Log in to the Xendit Console.
Step 2: Open the balance tab on the upper left side of the dashboard.
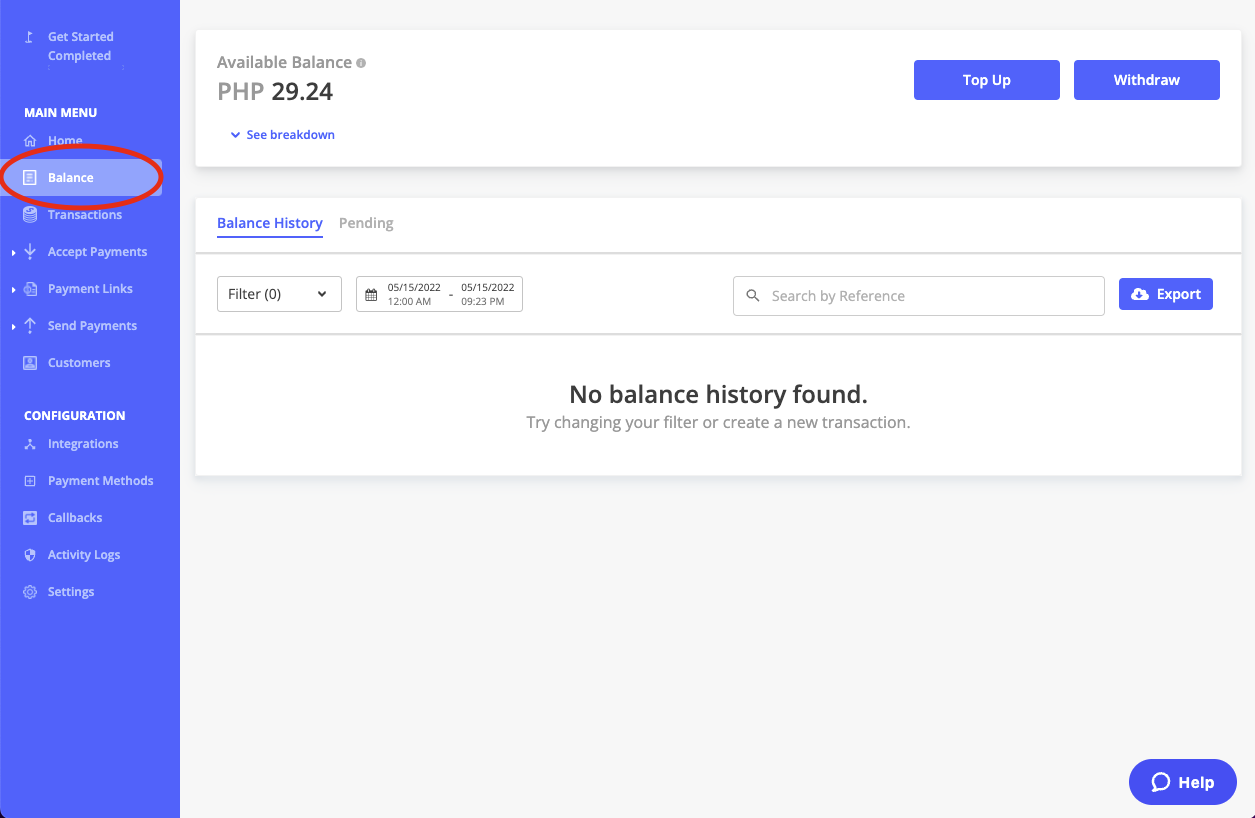
Since Xendit allows transactions to only be withdrawn after 2 transaction days, the amount shown on this tab is the total of all the unwithdrawn transactions that happened 2 days before the current date. This is the merchant's total withdrawable amount.
Step 3: Click on the withdraw button.
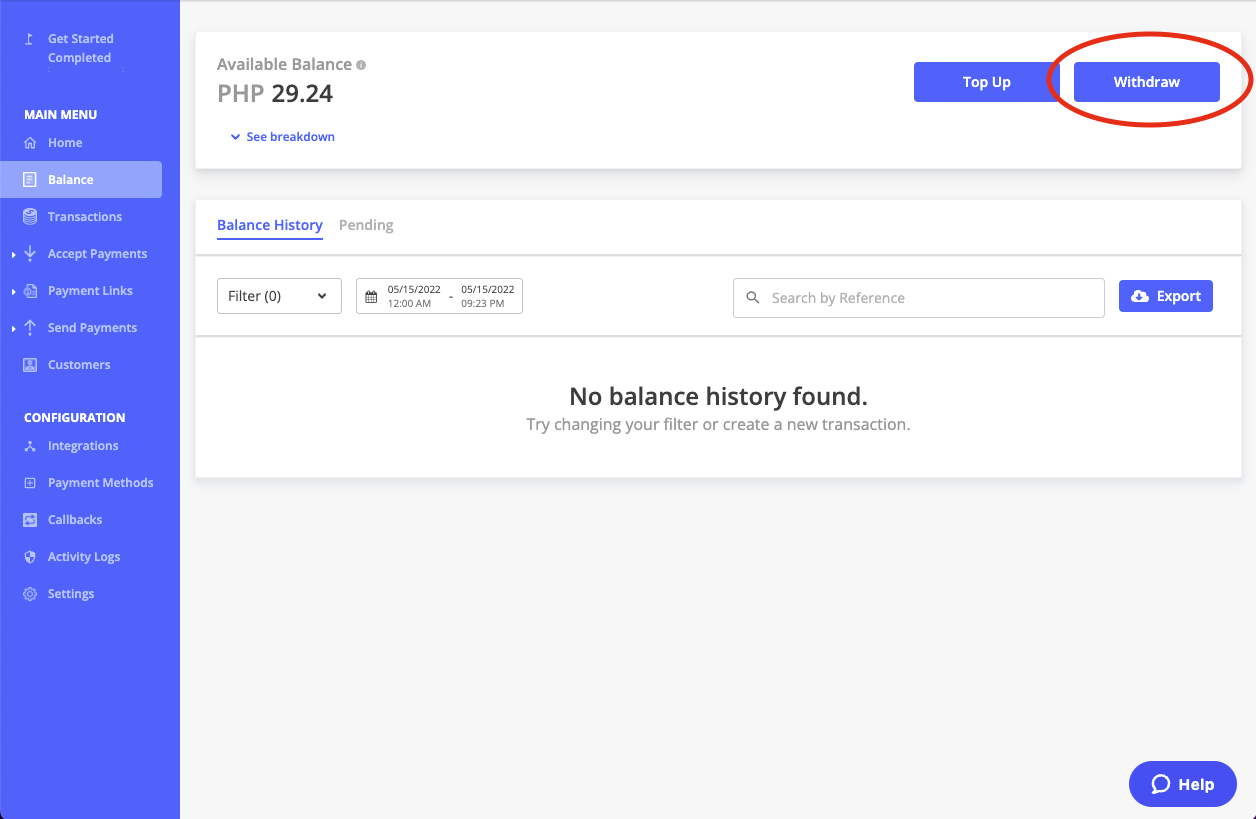
Step 4: Select the bank account to remit the funds to.
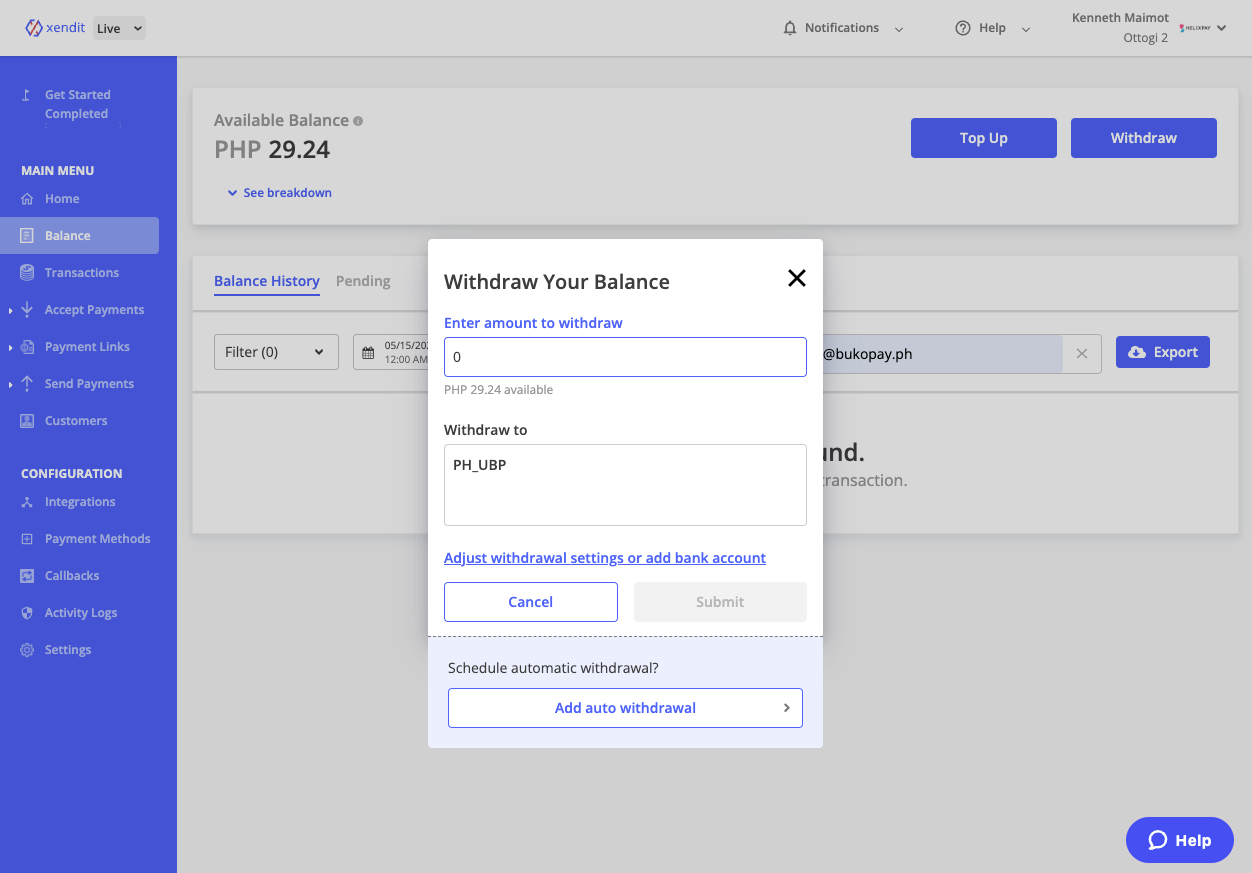
If no bank account has been created, you can create one by clicking the "Adjust withdrawal settings or bank account" button
Step 5: Enter the amount to withdraw and enter your PIN number.
If the merchant have not set their PIN, they will be prompted to create their PIN number on the settings page.
Step 6: Click submit and your withdrawal will be processed.
5.1. Can I set an auto-withdrawal schedule?
Merchants also have the option to set up an auto-withdrawal schedule on the Xendit console. To do this, please follow these steps:
Step 1: Log in to the Xendit Console.
Step 2: Go to the settings tab.
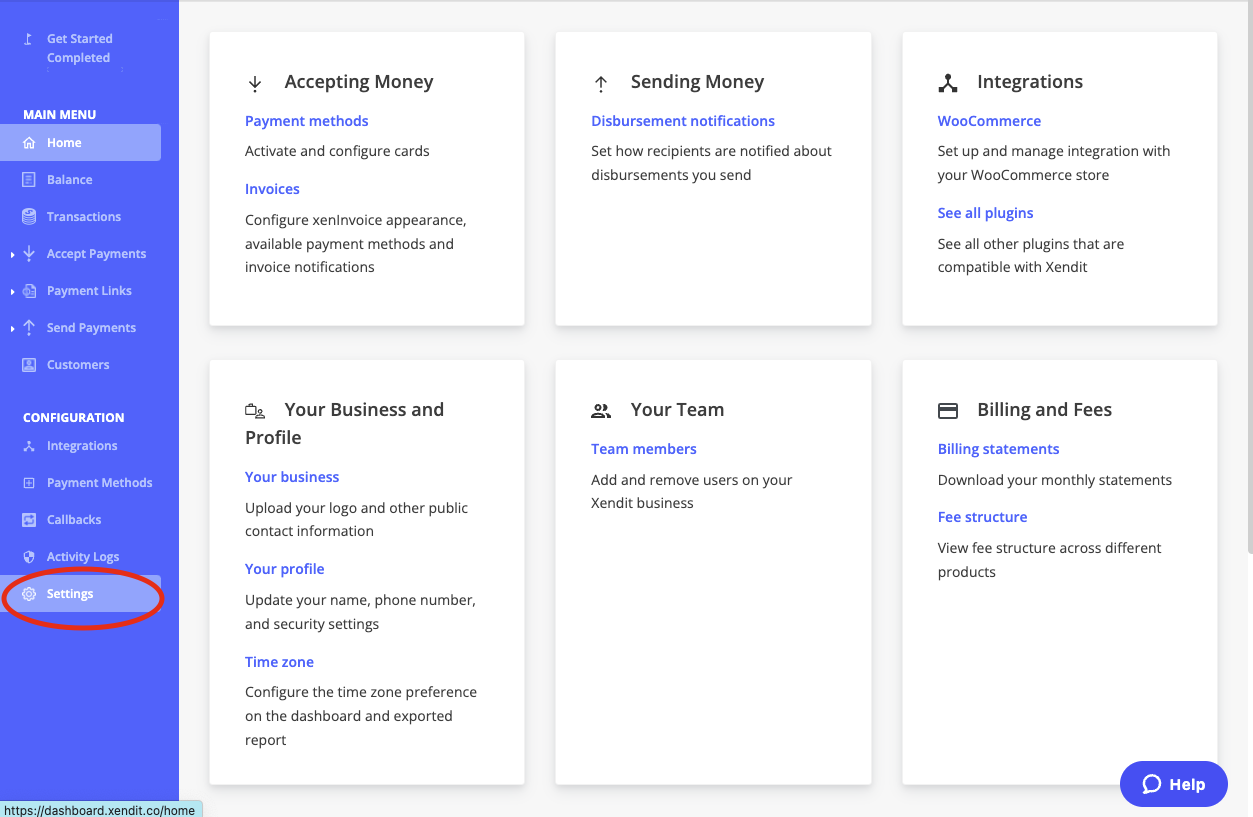
Step 3: Click on the Bank Accounts button in the withdrawals section.
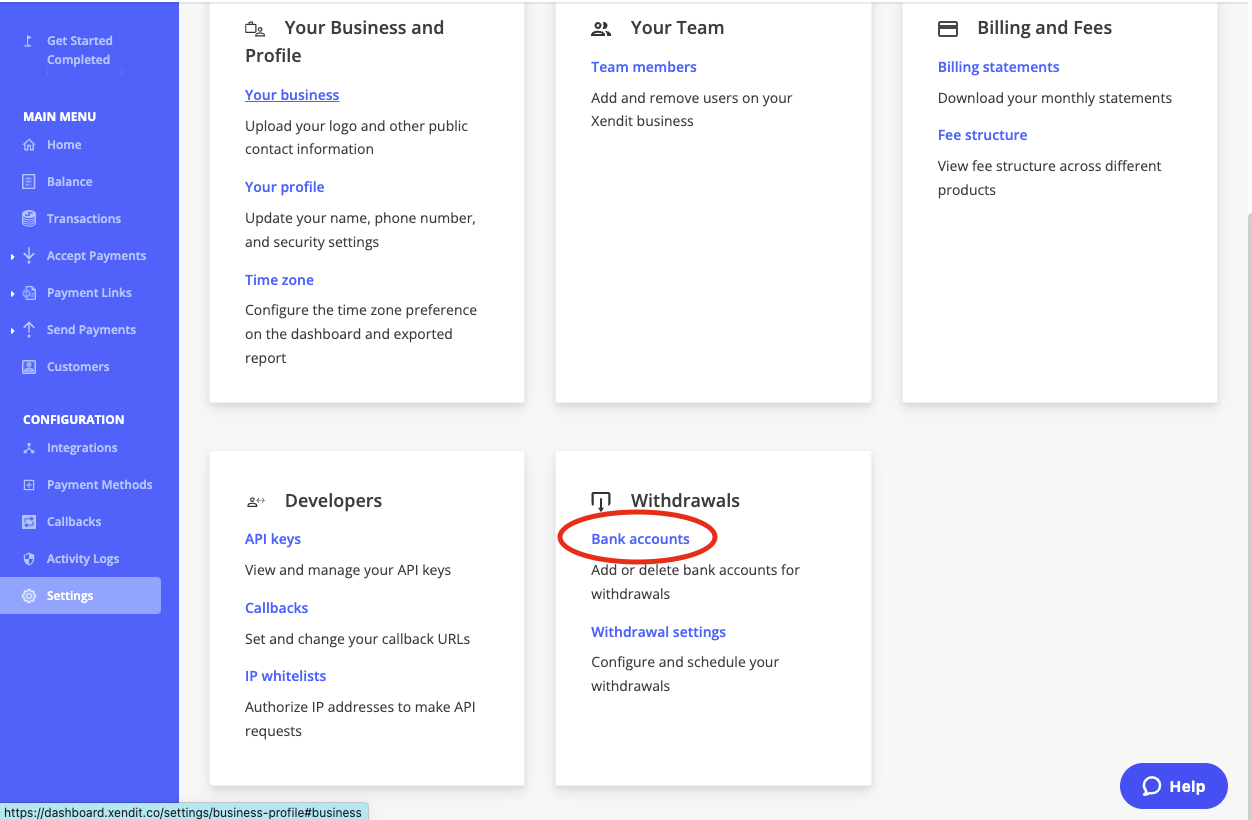
Step 4: Add your preferred settlement bank for your Gcash and Grabpay transactions.
Step 5: Click on the Add Auto Withdrawal button.
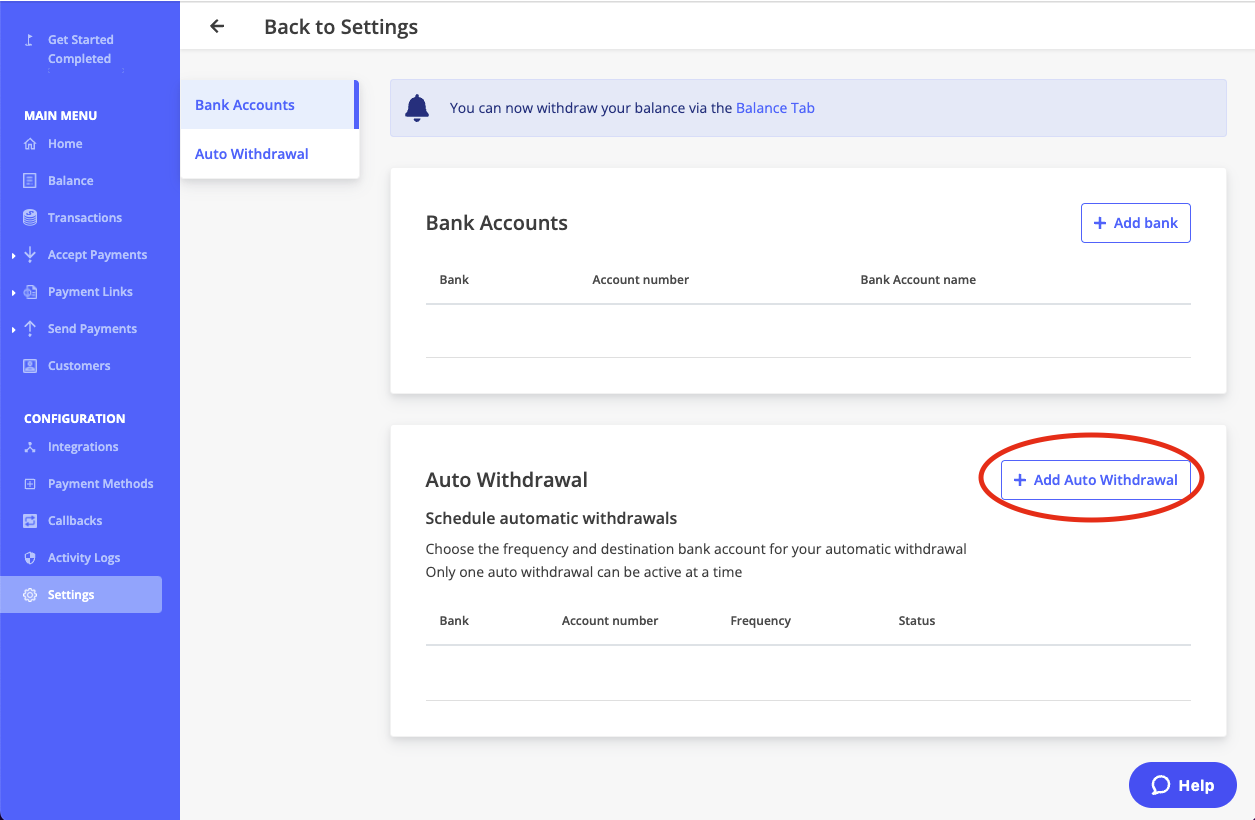
Step 6: Create your auto withdrawal schedule.
Step 6.1 Choose the bank account that you prefer
Step 6.2 Choose the frequency of the withdrawal.
Auto withdrawal remittance schedule
Weekly remittances are scheduled to run every Wednesday at 9 AM.
Step 6.3 Choose the minimum balance that will be retained in your xendit account after every withdrawal. This can be set to 0.
Step 6.4 Choose the start date of the auto-withdrawal schedule. The withdrawal will start running on the chosen start date at 9 AM and will settle the final balance based on the full dates (I.E 12 AM - 11:59 AM)
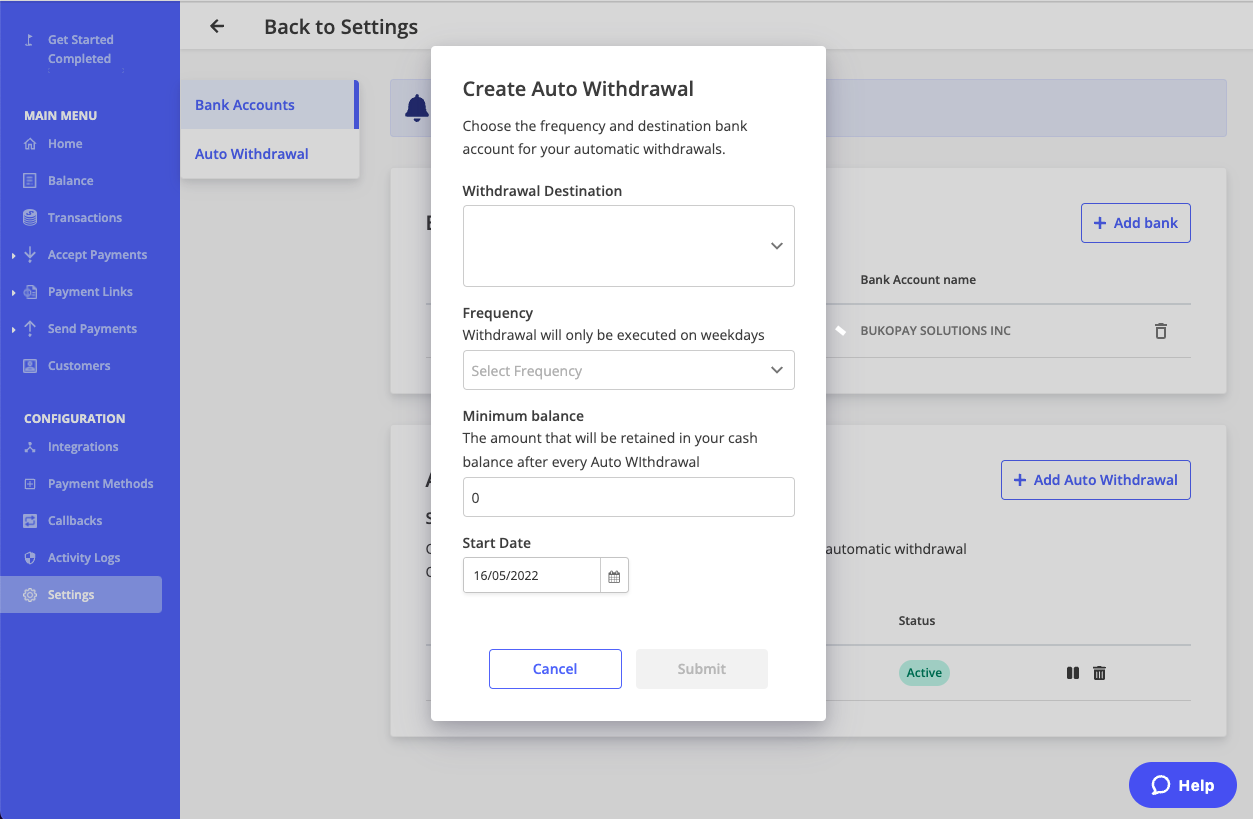
Step 7: Click the Submit button.
Updated over 2 years ago
